I stood at the base of Vernal Fall, drenched from the mist and grinning like a fool. The granite steps felt slick under my boots, water clung to my jacket, and I had to wipe my camera lens every few minutes. Honestly, I wouldn’t have traded that moment for anything. The Mist Trail to Vernal and Nevada Falls gives you one of Yosemite’s most rewarding hikes—think roaring waterfalls, dramatic granite, and a wild mix of terrain, all packed into a single, unforgettable adventure.
This trail taught me that being prepared can turn a tough slog into a story worth telling. From squeezing through the crowds at the trailhead to scrambling up those steep granite steps right beside the thundering falls, every stretch threw something new at me. The 6-mile loop carried me over paved walkways, rocky stairs, and quiet forest paths, all while showing off three incredible waterfalls.
If you’re eyeing your first Yosemite trip or just want to tackle one of the park’s most legendary hikes, it helps to know what’s coming. I’ll walk you through trailhead access, the gear you’ll want, route choices, and timing tricks that’ll make your own Mist Trail adventure way smoother.

Mist Trail Overview and Key Landmarks
The Mist Trail winds alongside the Merced River, carving through granite and linking up two of Yosemite’s most jaw-dropping waterfalls across a 7-mile round trip. Let’s break down the main route, waterfall highlights, and the big landmarks you’ll spot along the way.
Trail Route Summary
The Mist Trail kicks off at Happy Isles in Yosemite Valley, sitting at 4,020 feet. I started out on a paved path that quickly turned to dirt as the trail hugged the Merced River.
About a mile in, you hit the first big landmark—the Vernal Falls Bridge. Here, the trail crosses the river and the real fun begins.
You’ll tackle around 600 granite steps that climb right next to Vernal Fall. The mist absolutely soaks you as you go up. This part gains 600 feet in just over half a mile.
At 1.6 miles, you reach the top of Vernal Fall. From there, the trail heads up to Nevada Fall, adding another 1.4 miles and almost 1,000 feet of climbing.
The full out-and-back covers 7 miles and climbs about 2,000 feet if you go all the way to Nevada Fall.
Vernal Fall and Nevada Fall Highlights
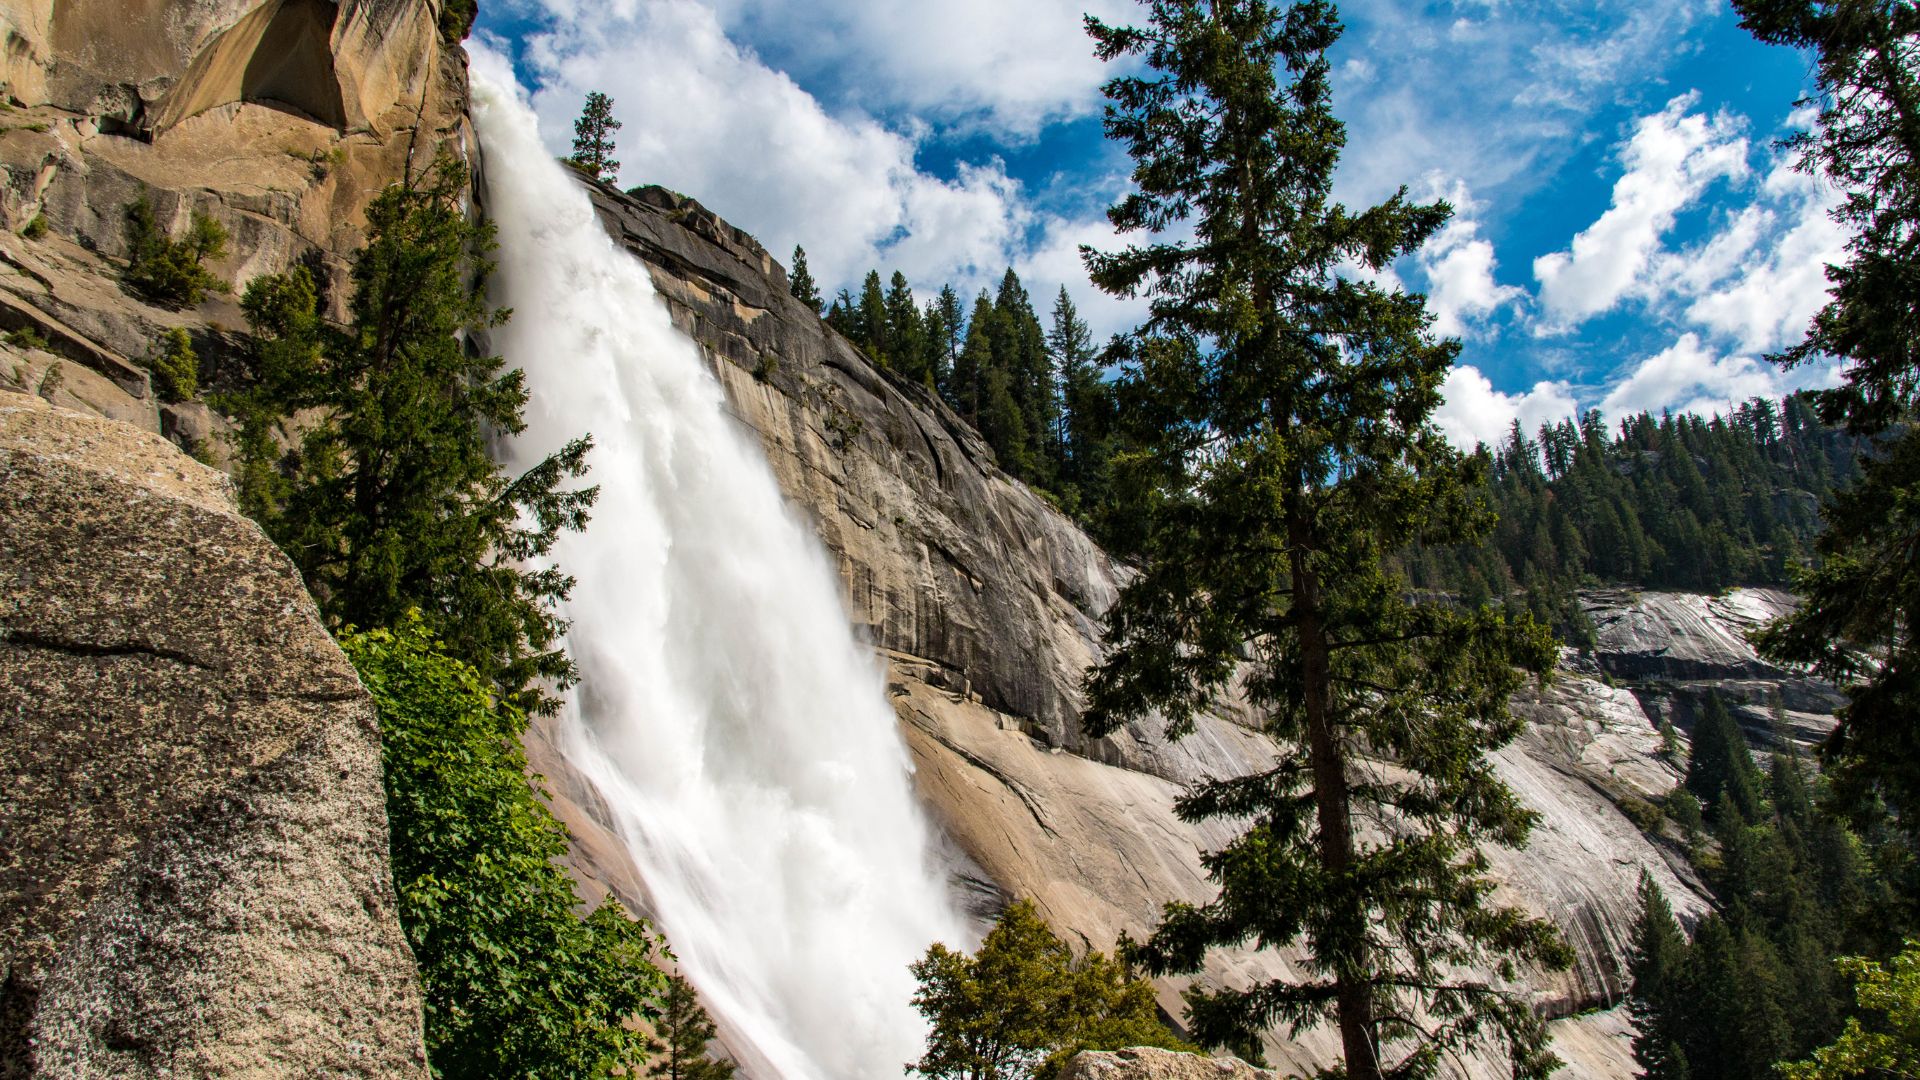
Vernal Fall drops 317 feet and creates that signature misty experience. The steps run right alongside the falling water. In spring and early summer, you’ll get absolutely drenched.
The top of Vernal Fall blew me away. Emerald Pool sparkles below, looking almost good enough to swim in (but don’t actually swim there).
Nevada Fall towers at 594 feet—nearly double Vernal’s height. The sound thunders through the granite canyon.
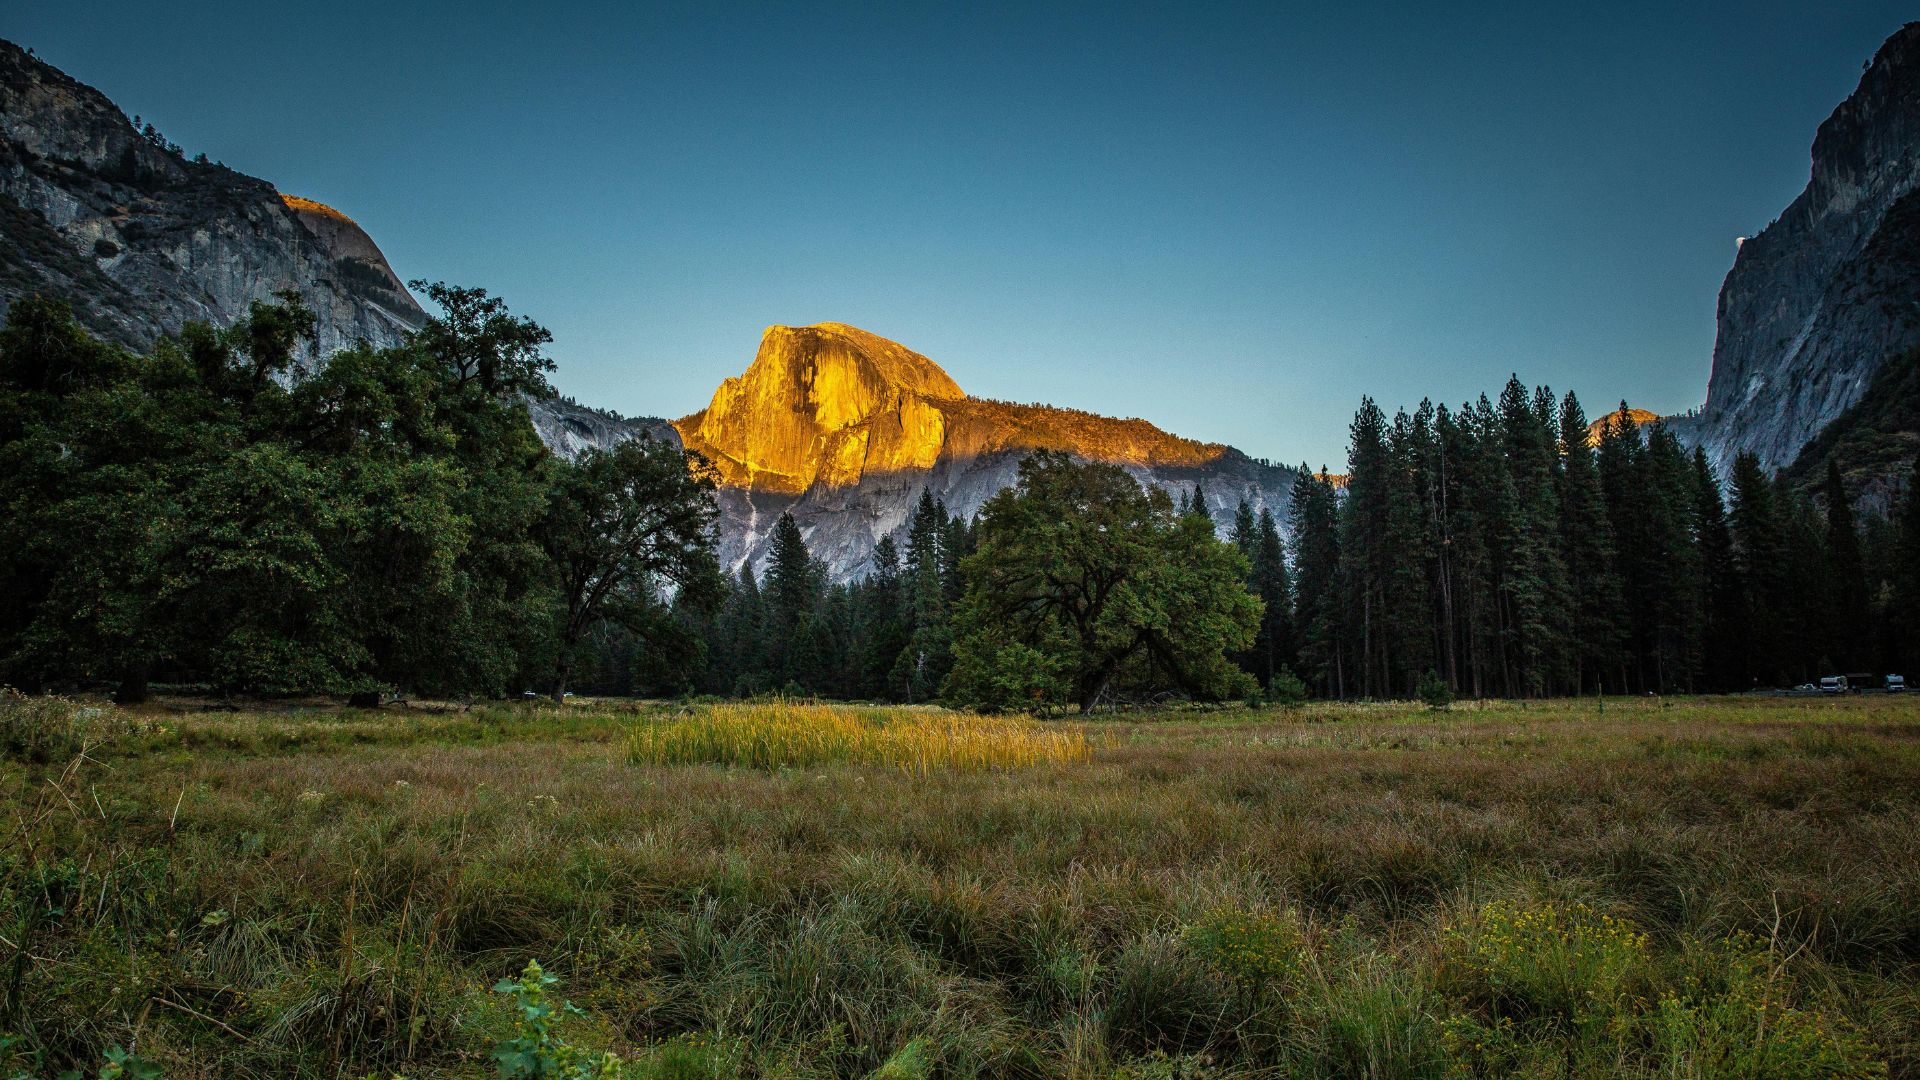
From the top of Nevada Fall, you get sweeping views of Yosemite Valley. I spotted the back side of Half Dome and Liberty Dome from up there.
Both waterfalls hit their peak flow during snowmelt season—think May through July.

Notable Landmarks Along the Trail
| Landmark | Distance | Elevation | Key Features |
|---|---|---|---|
| Happy Isles | 0 miles | 4,020 ft | Trailhead, shuttle stop |
| Vernal Falls Bridge | 1 mile | 4,400 ft | River crossing, first waterfall views |
| Granite Steps | 1-1.6 mi | 4,400-5,000 ft | 600 stone steps, heavy mist |
| Vernal Fall Top | 1.6 mi | 5,000 ft | Emerald Pool, rest area |
| Nevada Fall Top | 3 mi | 5,930 ft | Panoramic views, trail junction |
The granite steps from mile 1 to 1.6 really define the Mist Trail. Hand-carved stone winds up the cliff, right beside Vernal Fall.
Emerald Pool glows at the top—no swimming, though. Its green color comes from algae and minerals.
You’ll find restrooms near the trail junction at Nevada Fall. This is also where you can hop on the John Muir Trail if you want a different return route.
Getting to the Trailhead and Parking Information
The Mist Trail starts at Happy Isles, but you’ll need to use the free shuttle system since personal cars can’t reach the trailhead. Parking’s scattered around Yosemite Valley—Curry Village is the most convenient spot for catching the shuttle.
Accessing Happy Isles via Shuttle
The trailhead sits at shuttle stop 16, right at Happy Isles. I found this was really the only practical way in.
Free shuttle buses run all day during peak season. They start early and go until the evening.
From Happy Isles, I crossed the bridge over the Merced River and spotted the Mist Trail and John Muir Trail markers on the right. There are restrooms and some basic facilities here.
Quick shuttle facts:
- Stop 16 is your destination
- Shuttles are free
- They run year-round, but schedules change seasonally
- Connects to all the main valley spots

Parking Options Near Yosemite Valley
I checked out a few parking areas that work well for catching the shuttle to the trailhead.
Curry Village is your best bet. It’s got direct shuttle access and is closest to the action. Be warned: it fills up fast in summer.
Day-use parking is scattered around Yosemite Valley—near Yosemite Village and Swinging Bridge, for example.
Arrive early. I’d aim for before 8 AM in peak season to snag a spot. Weekends and holidays get especially competitive.
Parking is free but limited. All lots connect to the shuttle for easy trailhead access.
Navigation from Curry Village and Upper Pines Campground
From Curry Village, I walked to the shuttle stop and hopped on the bus straight to Happy Isles. It’s about a 10-minute ride.
Curry Village to Happy Isles:
- Walk to the shuttle stop in the village center
- Take the eastbound shuttle to stop 16
- Five minutes later, you’re there
Upper Pines Campground is close enough to walk. I hiked over to the trailhead in about 15 minutes.
From Upper Pines:
- Follow the paved path southeast toward Happy Isles
- Cross the Merced River bridge
- Watch for trailhead signs on the right
Both spots make it simple to reach the Mist Trail start—no crazy navigation needed.
What to Expect on the Trail: Terrain, Elevation, and Waterfalls
The Mist Trail keeps you guessing—paved paths, steep granite stairs, and big elevation gains. You’ll climb about 1,000 feet to Vernal Fall and 2,000 feet to Nevada Fall. Near the waterfalls, the mist can soak you through.
Hiking Conditions and Difficulty Levels
The first part is easy—just a paved stroll along the Merced River. It barely feels like a hike.
After the bridge, things get real. The trail goes rocky and steep as you approach Vernal Fall.
Distance and Elevation:
- Vernal Fall: 3 miles round trip, 1,000 feet up
- Nevada Fall: 7 miles round trip, 2,000 feet up
I’d call this moderate to tough. The first mile is a breeze, but the granite steps are a workout.
Your fitness level really matters on those steep parts. I’ve seen plenty of people underestimate the stairs.
The trail packs out after 9 AM. If you want some peace, hit it early.
Climbing the Granite Stairs
The granite stairs are the real test. About 600 stone steps take you up to Vernal Fall.
These steps are steep and uneven, and every one takes effort. When you’re halfway up, it feels endless.
The mist makes the granite slick. Trekking poles help a lot with balance.
Stair Tips:
- Break every 50-100 steps
- Use handrails when you can
- Watch your step, especially on wet rocks
- Let speedier hikers pass
The stairs keep going past Vernal Fall toward Nevada Fall. It’s less crowded but just as steep.
Coming down is rough on your knees. Lots of folks use the John Muir Trail to descend.
Mist Zones and the Soaking Adventure
Vernal Fall’s mist turns the trail into a natural shower about halfway up the stairs.
On hot days, that cool spray feels amazing. When it’s chilly, it’s a shock. I got soaked every time I hiked up.
Expect in the Mist:
- Visibility drops
- Everything gets slippery
- You’ll be drenched head to toe
- Cameras and glasses need constant wiping
The mist zone stretches about 200 yards. If you want the summit, you can’t dodge it.
Nevada Fall has its own mist, but it’s not as intense. The spray depends on how much water’s flowing and which way the wind’s blowing.
Emerald Pool at the top of Vernal Fall is a great spot to catch your breath and dry off a bit. The views of Liberty Cap and the granite all around are unreal.
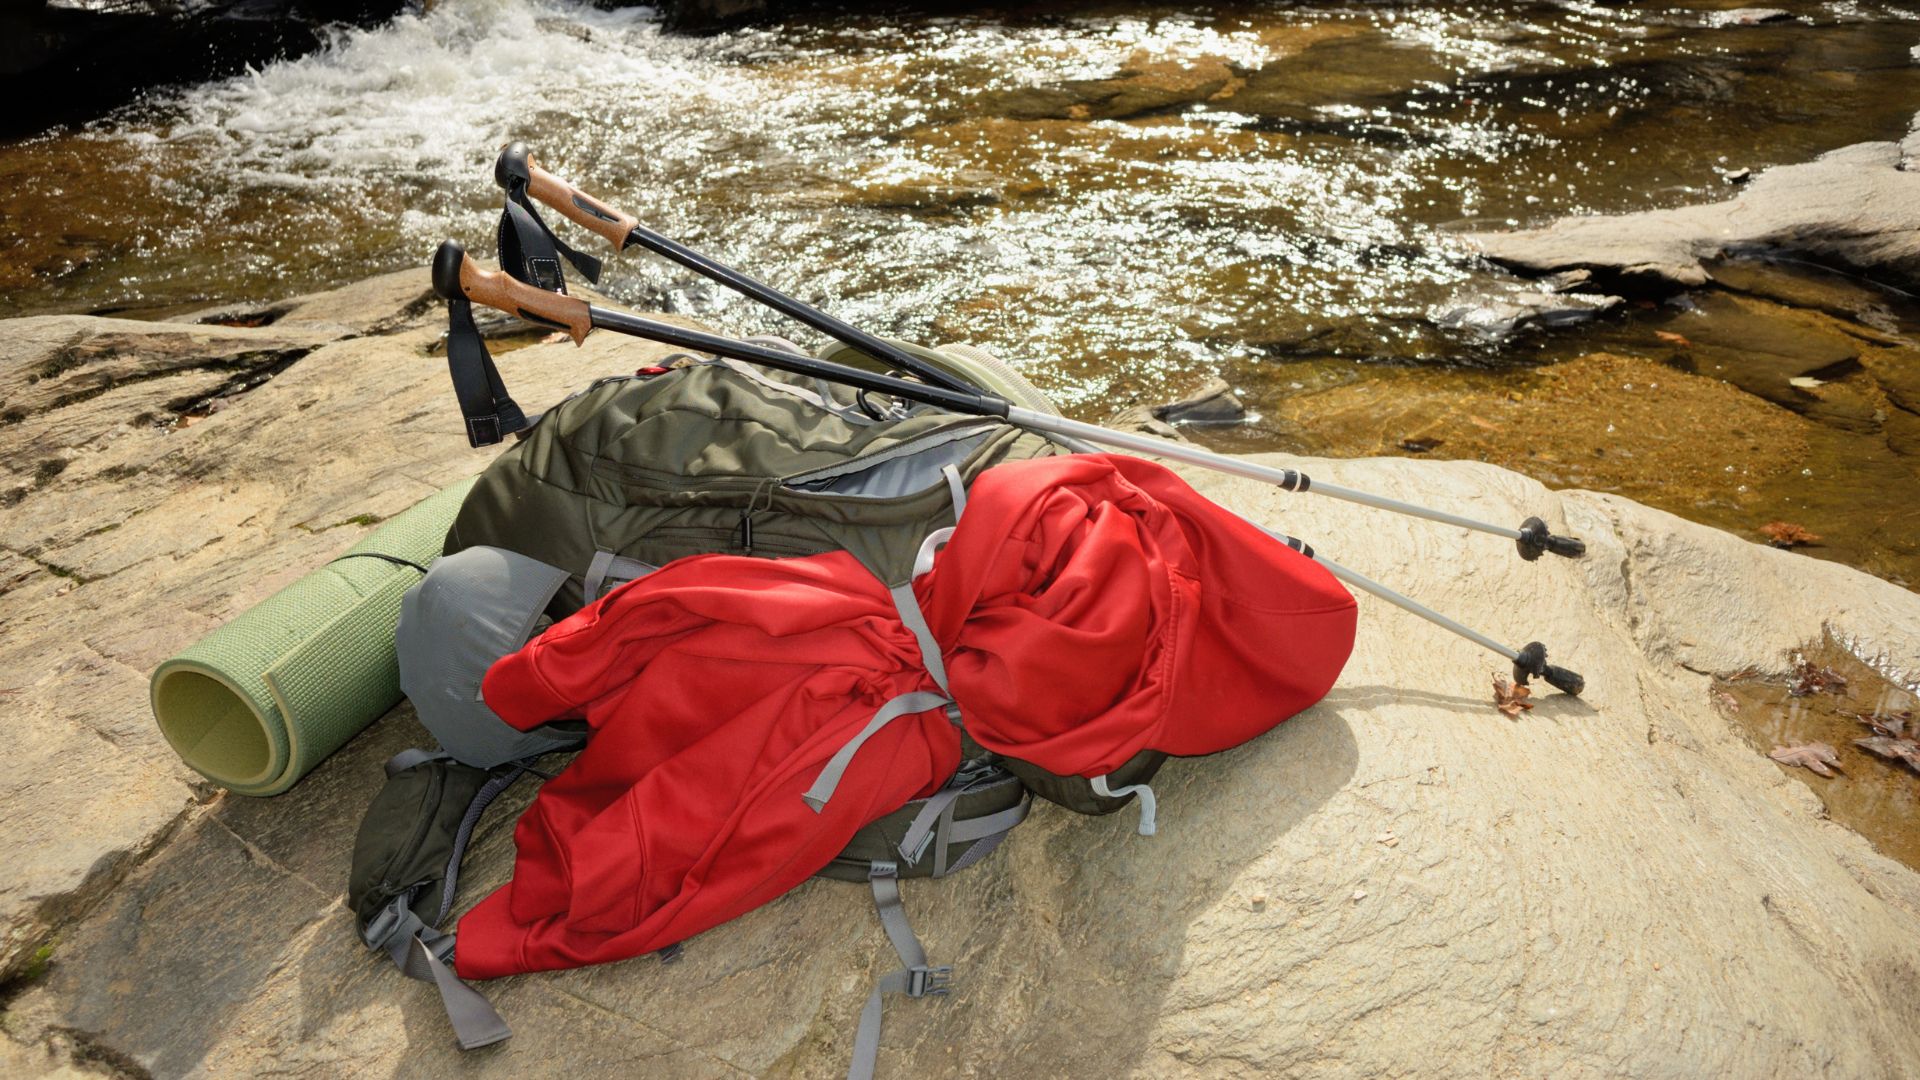
Essential Hiking Gear and Safety Tips
The Mist Trail demands good gear. You’ll want solid hiking boots, waterproof layers, and navigation tools to keep you dry and sure-footed.
Choosing the Right Hiking Boots and Clothing
I learned fast that you need legit hiking boots here. The granite gets slick from the mist.
Look for boots with deep tread and solid grip. Waterproof or at least water-resistant boots help a ton. I go for ankle-high boots for extra support.
Boot Checklist:
- Grippy rubber soles
- Ankle support
- Quick-dry material
- All-day comfort
Skip cotton clothes—they just stay soggy. I stick to synthetics or merino wool. You’ll get wet near both falls, so dress like you expect a downpour.
Toss an extra pair of socks in a waterproof bag. Trust me, your feet will thank you later.
Must-Have Gear for Rain and Mist
A rain jacket is a lifesaver here. The waterfall spray feels like a heavy rainstorm, especially on the steps near Vernal Fall.
I use a lightweight, packable rain jacket with a hood. Breathability matters too—you’ll work up a sweat.
Wet Weather Essentials:
- Rain jacket (waterproof)
- Quick-dry pants or shorts
- Waterproof phone case
- Dry bag for snacks and spare clothes
Hiking poles give you extra balance on wet rocks. I always bring at least a liter of water, but two is better if you’re heading to Nevada Fall.
Don’t forget a small towel for your glasses or camera lens. The mist will cover everything in minutes.
Trail Maps and Navigation Aids
The Mist Trail has plenty of signs, but I still carry a trail map. Cell service drops out, so don’t count on your phone alone.
Download offline maps before you go. AllTrails is great for this hike and works even without service. A printed map is good backup.
Navigation Tools:
- Printed trail map
- Offline GPS app
- Basic compass
- Fully charged phone (plus a spare battery)
Trail signs at the big junctions keep you on track. Watch for the split between the Mist Trail and John Muir Trail near Nevada Fall.
Mark key spots like the Vernal Falls footbridge and restroom locations on your map. It helps you pace yourself and plan breaks.
Trail Variations and Other Routes
The Mist Trail isn’t just one path—there are plenty of ways to mix up your hiking experience. You can loop back down the John Muir Trail for easier terrain, take the Clark Point alternate in winter, or stretch your legs all the way toward Half Dome if you’re feeling ambitious.
Looping Back via the John Muir Trail
Honestly, I always suggest taking the John Muir Trail down after reaching Nevada Fall. Heading back down the Mist Trail just isn’t worth the risk—those wet granite steps get super slippery and can feel sketchy.
The John Muir Trail winds gently downhill with switchbacks instead of those relentless stairs. Plus, you get these incredible views of Nevada Fall from behind and a glimpse of Half Dome’s back side—most people never see it from that angle.
Key benefits of the John Muir Trail descent:
- It’s way less slippery than the Mist Trail when it’s wet
- The scenery changes up and keeps things interesting
- Your knees and ankles will thank you for the easier grade
- You’ll find some of the best photo spots for the falls
The John Muir Trail adds about 0.7 miles to the hike, but I found the extra distance totally worth it for the safer walk and the fresh scenery.
Clark Point Alternate Path
Clark Point becomes a lifesaver in the winter months when the Mist Trail closes because of ice. The park rangers shut down the stretch from the footbridge up to Vernal Fall between November and April.
You can still reach both waterfalls by following the John Muir Trail up to Clark Point, then taking the cutoff to Vernal Fall. This way, you skip the granite steps altogether.
Winter route details:
- Start at the usual trailhead near Happy Isles
- Take the John Muir Trail instead of the Mist Trail after the footbridge
- Cut over at Clark Point to reach Vernal Fall from above
- Keep going to Nevada Fall on the main trail
This alternate route works any time of year if you’d rather avoid the wet, misty steps. The views change, but honestly, they’re just as beautiful.
Extending the Hike Toward Half Dome
From the top of Nevada Fall, you can keep heading east toward Half Dome—if you’ve got the right permit and enough energy left. The trail junction sits only about 0.2 miles from Nevada Fall’s summit.
Half Dome extension options:
- Sub Dome viewpoint: Just 2 miles further for sweeping views
- Full Half Dome: 4 miles total, including the cables (permit required)
- Little Yosemite Valley: 1 mile for the camping area
I’ve watched plenty of hikers underestimate this extension. The trail to Half Dome really ramps up the challenge and distance.
You’ll need to secure a Half Dome permit in advance, and the cables section can get intense—bring gloves and be ready for a serious climb. Only go for it if you’re truly prepared and have some solid hiking experience.
Best Times to Hike and Planning Your Visit
Spring and early summer bring the most impressive waterfall flows, while late summer means easier trails and fewer people. Parking goes fast, so plan to show up early or consider staying nearby at Curry Village or Upper Pines Campground.
Seasonal Conditions and Crowds
Spring (April-June) is wild—the waterfalls roar with snowmelt, and the mist can absolutely drench you. I remember hiking in May and barely seeing the next person on the granite steps because the spray was so thick.
Summer (July-September) brings warmer days, but the water levels start dropping. The falls still run year-round, but the mist calms down. Expect lots of company on the trail.
Fall and Winter feel almost peaceful. Water levels drop, but you can get closer to the waterfall base over the exposed rocks.
Winter hiking is possible, but it’s a challenge. Ice coats parts of the trail, and some sections close. Microspikes make a huge difference for traction.
Even early mornings get busy, since Half Dome hikers hit the trail before sunrise. If you want a quieter hike, late afternoon usually works better.
Advice for Early Morning and Late Season Hikes
Starting early helps you dodge crowds and snag a parking spot. The Yosemite Valley Trailhead Parking lot can fill up by 7 AM during busy months.
Mornings stay chilly in the canyon shadows. Bring layers—if you get soaked by the mist, it feels colder before the sun reaches the trail.
Hiking in the late season, especially fall, has its perks. You can often get closer to the base of the waterfalls when water levels drop, and the granite steps stay less slick without constant spray.
Winter brings its own set of challenges. Pack microspikes or light crampons for the icy bits. The trail to the wooden bridge usually stays open, but higher sections might close without warning.
I’ve hiked here in winter a couple of times after snowstorms. The snowy scenery is unreal, but those icy steps can get dicey without the right gear.
Always check the latest trail conditions before you go. Weather can close off certain sections with little notice.
Camping and Staying Nearby
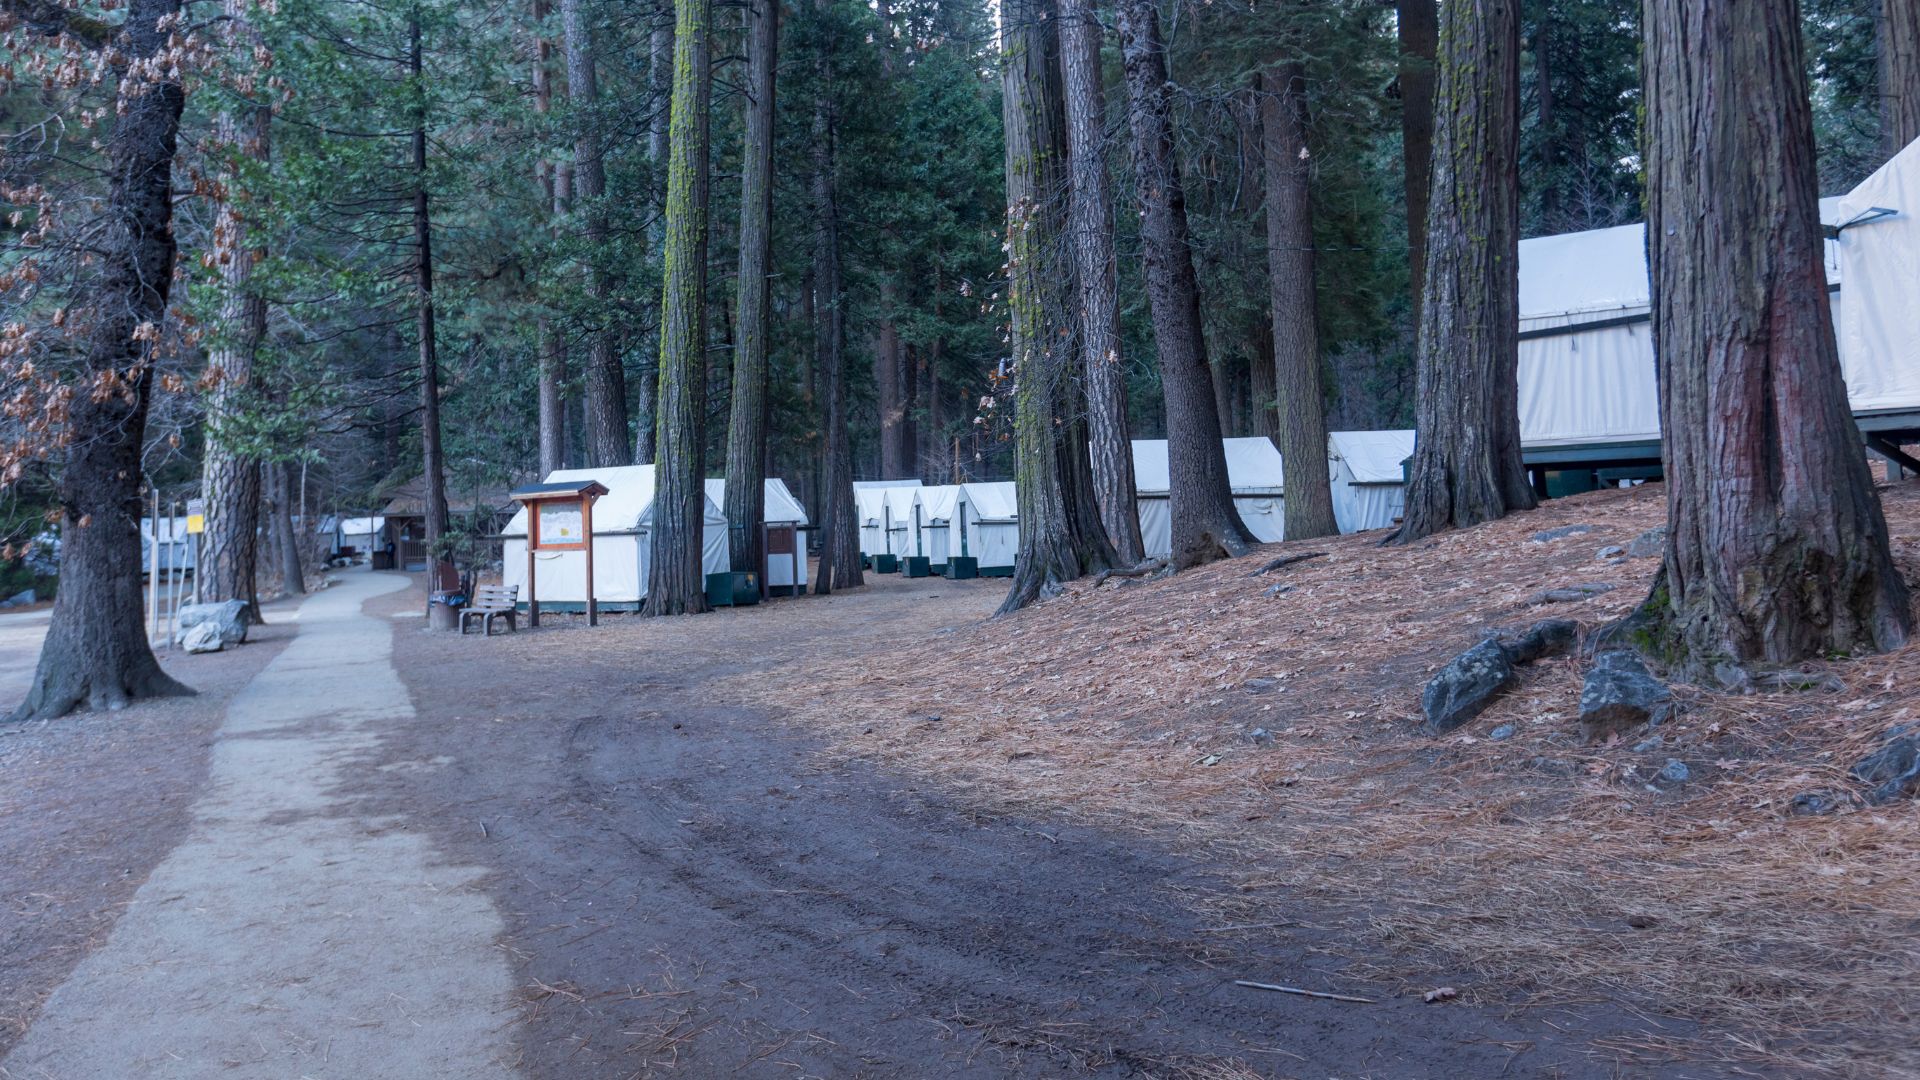
Upper Pines Campground sits closest to the Mist Trail trailhead. You’re just about 1.5 miles from the Happy Isles shuttle stop where the trail kicks off.
Curry Village is another solid option nearby. The parking lots here tack on around 1.5 miles to your hike, but honestly, it’s usually easier to find a spot than at the main trailhead.
When you stay in Yosemite Valley, you can hit the trail early—before the crowds roll in. I’ve found that early starts mean better parking and a much quieter path.
The Happy Isles shuttle stop (#16) runs pretty often, at least during peak season. If you park at Curry Village, just hop on the shuttle and skip some of that extra walking.
Day visitors really need to get there by 6 AM if they want parking close to the trailhead. The closest lot fills up fast, and if you’re late, you’ll end up parking farther away in Yosemite Valley.