Standing at 14,410 feet, Mount Rainier is a challenge that rewards climbers with some of the most breathtaking views in the United States. My journey to the summit last summer pushed me physically and mentally, but the panoramic vista that greeted me at the top made every painful step worthwhile.
The summit of Mount Rainier offers an unmatched 360-degree view of the Cascade Range, with neighboring peaks like Mount Adams and Mount St. Helens appearing small in comparison.
The climb via Emmons Glacier took our team about 8 hours on summit day alone. We started in darkness, our headlamps cutting through the pre-dawn air, and watched the sunrise paint the snow in brilliant oranges and pinks.
Being properly prepared made all the difference – good gear, physical conditioning, and respect for the mountain’s changing conditions kept us safe throughout the journey.
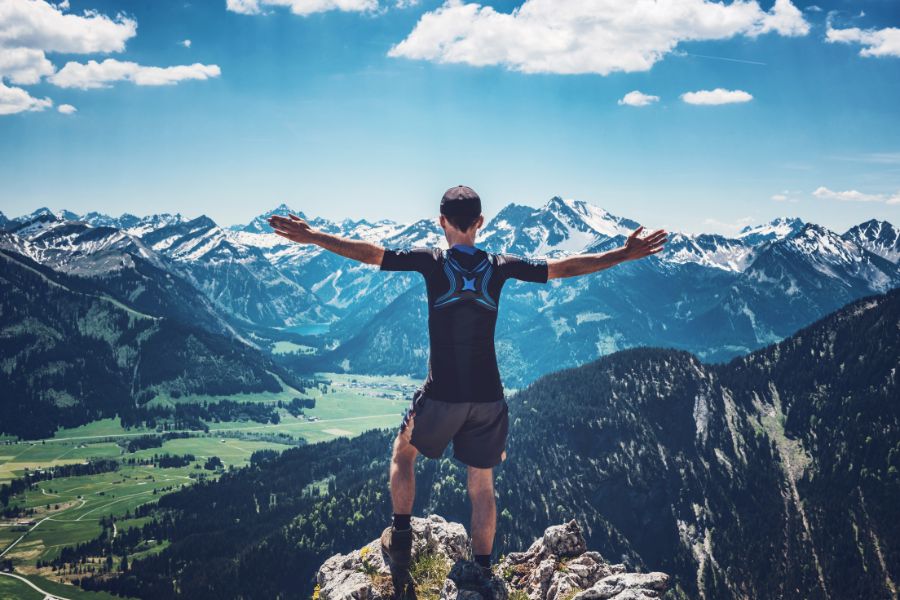
What surprised me most was the spiritual experience of reaching the top. There’s something humbling about standing on Washington’s highest point, looking out over forests and hillsides that stretch endlessly in every direction. The mountain demands respect, and as many climbers learn, sometimes turning back is the wisest decision when conditions aren’t right. But when everything aligns, that moment at the summit becomes a memory that will last a lifetime.
Preparing for the Climb
Summiting Mount Rainier demands serious preparation that can make or break your climbing experience. The mountain’s challenging conditions require physical conditioning, specialized gear, and mental readiness before attempting the ascent.
Understanding the Challenge: Mount Rainier’s Elevation and Terrain
Standing at 14,411 feet, Mount Rainier presents significant altitude challenges even for experienced climbers. During my climb, I quickly learned why it’s considered one of the most challenging mountaineering experiences in the continental US.
The mountain is covered with 26 major glaciers that create crevasses and constantly changing conditions. The Disappointment Cleaver (DC) route is the most common path to the summit, but don’t let its popularity fool you – it remains technically demanding.
Weather conditions can change rapidly on Rainier, sometimes trapping climbers in whiteout conditions or exposing them to dangerous winds. I witnessed firsthand how the Nisqually Glacier’s shifting ice fields require careful navigation with experienced guides.

Most summit attempts begin at midnight to ensure snow conditions are firm and stable, reducing avalanche risks that increase as the day warms.
Essential Gear: From Crampons to Ice Axes
Proper equipment is non-negotiable for a Rainier climb. My packing list included several critical items that saved me from potential disaster:
Critical Climbing Gear:
- Crampons for traction on icy surfaces
- Ice ax for self-arrest and stability
- Helmet to protect against falling ice and rock
- Harness and carabiners for glacier travel
- Mountaineering boots with insulation
The layering system is crucial given Rainier’s unpredictable weather. I started with moisture-wicking base layers, added insulating mid-layers, and topped with waterproof, windproof outer shells.

Don’t underestimate small essentials: high-SPF sunscreen, glacier glasses, and a headlamp with extra batteries proved indispensable during my climb, especially during the pre-dawn summit push.
Physical Training: Getting in Shape for the Summit
My six-month training program focused on building endurance, strength, and altitude adaptation. Without this preparation, summit day would have been impossible.
I incorporated these key training elements:
- Weekly hikes with a loaded pack (30-40 pounds)
- Stair climbing sessions (1-2 hours) to build leg strength
- Cardio workouts 4-5 times weekly to improve aerobic capacity
- Core strengthening to support heavy pack carrying
Training hikes at progressively higher elevations helped my body adapt to altitude changes. I found that even experienced hikers struggle on Rainier without specific altitude preparation.

Climber fatigue is the most common reason summit attempts fail. I pushed myself during training to build mental toughness alongside physical strength, which proved essential when facing steep snowfields after hours of climbing.
The Journey Begins
The start of the Mount Rainier climb offers both challenge and beauty. From the iconic Paradise visitor area to the vital stopover at Camp Muir and across the demanding Muir Snowfield, each step brings you closer to one of America’s most rewarding summits.
Starting at Paradise: Trails and Parking Information
Paradise serves as the main launching point for most Rainier summit attempts. I arrived early at 6:00 AM to secure parking, which fills quickly, especially during summer weekends. The large Paradise parking lot offers about 400 spaces, but arriving by 7:00 AM is crucial during peak season.
The Skyline Trail begins right outside the Paradise Visitor Center at 5,400 feet elevation. Before setting out, I checked in at the ranger station to get my climbing permit ($48) and receive the latest weather updates.
The first 2-3 miles through Paradise meadows offer stunning wildflower displays in summer. Though tempting to rush through this section, I took time to acclimate to the elevation and pace myself for the journey ahead.
Camp Muir: A Stopover Before the Assent
Camp Muir sits at 10,188 feet and serves as the primary high camp before summit day. Most climbers, myself included, spend a night here to acclimate and rest before the final push.
The camp consists of a stone climber’s hut (accommodating 25 people), a ranger hut, and a few outhouses. Space operates on first-come-first-served basis for independent climbers, while guided groups use separate shelters.
I arrived at Camp Muir around 2:00 PM after a 4-5 hour hike from Paradise. This gave me plenty of time to set up, melt snow for water, and prepare my gear for the early morning start.

The views from Camp Muir are spectacular, with Mount Adams, Mount St. Helens, and Mount Hood visible on clear days. Temperatures often drop below freezing, even in summer, so proper layers are essential.
Navigating the Muir Snowfield
The Muir Snowfield presents one of the most challenging sections of the climb. This permanent snowfield stretches for about 2.5 miles with approximately 2,800 feet of elevation gain.
I found hiking poles and proper footwear with good traction essential here. Early in the season (May-June), microspikes helped tremendously. By July and August, the snow develops a well-worn boot path that’s easier to follow.
Navigation becomes critical in poor weather. The snowfield has few landmarks, and visibility can drop to near zero in clouds or storms. I carried a GPS device and compass as backup.
Water management is crucial on the snowfield. There are no water sources between Paradise and Camp Muir, so I carried 2-3 liters and refilled using my stove at camp by melting snow.
Tackling the Summit
The final push toward Mount Rainier’s summit combines technical challenges with breathtaking moments that test both physical endurance and mental fortitude. Timing, terrain awareness, and respect for the mountain’s ever-changing conditions became critical factors in my summit attempt.

Assessing Weather Factors and Climbing Windows
I learned quickly that weather dictates everything on Rainier. The ideal climbing window typically opens during summer months (July-September) when conditions are most stable.
My guide constantly monitored weather forecasts, looking specifically for clear skies, minimal wind (under 25 mph), and temperatures above 20°F. We started our summit push at midnight, not just for the spectacular sunrise views, but because snow conditions are more stable during pre-dawn hours when everything remains frozen.
“Mount Rainier is going to do what it wants to do,” my guide reminded us. “All we can do is learn about the mountain and be prepared.”
Some climbing parties ahead of us turned back due to sudden cloud development. This reinforced the vital lesson: summits aren’t worth dying for, and flexibility with your climbing schedule is essential.
Cathedral Rocks and Ingraham Flats: Landmarks on the Route
Cathedral Rocks marked our first major landmark, dark silhouettes against the night sky as we ascended with headlamps illuminating just a few feet ahead. The massive rock formations created a dramatic backdrop against the starlit sky.
Reaching Ingraham Flats at around 11,000 feet provided a brief but welcome reprieve. This relatively flat snowfield served as our resting point before tackling the steeper sections ahead.
The panorama from here was already spectacular—distant peaks emerging from darkness as first light appeared. Many climbers, including several in our group, used this spot to adjust equipment and take in vital calories and hydration.
The Flats also offered my first real perspective on the technical challenges ahead. Looking up, I could trace our zigzagging route through the Disappointment Cleaver, the most common path to Rainier’s summit.
Facing Crevasse Challenges and Altitude Adjustments
Crevasses presented the most intimidating obstacle on our route. These deep ice fissures, sometimes hidden by snow bridges, required careful navigation. We remained roped together in teams of four, maintaining consistent spacing to minimize risk.
The effects of altitude became increasingly apparent above 12,000 feet. My breathing grew labored, and what would normally be simple movements required deliberate effort. I developed a rhythm: ten steps, brief pause, repeat.
I witnessed two climbers from another group turn back with altitude sickness symptoms—headache, nausea, and disorientation. Our guide emphasized the importance of honest self-assessment throughout the climb.
The final push across the summit crater tested my limits. The thinning air at 14,000+ feet made each step a conscious decision. Despite the challenges, reaching Rainier’s true summit at Columbia Crest delivered unparalleled views that made every difficult step worthwhile.
Panoramic Views and Notable Landscapes
Mount Rainier offers some of the most breathtaking vistas in the Pacific Northwest. The mountain’s massive presence dominates the landscape, creating stunning viewpoints that showcase its glaciers, surrounding peaks, and seasonal beauty.
Peaks and Valleys: The Tatoosh Range and Emmons Glacier
The Tatoosh Range provides one of my favorite perspectives of Mount Rainier. This jagged line of peaks creates a dramatic foreground when photographing the mountain from the south. I spent nearly an hour at Pinnacle Peak just taking in the spectacular panorama.
Emmons Glacier, the largest glacier in the continental United States, covers the northeast face of Rainier. During my summer trek, the massive ice field glowed with an ethereal blue hue in the morning light.
The contrast between the dark volcanic rock and brilliant white snow creates a photographer’s paradise. From Fremont Lookout, I could see the full expanse of Emmons stretching down the mountainside. Rangers once used this spot to watch for forest fires, and now it offers hikers one of the most rewarding views in the park.
Seasonal Spectacles: Wildflowers and Summerland
Summer transforms Mount Rainier’s slopes into a riot of colors. The wildflower season typically peaks in late July and early August, carpeting meadows with vibrant purples, yellows, and reds.
Summerland, on the mountain’s eastern side, became my favorite wildflower viewing area. The trail winds through forests before opening to sprawling meadows filled with lupine, paintbrush, and aster flowers against Rainier’s white backdrop.
I recommend arriving at Summerland in early morning for the best light and fewer crowds. The combination of golden sunrise illuminating the meadows with dew-covered wildflowers created some of my most memorable photos from the trip.
Panorama Point: A Favorite Among Hikers
Panorama Point lives up to its name with sweeping 360-degree views that take your breath away. At 6,800 feet elevation, this viewpoint on the Skyline Trail offers an unobstructed perspective of the Cascade Range and valleys below.
I reached Panorama Point after a moderately challenging hike from Paradise. The effort was completely worth it when I stood above the clouds, watching them swirl around distant peaks.
On clear days, you can see Mount Adams, Mount St. Helens, and even Mount Hood in Oregon. I recommend bringing binoculars to spot mountain goats on nearby ridges. The reflection of Rainier in a small alpine lake near the viewpoint creates a perfect mirror image worth capturing.
Rest and Recuperation: Staying at Paradise Inn
Paradise Inn became my sanctuary after the grueling summit attempt. This historic lodge was built in 1916 and offers rustic charm with its massive timber beams and stone fireplaces. I spent hours in the lobby’s comfortable chairs, nursing sore muscles while gazing at the mountain I’d just conquered.
The rooms are simple but comfortable, providing a peaceful retreat after days on the mountain. No TVs or phones meant I truly disconnected from the outside world.
The dining room serves hearty meals that hit the spot after burning thousands of calories on the climb. I particularly enjoyed their huckleberry pancakes for breakfast and local salmon for dinner.
Fall asleep to absolute silence here, broken only by the occasional creak of the old wooden structure. The staff shared fascinating stories about the inn’s history and famous guests who’ve stayed there over the decades.
Day Hikes and Exploration Beyond the Summit
Once my legs recovered, I explored the network of trails around Paradise. The Skyline Trail offered spectacular views without the intensity of the summit climb.
Wildflower meadows burst with color in summer months, creating carpet-like displays of lupine, paintbrush, and asters.
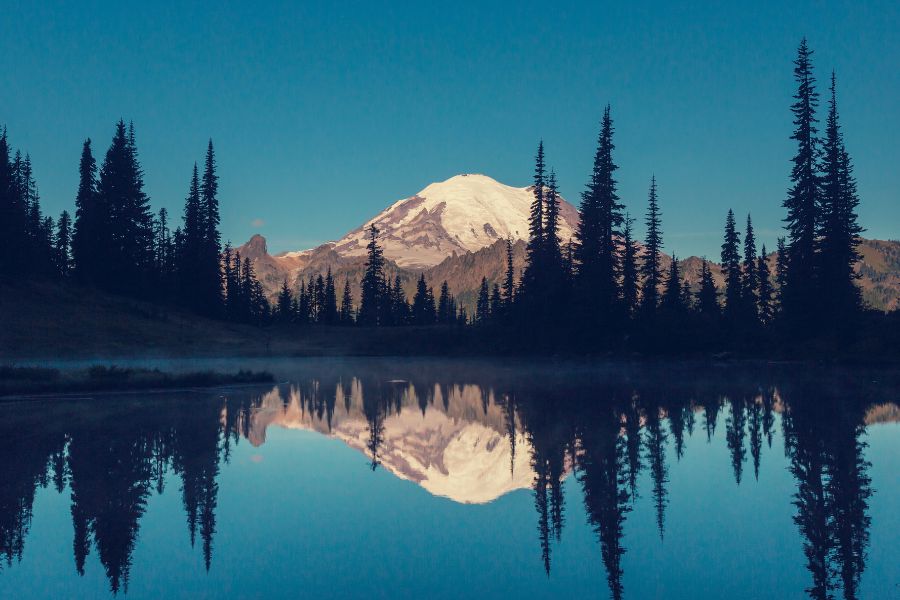
Reflection Lakes provided perfect mirror images of Mt. Rainier on calm mornings. I arrived at sunrise one day and watched the mountain glow pink in first light.
For an easier experience, I wandered the Grove of the Patriarchs trail to see ancient, massive trees. Some of these giants are over 1,000 years old!
Narada Falls impressed with its powerful 188-foot cascade. The spray created rainbows in the afternoon sun, and I could feel the mist from the viewpoint.
The Paradise Visitor Center offered excellent exhibits about the mountain’s geology, wildlife, and climbing history. Rangers gave informative talks that helped me understand the ecosystem better.
Reflecting on the Experience and Sharing Reviews
Writing in my journal each evening helped process the emotions from summiting. The sense of accomplishment mixed with humility before nature’s power stayed with me.
I found myself scrolling through photos constantly, hardly believing I’d stood atop that massive volcano.
I posted reviews on hiking forums to share trail conditions and advice with future climbers. Mentioning the challenging parts of Emmons Glacier helped others prepare realistically for their own attempts.
Connecting with fellow hikers in the park created an unexpected community. We swapped stories over beers at the National Park Inn’s restaurant, comparing routes and experiences.
The adventure changed my perspective on what I’m capable of achieving. Pushing through exhaustion and fear to reach the summit taught resilience that applies to everyday challenges back home.