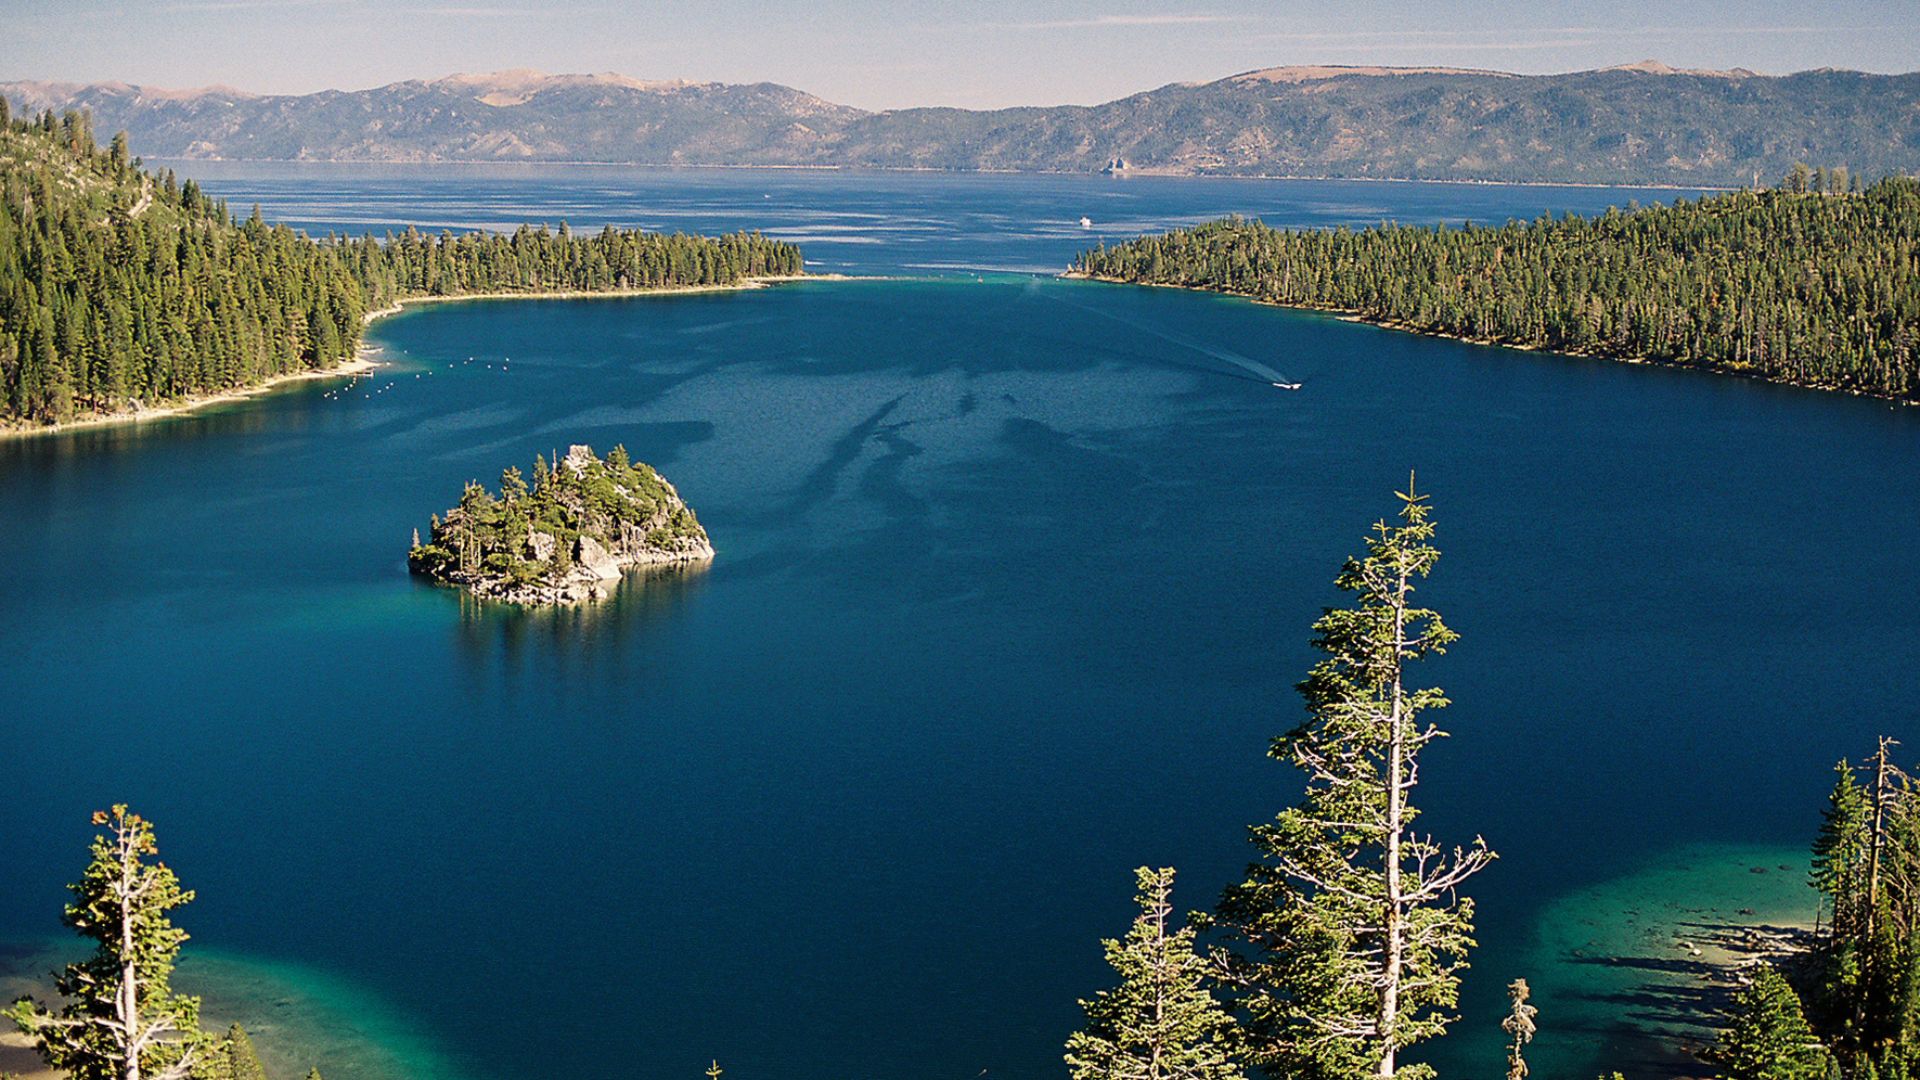
Emerald Bay at Lake Tahoe has earned its spot as one of California’s most photographed natural landmarks. After visiting more times than I can count, I’ve got to say—it really does live up to the hype.
This bay’s crystal-clear waters, towering pine forests, and granite peaks blend together to create views that almost seem unreal. Sometimes I catch myself thinking, “Is this even real life?”
The three viewpoints I’m about to share each give you a completely different look at Emerald Bay. Some you can reach in just a few minutes by car, while others reward you after a good hike. Every spot promises unique photo ops and a fresh way to appreciate why Emerald Bay State Park draws millions of visitors year after year.
I’ll show you exactly how to get to each viewpoint, whether you’re in the mood for a quick roadside stop or you’re ready to break a sweat on the trail. I’ll also let you in on the best times to go, what outdoor activities you can try, and how to snap that perfect photo of Lake Tahoe’s natural beauty.
Emerald Bay’s Most Breathtaking Viewpoints Revealed
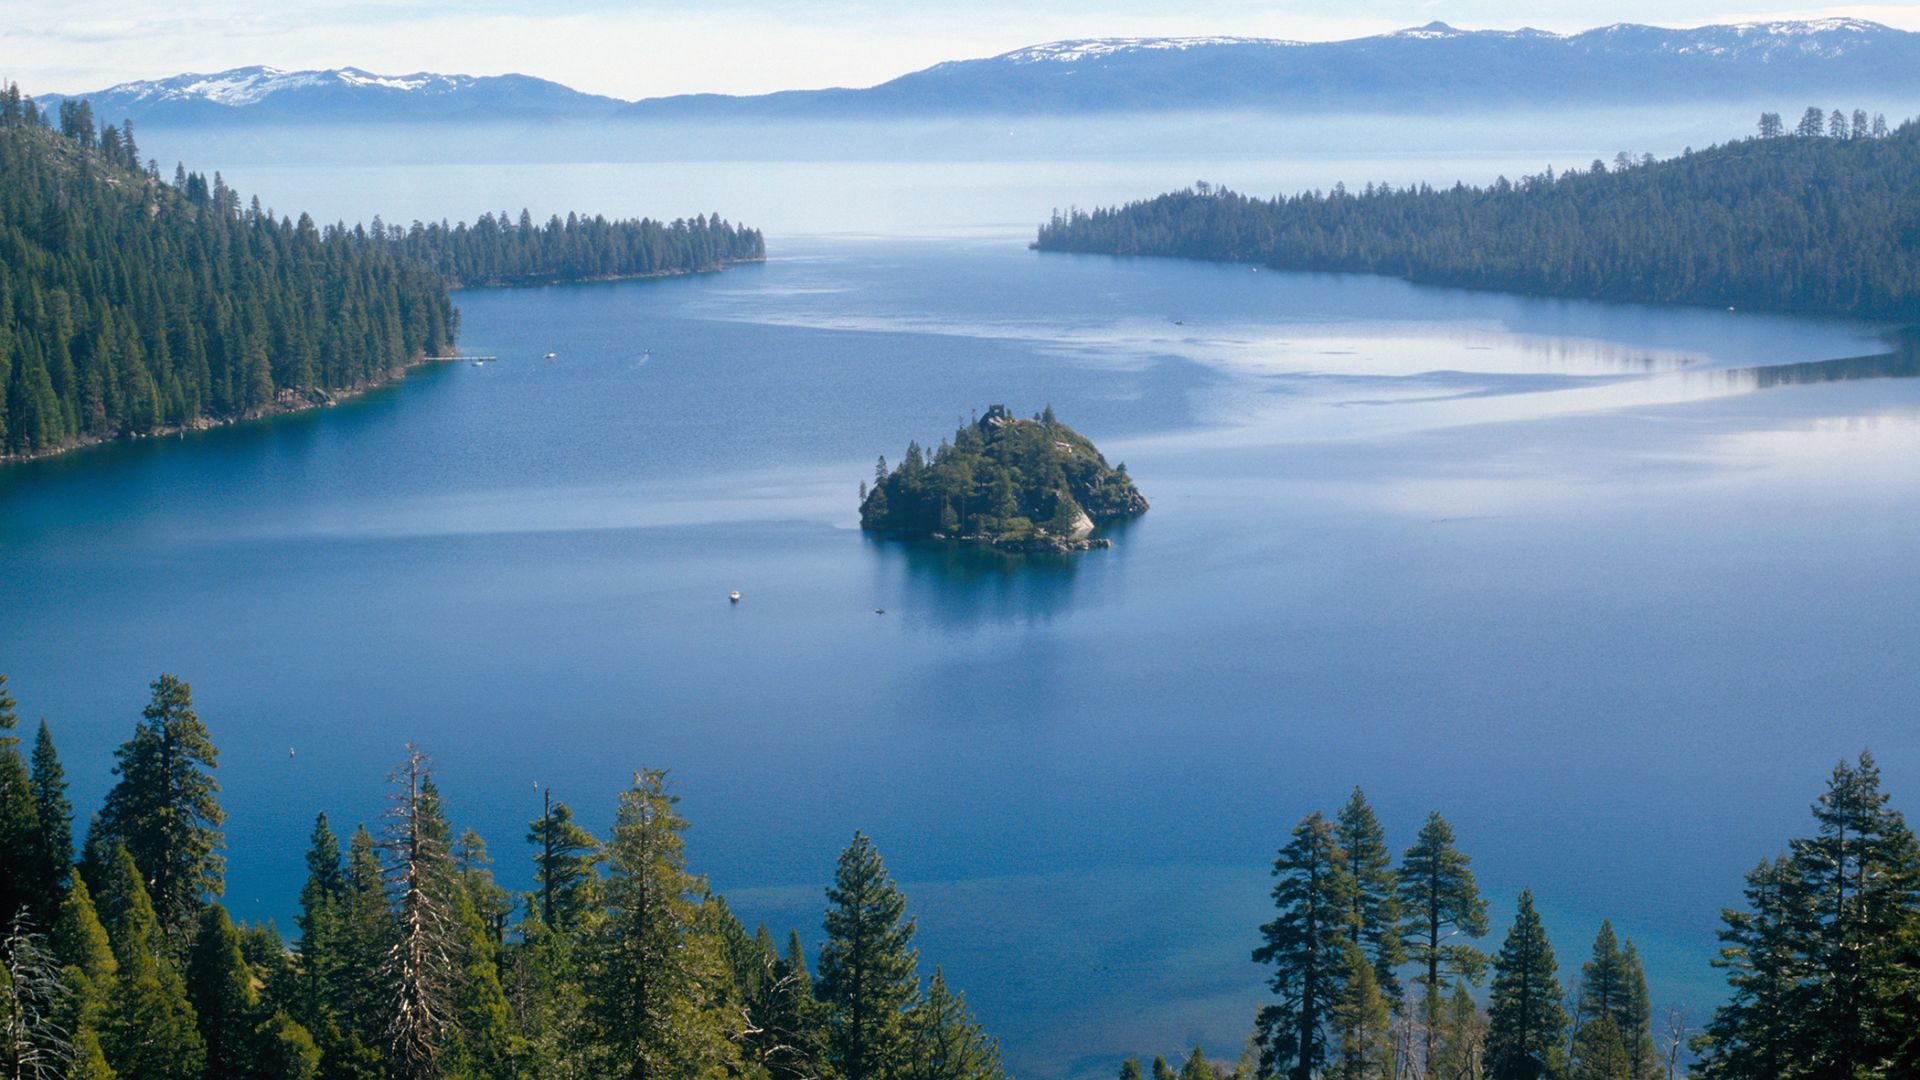
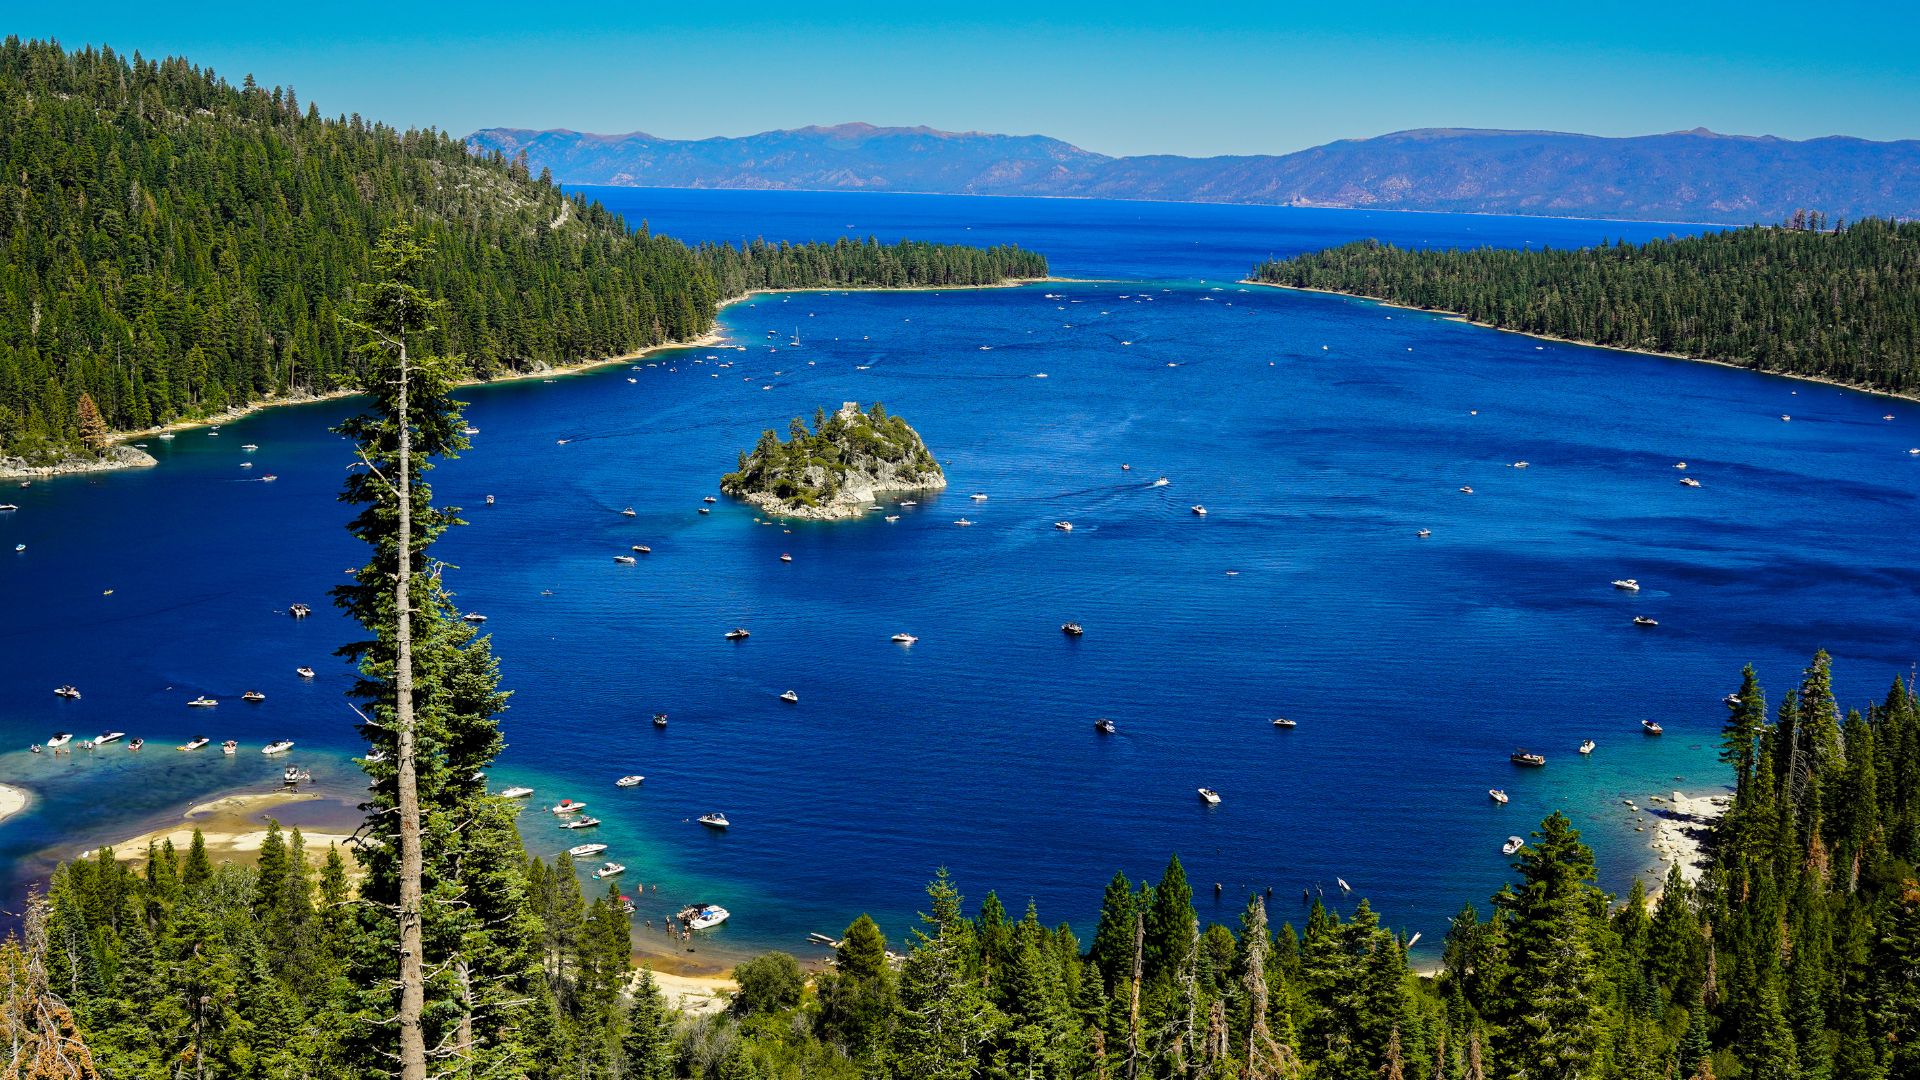
These three spots offer the most jaw-dropping views of Emerald Bay’s blue-green water, granite cliffs, and iconic landmarks. Each one lets you see Fannette Island and the surrounding landscape from a different angle.
Eagle Point: Sweeping Vistas of Emerald Bay
Eagle Point is the place everyone talks about—and for good reason. I think it’s the best scenic overlook for your first trip.
The viewpoint sits up high above the bay. When I’m there, I get a full view of the emerald basin ringed by dramatic granite cliffs.
Why Eagle Point stands out:
- The view of Fannette Island is totally unobstructed
- It’s a killer spot for sunrise or sunset shots
- You can just drive up and park
Fannette Island sits right in the middle of the bay below. The old stone tea house on its peak adds a bit of mystery to the whole scene.
How to get there: Drive along Highway 89 on the west shore of Lake Tahoe. Watch for the Eagle Point parking lot about a mile south of the Emerald Bay State Park entrance. Parking runs $10 per day.
The granite cliffs frame the bay perfectly from here. I always aim for early morning or late afternoon to catch the best lighting.
Vikingsholm Overlook: Views of the Castle and Bay
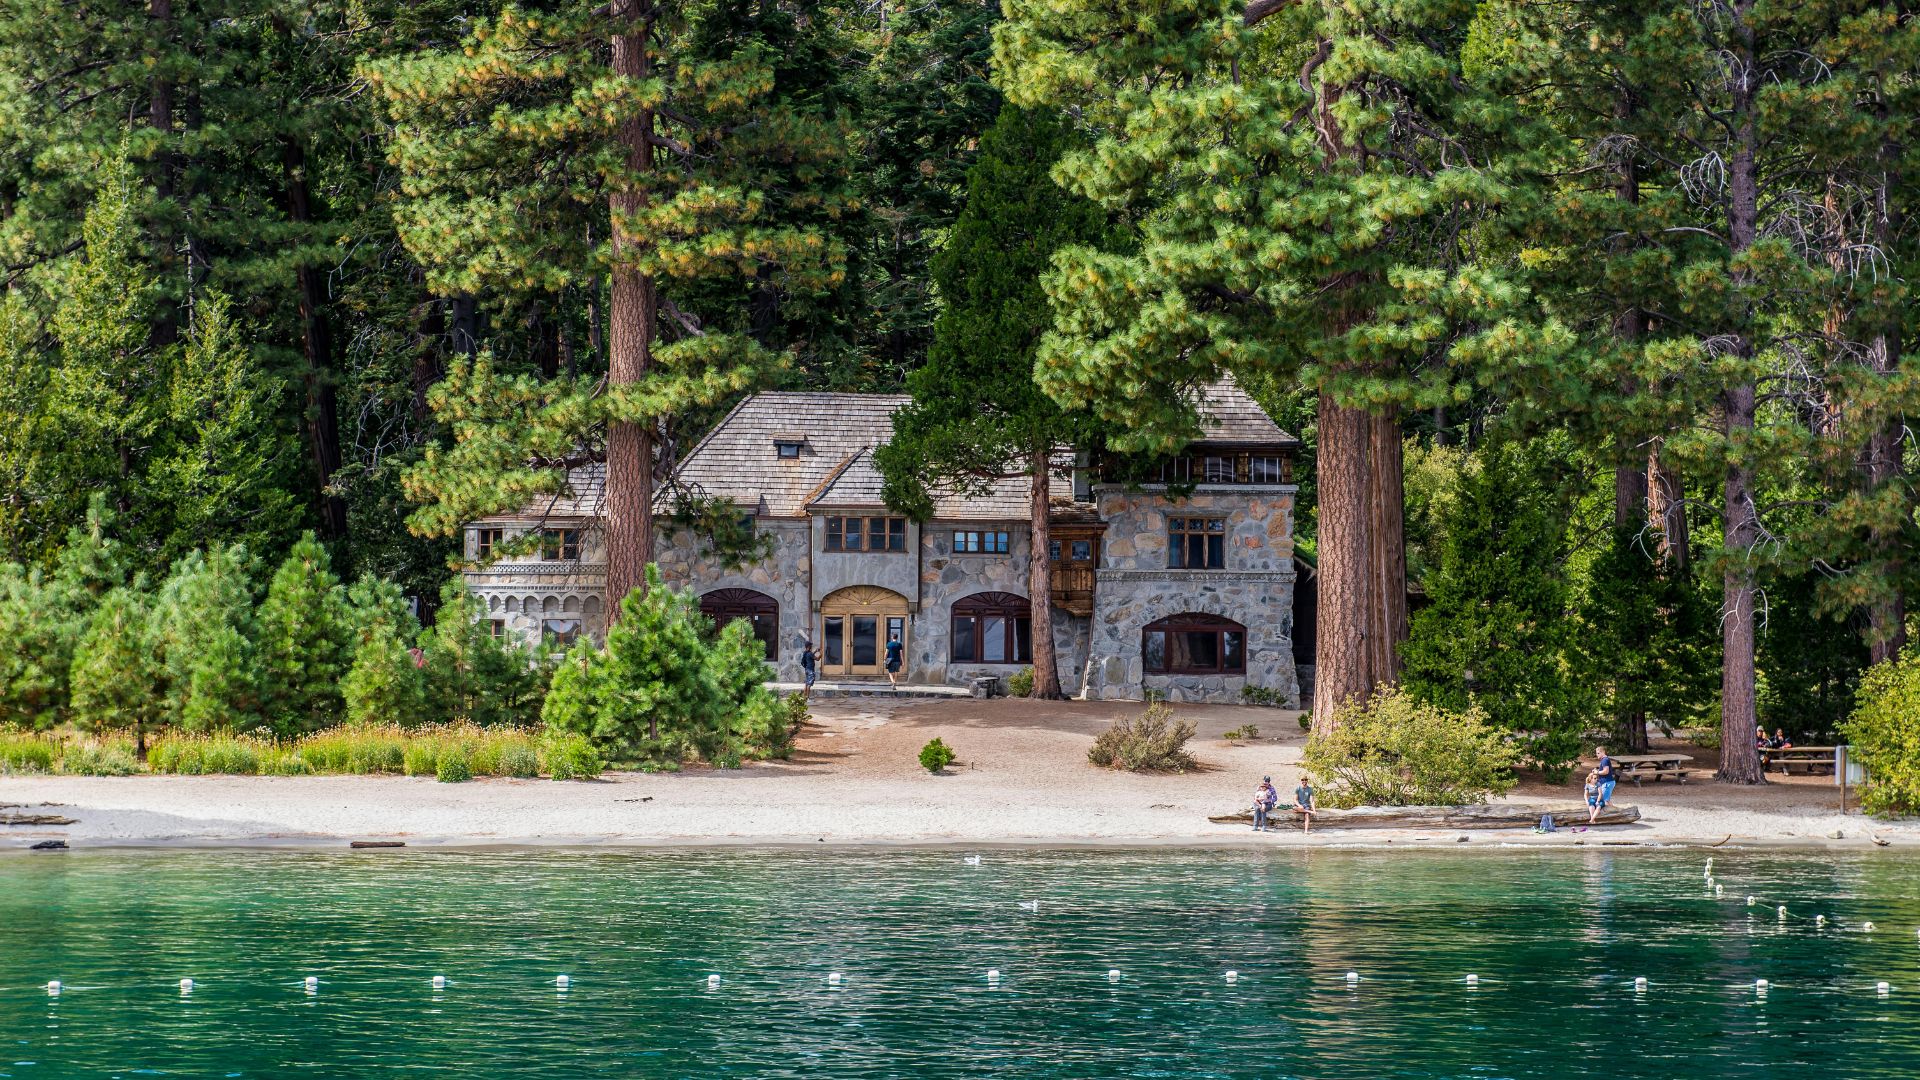
The Vikingsholm Overlook gives you a one-of-a-kind view of both the historic castle and Emerald Bay. It’s where architecture and nature meet in the best way.
Vikingsholm Castle sits just below, showing off that classic Scandinavian style. Built in 1929, the 38-room mansion is one of North America’s best examples of Nordic design.
From this overlook, you’ll spot:
- The castle’s grassy roof and stone walls
- A sandy beach surrounding the castle
- Fannette Island up close
- The sheltered cove of Emerald Bay
Getting there: Park at the Vikingsholm lot and walk to the overlook spots. The trail is short—about five minutes from the parking area.
From here, the castle’s sod roof and hand-carved details really pop against the landscape. It’s a spot that’s made for unique photos, blending history and natural beauty in every shot.
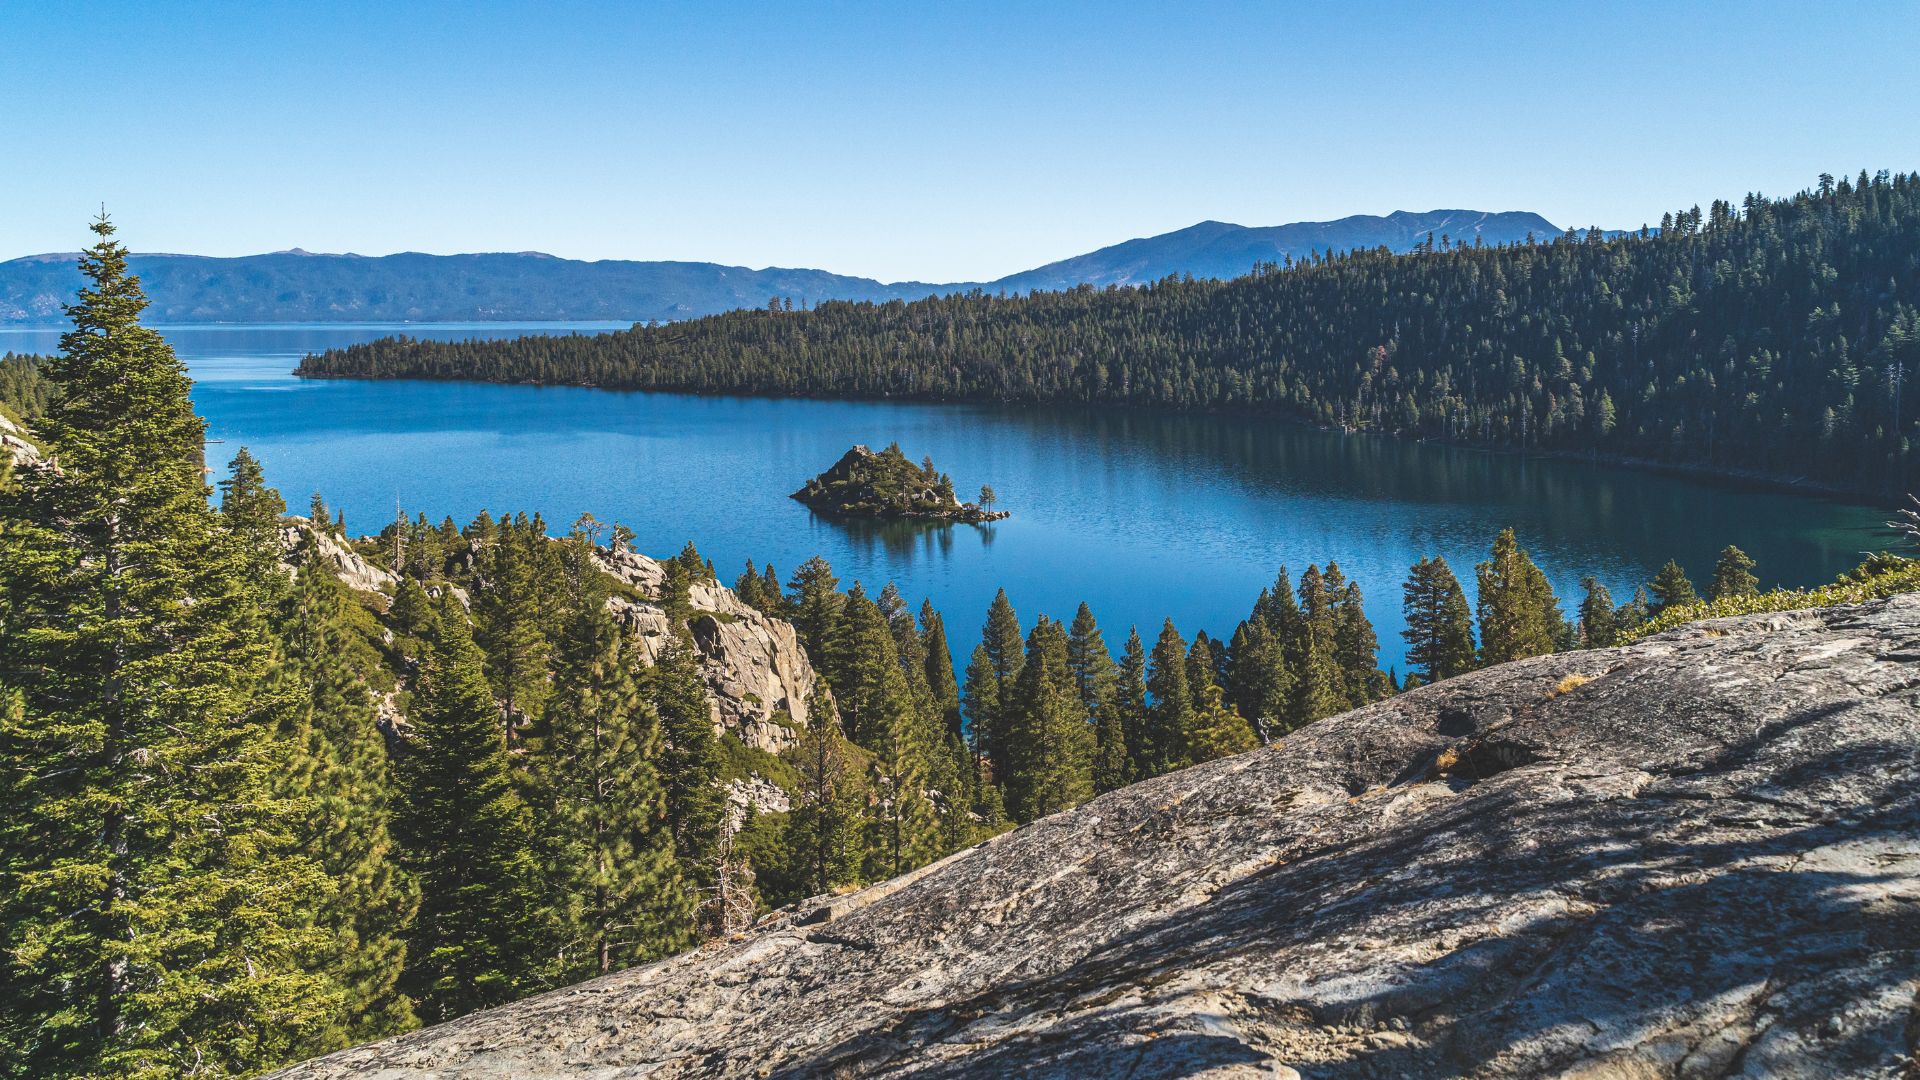
Inspiration Point: The Classic Panoramic Perspective
Inspiration Point has those wide, cinematic views that make you stop and stare. From up here, you can see way beyond Emerald Bay.
This overlook sits higher than the others. I can spot multiple bays, distant mountains, and the huge sweep of Lake Tahoe all at once.
What makes Inspiration Point different:
- The widest panoramic views around
- You can see several bays at the same time
- It’s perfect for landscape photography
- Usually less crowded than Eagle Point
Hiking tip: The trail to Inspiration Point starts at the Eagle Point parking area. It’s a moderate 1.2-mile hike with a few steep spots.
Granite cliffs drop straight down to the clear water below. From here, you really get a sense of just how big Lake Tahoe is.
Fall is my favorite time up here. The forest turns brilliant colors, and the blue water makes the leaves look even more vibrant.
Bring a wide-angle lens if you love photography. The sweeping views here capture all the drama of the Lake Tahoe basin.
How to Access Each Viewpoint: Hiking, Driving, and More
You’ll need different strategies to reach each viewpoint. Highway 89 links all three, but parking and trails aren’t all the same.
Getting to Eagle Point by Car or Trail
Eagle Point sits above Emerald Bay State Park. You can drive or hike, depending on your mood and fitness.
By Car:
- Head north on Highway 89 from South Lake Tahoe
- Look for small pullouts along the highway between Emerald Bay and DL Bliss State Park
- Roadside parking is limited
- Best time: Before 9 AM to snag a spot
By Trail:
If you’re up for a hike, try the Rubicon Trail. Start at the main Emerald Bay State Park parking area (it’s $10 for the day). The trail connects to Eagle Point with a 2-mile section heading north.
Trail Details:
- Distance: 2-3 miles depending on where you start
- Difficulty: Moderate
- Terrain: Rocky shoreline
- Dogs: Not allowed in this section of the park
The hiking trails offer better photo spots than the roadside pullouts. Bring water and wear sturdy shoes—the rocks can be rough.
Reaching Vikingsholm via Hiking and Parking Options
Vikingsholm takes a little more effort, but the castle views are so worth it.
Parking:
- Emerald Bay State Park lot: $10, fills up fast
- Roadside on Highway 89: Free but goes early
- Alternative: Park at Eagle Falls Trailhead across the road
The Hike Down:
You’ll walk a mile downhill from the parking area to reach Vikingsholm. The trail drops you right at water level by the bay’s beach.
Key Details:
- Distance: 1 mile each way
- Elevation: Lose 400 feet going down
- Time: 20 minutes down, about 35 minutes back up
- Surface: Paved but with some rocky bits
Heading Back:
The climb up is no joke—it’s steep and can be tough, especially on hot days. I always bring extra water and take breaks. It’s easy to underestimate this climb.
Arriving at Inspiration Point: Best Routes and Tips
Inspiration Point is the easiest to reach—almost no walking required.
Direct Access:
- Right off Highway 89
- Small lot fits about 8-10 cars
- GPS: Highway 89, South Lake Tahoe, CA 96150
Parking Tips:
I usually get there before 8 AM or after 4 PM to skip the crowds. The lot fills up fast during busy times.
Walking Distance:
- Less than 100 yards from the car
- Paved walkway to the viewpoint
- Fine for most fitness levels
Heads Up:
Some trees partially block the view here. For a clearer shot, walk about 0.2 miles north on Highway 89 to the Emerald Bay Main Viewpoint.
Photo Timing:
- Morning: 7-9 AM for soft light
- Evening: 5-7 PM for golden hour
- Midday: Skip it—light is harsh
This spot works great as a quick stop if you’re driving the scenic Highway 89 loop.
Outdoor Activities and Experiences at Emerald Bay
Emerald Bay is an outdoor lover’s dream. You’ll find hiking trails with epic views and peaceful alpine lakes. The water is so clear, it’s perfect for kayaking, paddleboarding, or even a quick swim if you’re brave.
Top Hiking Trails with Exceptional Views
Eagle Lake Trail is my favorite trail for families and beginners. It’s a gentle two-mile round trip through forest to a picture-perfect alpine lake.
The trail is easy and mostly flat. Wildflowers bloom here in late spring and early summer—honestly, it’s magical.
Rubicon Trail is for the more adventurous. At 22 miles, it hugs Lake Tahoe’s shoreline and serves up some of the most spectacular views I’ve found in the Sierra Nevada.
You’ll walk through granite cliffs, sandy beaches, and thick forests. Start early and bring plenty of water—this hike is no joke.
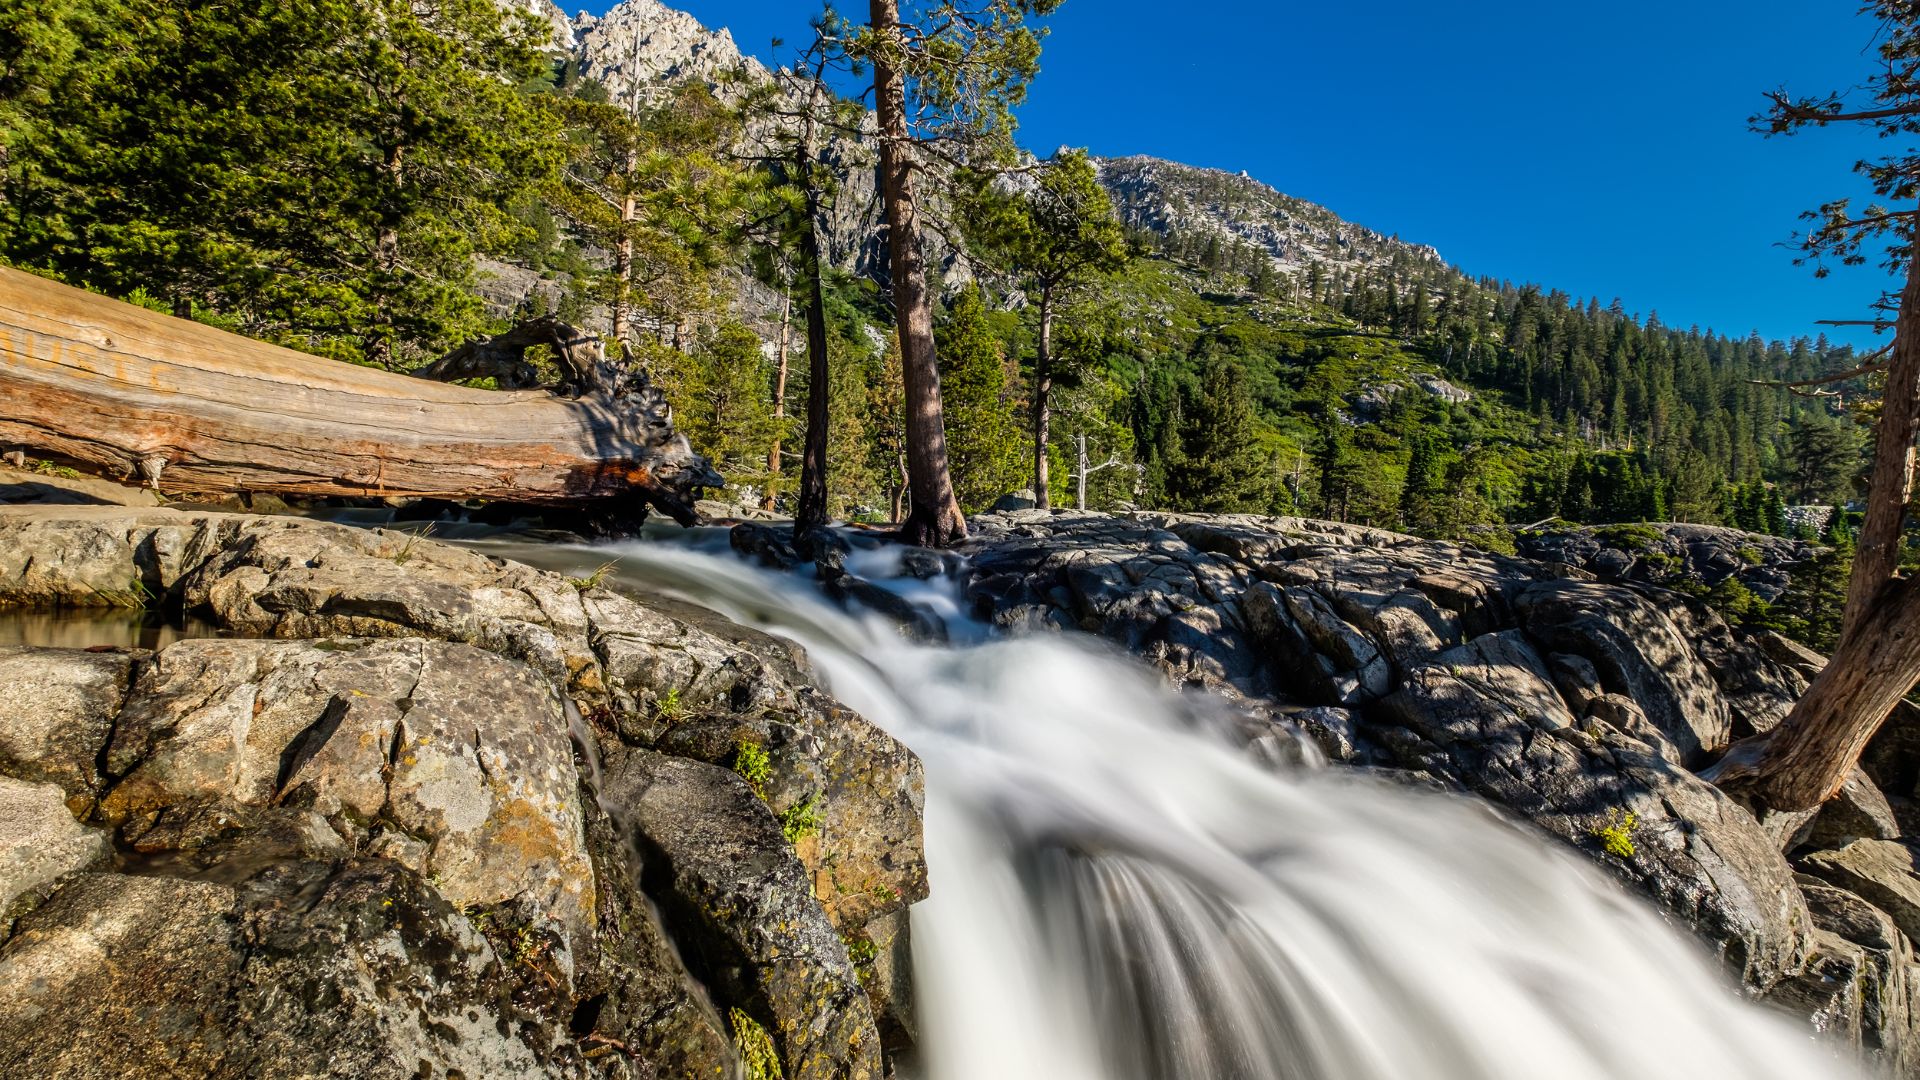
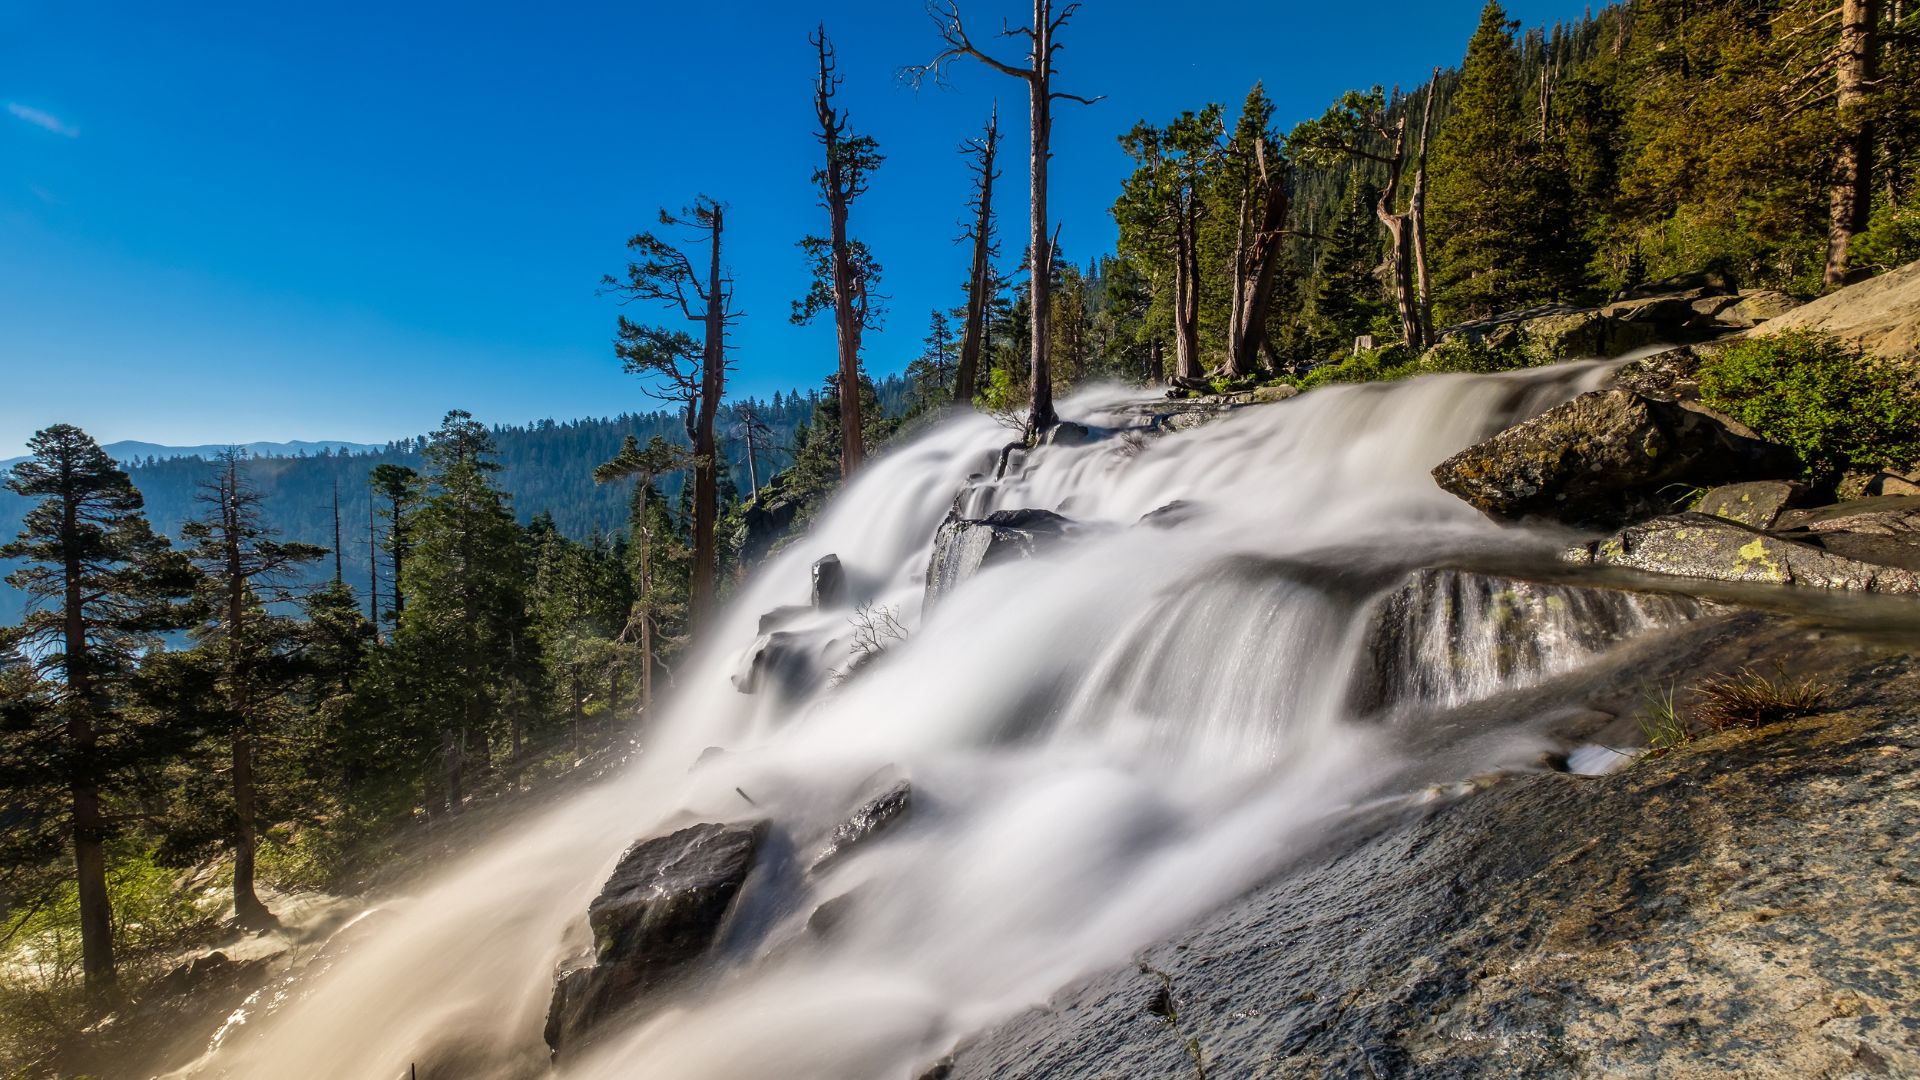
Eagle Falls Trail is a quick one—just a mile round trip. It leads to a beautiful waterfall that runs all year. The views of Emerald Bay from this trail are something I never get tired of.
Kayaking, Paddleboarding, and Swimming Around Emerald Bay
The bay’s protected waters make it perfect for paddling. I’ve kayaked here a bunch, and mornings are always the calmest.
Fannette Island sits right in the center and makes a great destination for kayakers. Exploring the old tea house ruins is a fun little adventure.
Swimming is popular at the small beaches around the bay. The water’s cold—even in summer it usually tops out at 65-70°F. I always bring a wetsuit if I plan to stay in long.
You can rent gear at nearby marinas. The boat ramp near Vikingsholm Castle and Eagle Point Campground are both popular launch spots.
Photography Tips for Capturing Emerald Bay’s Panoramic Beauty
If you want that perfect Emerald Bay photo, timing is everything. Aim for golden hour and bring the right camera gear. The soft morning light over the water and mountains makes all the difference.
Best Times and Lighting for Photography
Early morning is hands-down the best time for Emerald Bay photos. I like to arrive about half an hour before sunrise to set up.
Golden hour kicks in about 20 minutes before sunrise. That’s when the light turns warm and soft, and the water glows. Shadows are gentle, and everything looks magical.
Sunset is good too, but sunrise wins. Morning light comes in from the east and lights up the bay just right. Evening can throw dark shadows across the water.
Weather really matters. Clear days give you crisp mountain backgrounds, but a few clouds can add drama.
Skip midday (11 AM to 3 PM) if you want great photos. The light is harsh, and the water reflects too much. Photos end up looking flat and washed out.
In winter, the light changes and snow on the mountains adds contrast. The sun stays low, so you get longer golden hours.
Essential Gear for Scenic and Panoramic Shots
A wide-angle lens is a must for Emerald Bay. I use a 16-35mm lens to fit the whole bay in one frame. It really shows off the scale.
Bring a solid tripod. Early mornings are dim, so you’ll need slower shutter speeds. A tripod keeps your shots sharp.
Polarizing filters cut glare on the water. They make the blues pop and the water look clear. The sky also gets a deeper color.
Pack extra batteries—cold mountain air drains them fast. Lens cloths come in handy for wiping off dew.
A graduated neutral density filter helps balance the sky and water. The sky’s often much brighter than the bay, and this filter keeps your exposure even.
Use a remote shutter or your camera’s timer to avoid shaking the camera. Even tiny movements can blur those big panoramic shots.
Exploring Nearby Landmarks and Amenities
Emerald Bay isn’t just about the views. Fannette Island is home to historic ruins that are fun to explore, and D.L. Bliss State Park offers more overlooks and recreation just minutes away.
Discovering Fannette Island and the Tea House Ruins
Fannette Island floats right in the middle of Emerald Bay, and honestly, it’s Lake Tahoe’s only island. When I first saw this small, rocky spot, I couldn’t help but wonder about the mysterious tea house ruins perched on top.
Back in the 1920s, Mrs. Lora Knight built the stone tea house up there. She’s the same person behind Vikingsholm Castle, which is just across the bay. Reaching the island isn’t exactly a casual stroll—you’ll need a kayak, canoe, or a small boat, and summer’s the only real window for that.
Getting There:
- You can rent a kayak from vendors nearby.
- Paddle out about a quarter mile from the shore.
- I’d set aside 2-3 hours for the round trip, just to take it easy.
Once you land, there’s a short but steep trail up to the tea house ruins. It took me about ten minutes, but the rocks can get slippery. Good shoes and some water? Absolutely essential.
Standing on the island, looking back at Emerald Bay, you get a view that’s completely different from the usual overlooks. It almost feels like you’re seeing a secret side of Tahoe that most people miss.
Visiting D.L. Bliss State Park: Overlooks and Trails
D.L. Bliss State Park sits just north of Emerald Bay on Highway 89, and it’s directly connected to the bay. For me, it’s always been a spot with some of the best viewpoints in the area.
Key Features:
- Balancing Rock: This 130-ton granite boulder somehow balances on a tiny base.
- Rubicon Trail: A 4.5-mile hike that hugs the shoreline, giving you those classic lake views.
- Calawee Cove Beach: A sandy stretch that’s perfect for swimming or just relaxing.
I have to say, the Rubicon Trail is a personal favorite. It follows the edge of the lake almost the whole way, so you’re never far from the water. Plus, since it connects D.L. Bliss to Emerald Bay, you can explore both parks without much hassle.
Balancing Rock is only a five-minute walk from the parking lot. It’s quirky and makes for a fun photo, especially with Tahoe shimmering in the background.
Park hours run from sunrise to sunset. The $10 entrance fee covers both D.L. Bliss and Emerald Bay State Parks, which is actually a pretty good deal if you’re planning to see both in a day.
Picnic, Camping, and Guided Tours Near Emerald Bay
You’ll find plenty of picnic spots scattered around Emerald Bay, and honestly, it’s tough to beat those lake views while you eat. I’ve always liked the picnic tables right by the main parking area—they’re super convenient, especially if you’ve got kids or a group in tow.
Camping Options:
- D.L. Bliss Campground: 168 sites
- Emerald Bay Campground: Boat-in camping only
- You’ll need to reserve through ReserveCalifornia.com
D.L. Bliss feels like classic camping—think restrooms, showers, and forest air. The campsites book up fast in summer, so if you’re even thinking about going, you should probably snag a spot months ahead.
Guided Tours Available:
- Tours of Vikingsholm Castle (seasonal)
- Boat tours on Emerald Bay
- Kayak trips out to Fannette Island
Vikingsholm Castle opens for tours between Memorial Day and Labor Day. They charge $10 for adults, and you’ll get a peek into the mansion’s Scandinavian-inspired history. It’s honestly fascinating, even if you’re not a huge architecture buff.
A handful of local guides run kayak tours out to Fannette Island. They’ll set you up with all the gear and lead you on a 2-3 hour adventure, with plenty of time for snapping photos and poking around the island. If you’ve never tried it, it’s a pretty unforgettable way to see the bay.