Gran Canaria‘s highest accessible peak towers nearly 2,000 meters above sea level. The views up here? Absolutely wild—on a clear day, you can see the entire island and even spot Mount Teide over on Tenerife. I couldn’t believe how easy it was to combine the thrill of reaching Gran Canaria’s rooftop with the comfort of just driving almost to the summit.
What really sets Pico de las Nieves apart is how accessible it is. You can drive right up to the viewpoint on smooth, well-maintained roads. It’s ideal if you’re after epic mountain scenery but aren’t in the mood for a grueling hike.
The drive itself is a journey through Gran Canaria’s ever-changing landscapes. One minute you’re hugging the coast, and the next you’re weaving through fragrant pine forests. It’s honestly hard not to stop for photos every five minutes.
When I reached this 1,949-meter peak, I realized timing is everything. Weather can flip the experience from “nice view” to “jaw-dropping.” There are plenty of ways to explore up here—quick car trips, hiking routes, and even little villages to poke around in.
Reaching Pico de las Nieves by Car
Getting to Pico de las Nieves by car is pretty straightforward. Two main roads give you different scenic options to approach Gran Canaria’s second-highest peak.
You’ll find parking right at the summit. Several nearby towns are perfect pit stops if you want to stretch your legs or grab a bite.
Driving Routes: GC-130, GC-134, and Approaches
You’ve got two main choices: GC-130 and GC-134. Both roads twist through the heart of the island, and the views are something else.
GC-130 comes in from the north through Cruz de Tejeda. The road treats you to sweeping vistas of the central peaks. I found the bends manageable, though you’ll want to stay focused.
GC-134 approaches from the south near Ayacata. Here, the scenery shifts to volcanic landscapes and deep valleys. The road’s in good shape, but expect plenty of curves and some hairpins.
Both routes meet up near the summit. The last stretch to the parking lot is clearly marked.
Depending on where you start, the drive takes anywhere from 45 minutes to an hour and a half.
Small cars are best for these roads. Larger vehicles and buses do make the trip, but those tight turns require a bit more patience.
Parking Information and Tips
You can park for free right at the Pico de las Nieves summit. The lot’s at the very end of the road, so it’s super convenient.
But here’s the catch: Parking fills up fast, especially between 10 AM and 2 PM or on weekends. I’d suggest arriving early—before the crowds roll in.
The lot is paved and works for standard cars. No permits or fees needed. There’s space for about 20-30 cars, so it’s not huge.
When things get busy, people start parking along the roadside. This narrows the road, so take it slow and watch out for traffic.
Winds at this altitude can get fierce. I’ve had car doors nearly ripped out of my hands, so hang onto your stuff and secure anything that might blow away.
Nearby Destinations: Ayacata, Cruz de Tejeda, and San Mateo
If you’re up for exploring more, a few towns nearby make great stops.
Ayacata is right on the southern approach (GC-134). It’s a tiny village with classic Canarian food and a good base for hiking. The drive from here to the peak is about 20 minutes.
Cruz de Tejeda sits along the northern route (GC-130). This mountain town has a visitor center and restaurants with killer views. It’s also known for traditional crafts and its central location.
San Mateo is a bit of a detour but worth it if you want a taste of rural Gran Canaria. The town has a lively weekend market and lots of local flavor. Add about half an hour to your trip if you swing by here.
All three towns have parking and basic facilities. They’re perfect for lunch or even an overnight stay if you want to linger in the mountains.
Pico de las Nieves Viewpoint: Panoramic Highlights
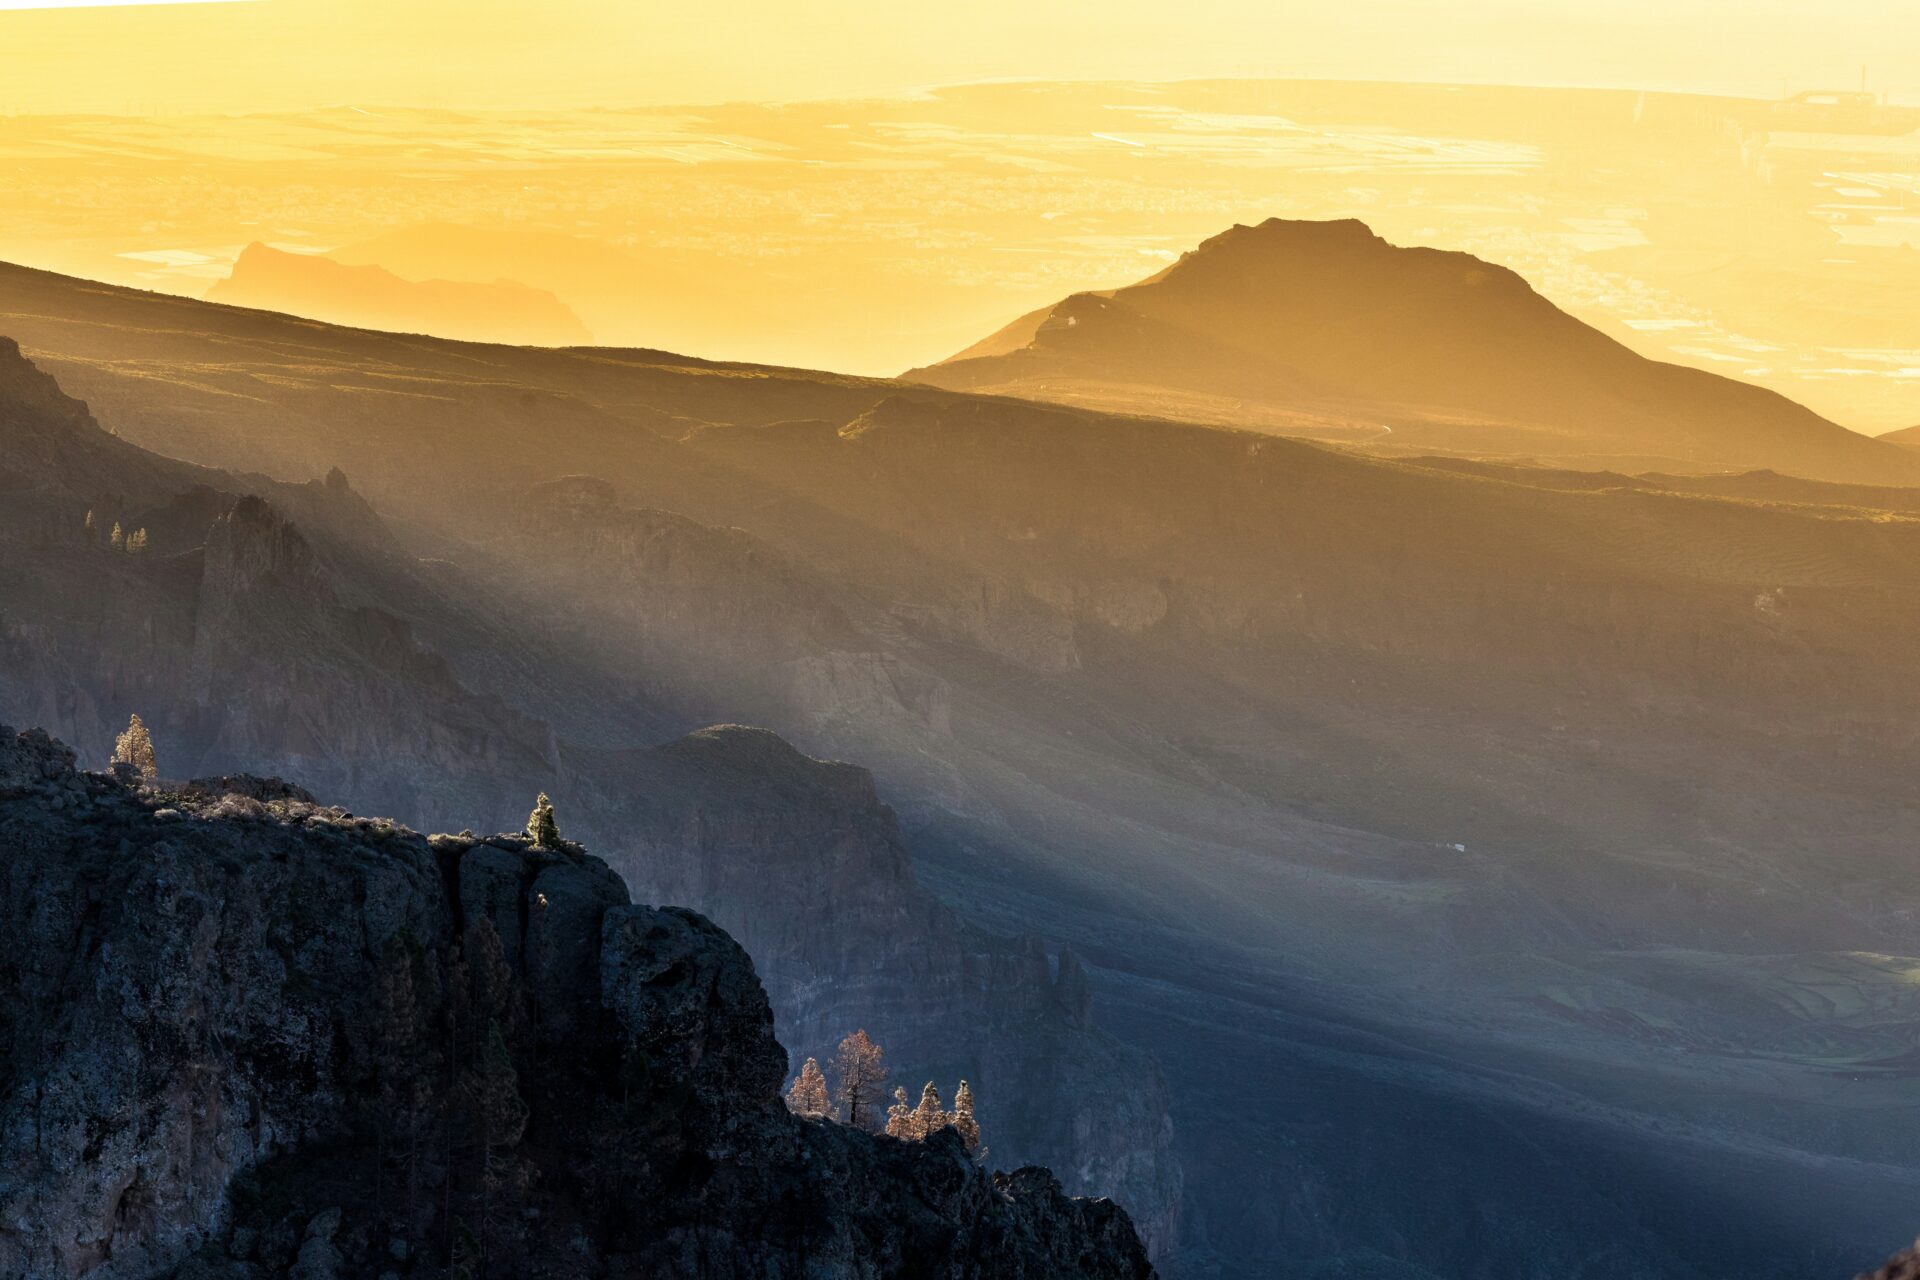
Standing at 1,949 meters, the viewpoint at Pico de las Nieves delivers some of the wildest panoramas in the Canary Islands. The air feels crisp and clear, and the height gives you a front-row seat to Gran Canaria’s crazy mix of landscapes.
Best Island-Wide Views on a Clear Day
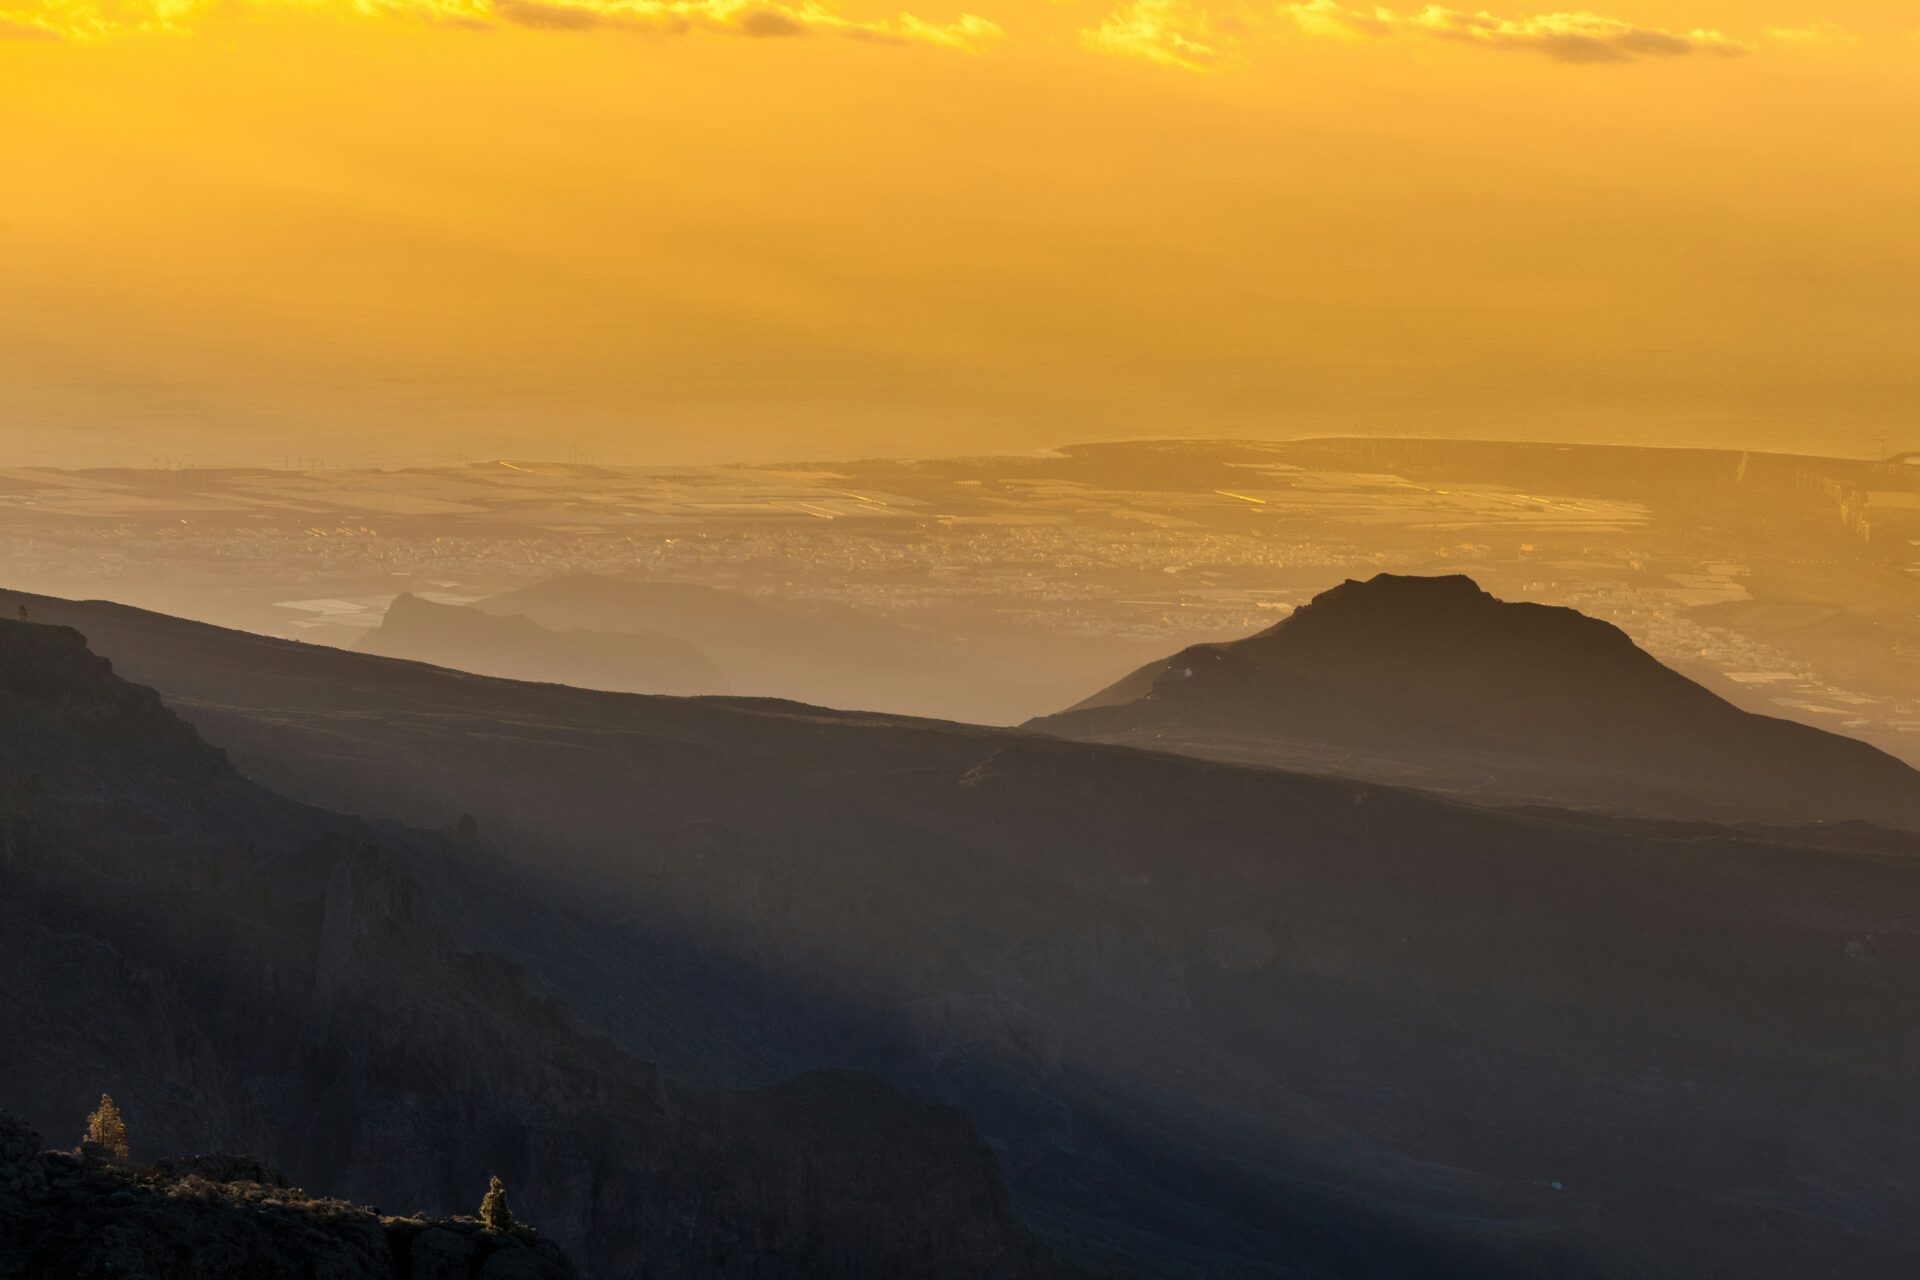
On a clear day, you can see almost the whole island from up here. The green valleys up north stretch toward Las Palmas, while the golden coastline runs all the way to Maspalomas in the south.
The differences jump out at you. Pine forests blanket the center, and volcanic terrain adds drama to the peaks.
Sometimes, the Atlantic seems to wrap around you, making Gran Canaria look like a floating jewel.
Key directions for your gaze:
- North: Las Palmas and the lush coastal plains
- South: Maspalomas dunes and those famous resort beaches
- East: Rugged volcanic craters
- West: Mountain ridges soaking up the sunset
The cumbre area gives you several angles. I like to wander around the lot to see how the landscape shifts with every step.
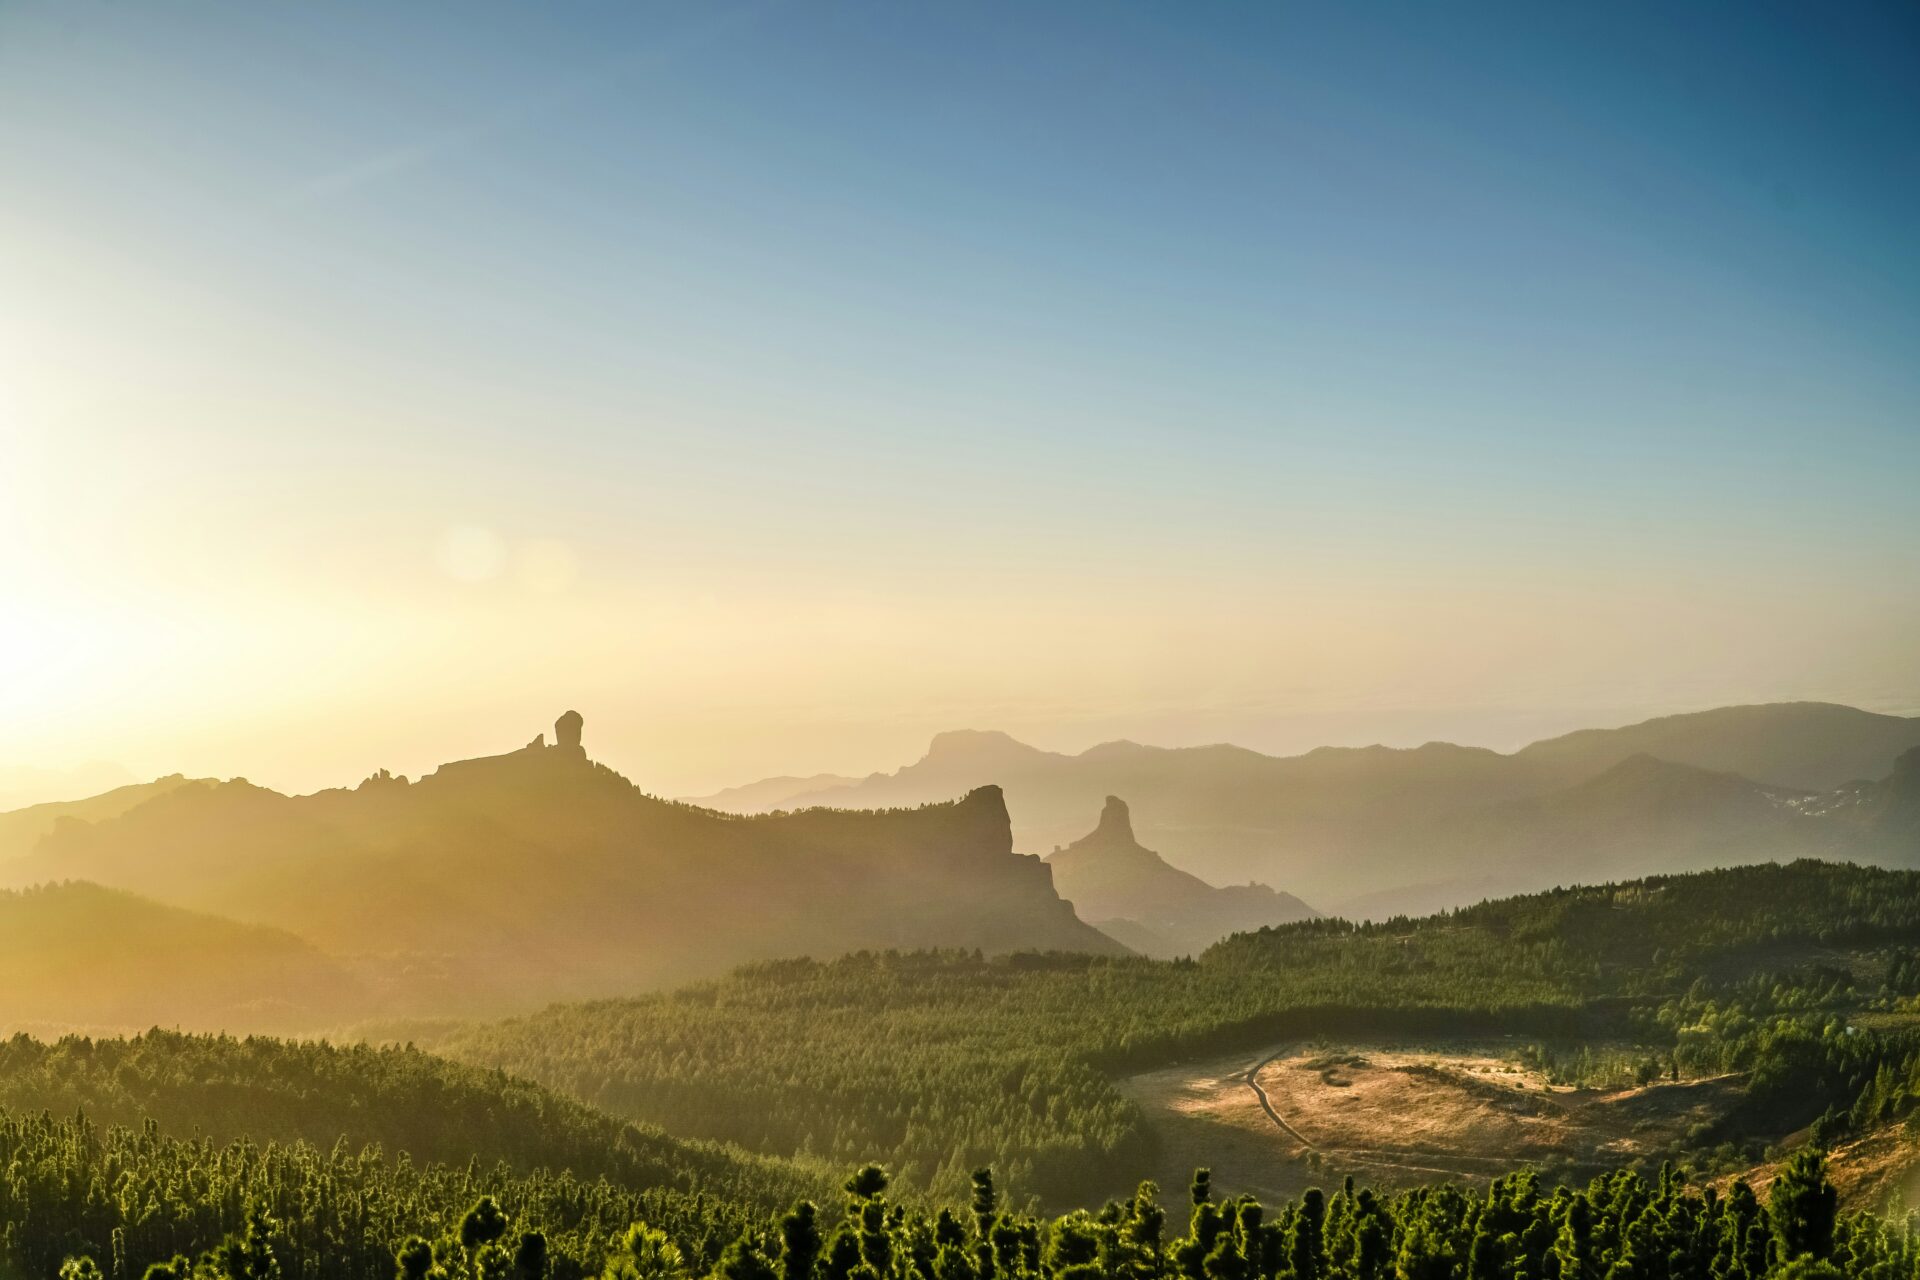
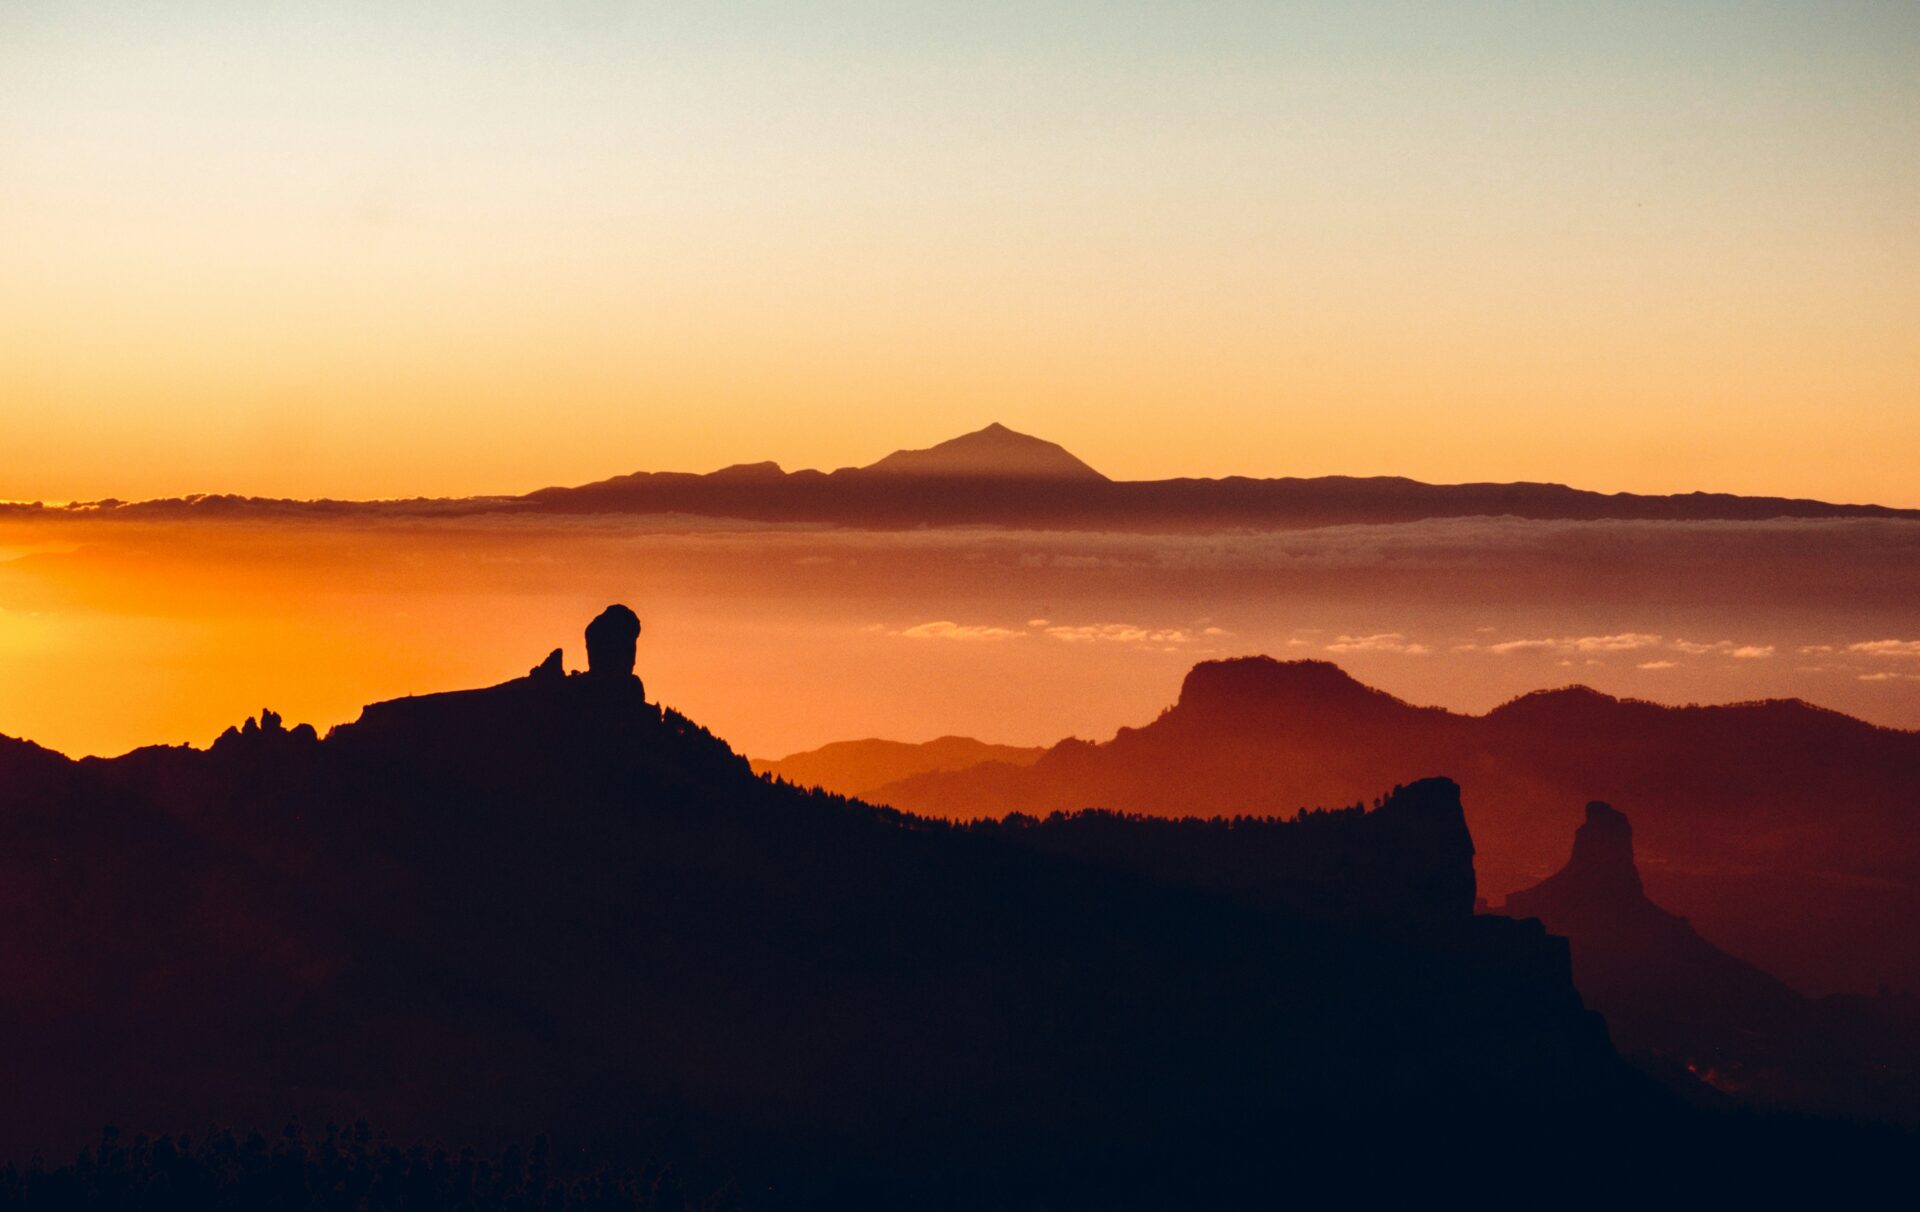
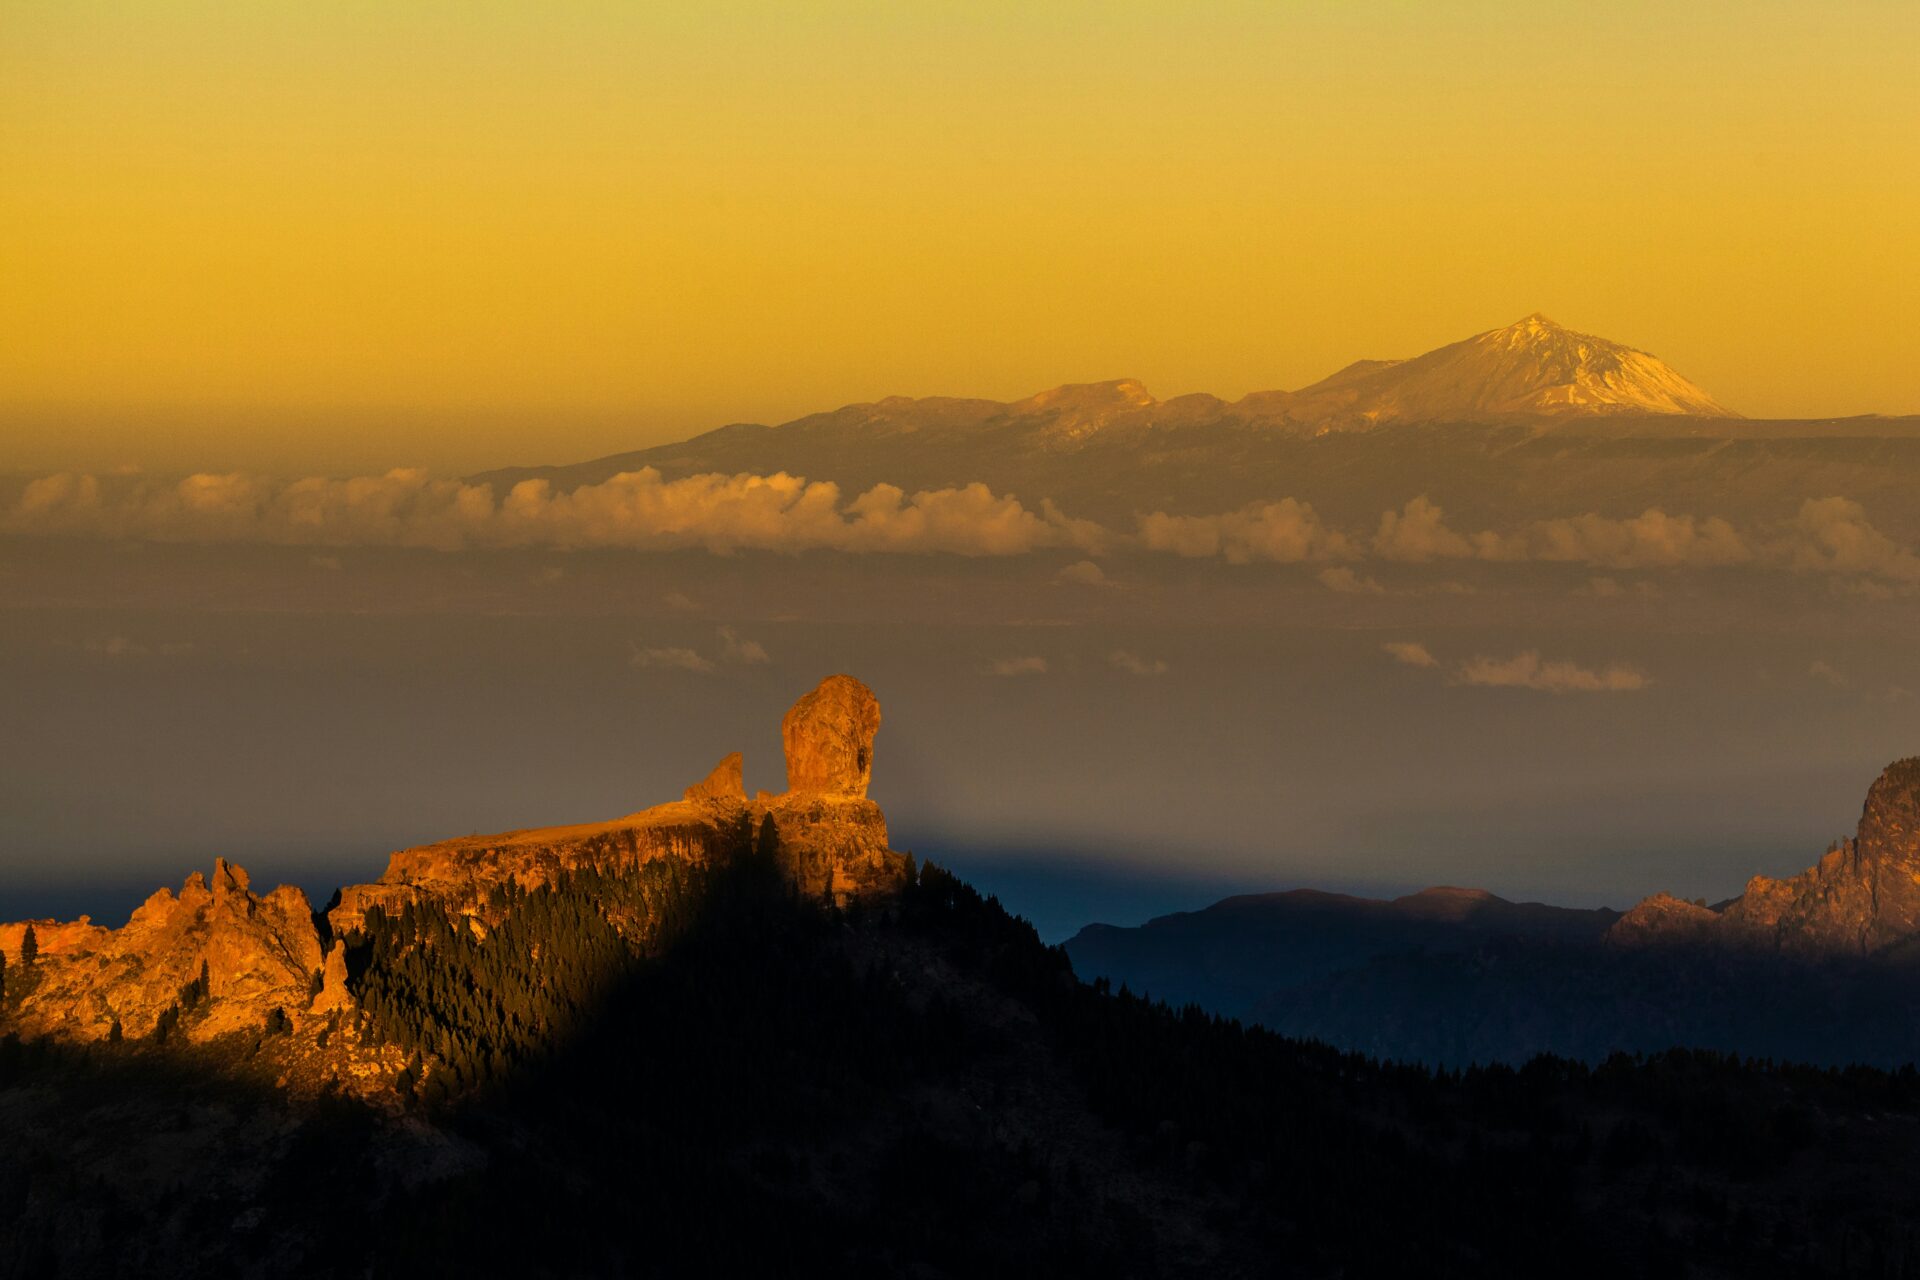
Iconic Landmarks: Roque Nublo, Morro de la Agujereada, and Tenerife
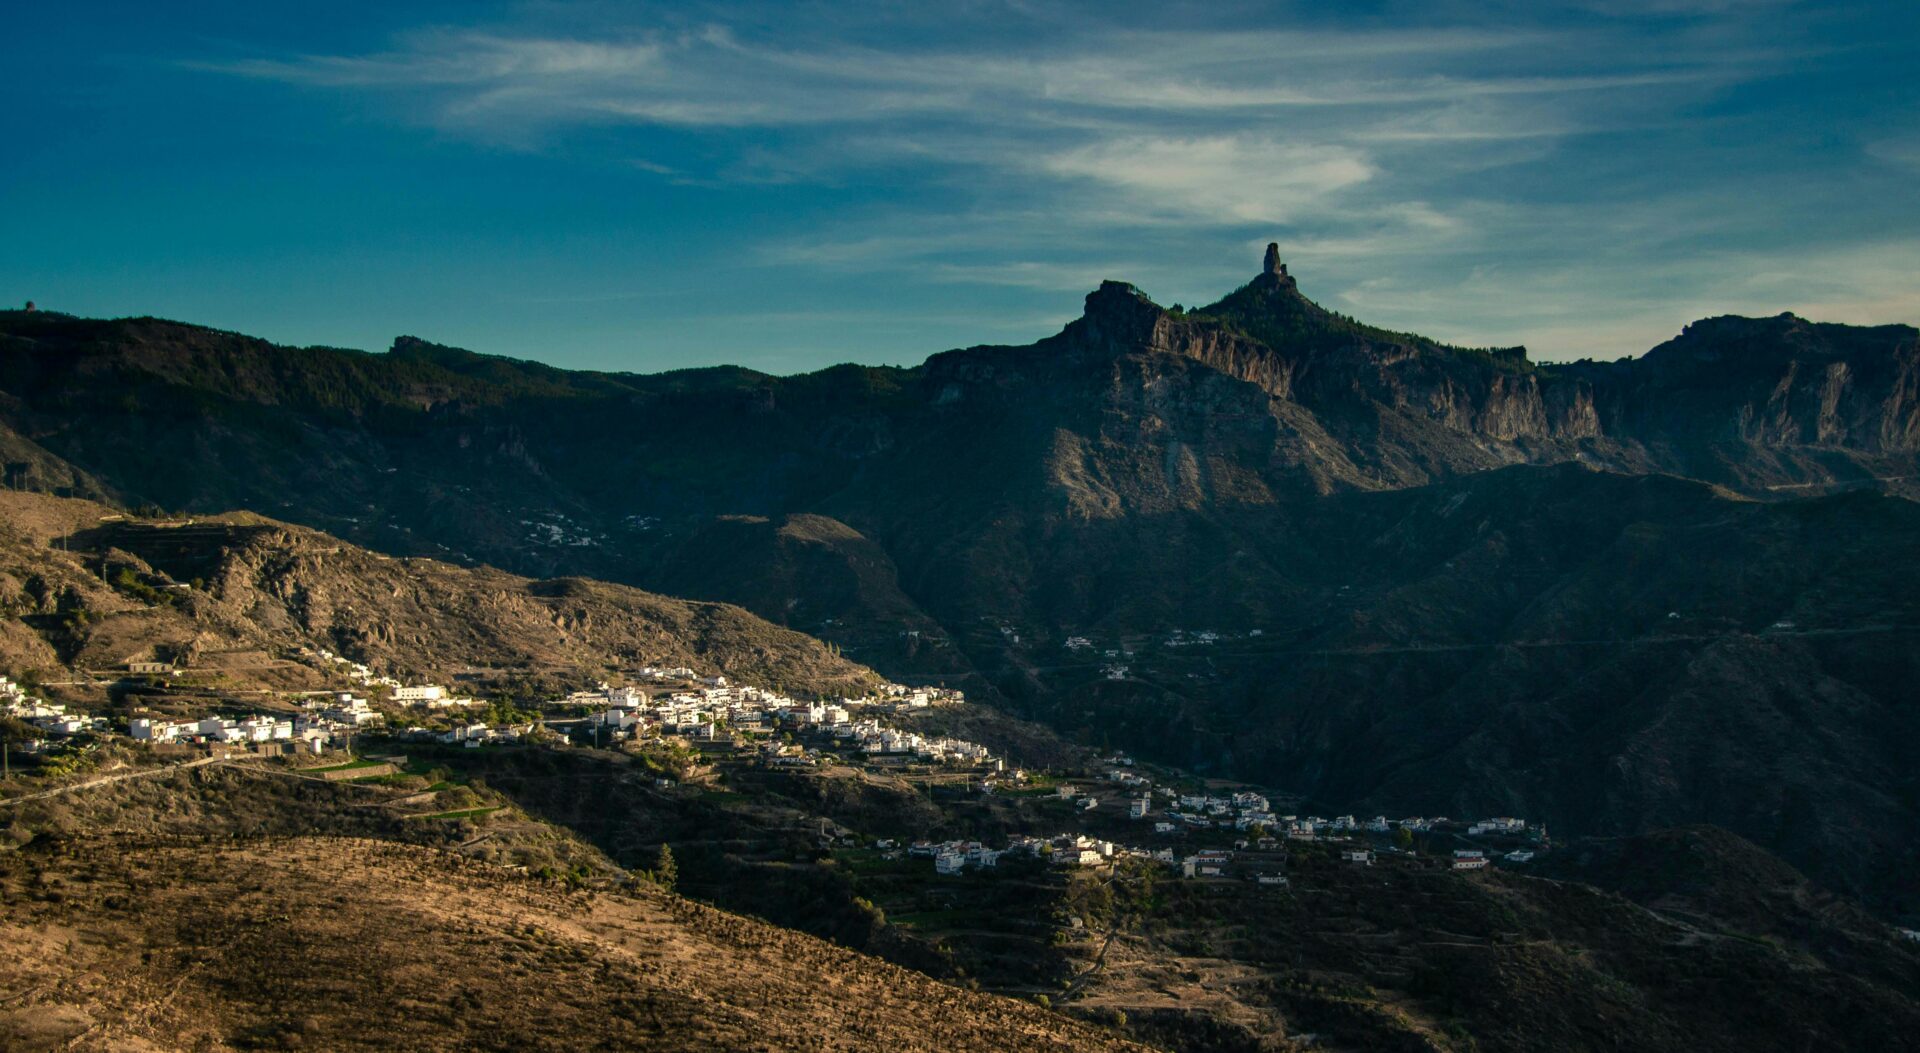
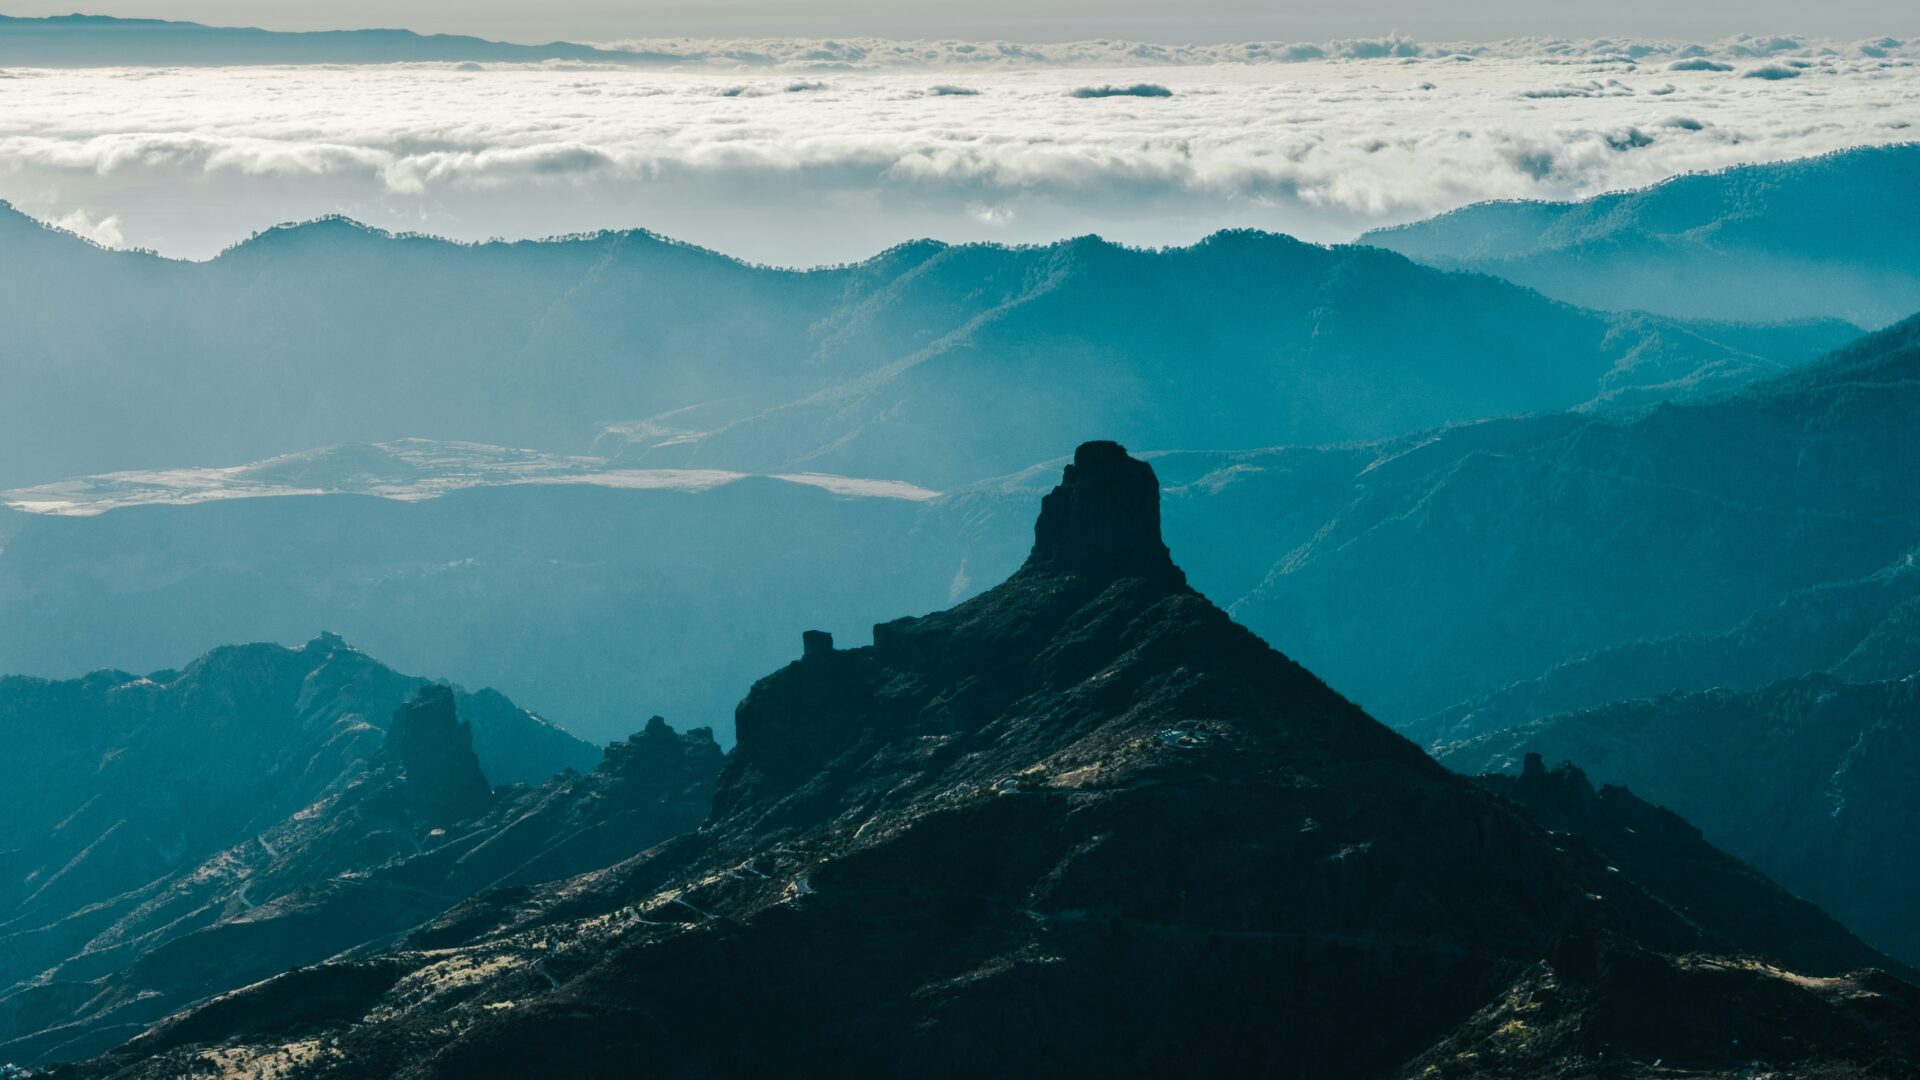
Roque Nublo is the showstopper here. That massive rock juts out of the landscape just a few kilometers away—it’s impossible to miss.
Morro de la Agujereada actually claims the title of highest point on the island at 1,956 meters. It’s just a stone’s throw from the main viewpoint, a little higher than the main deck.
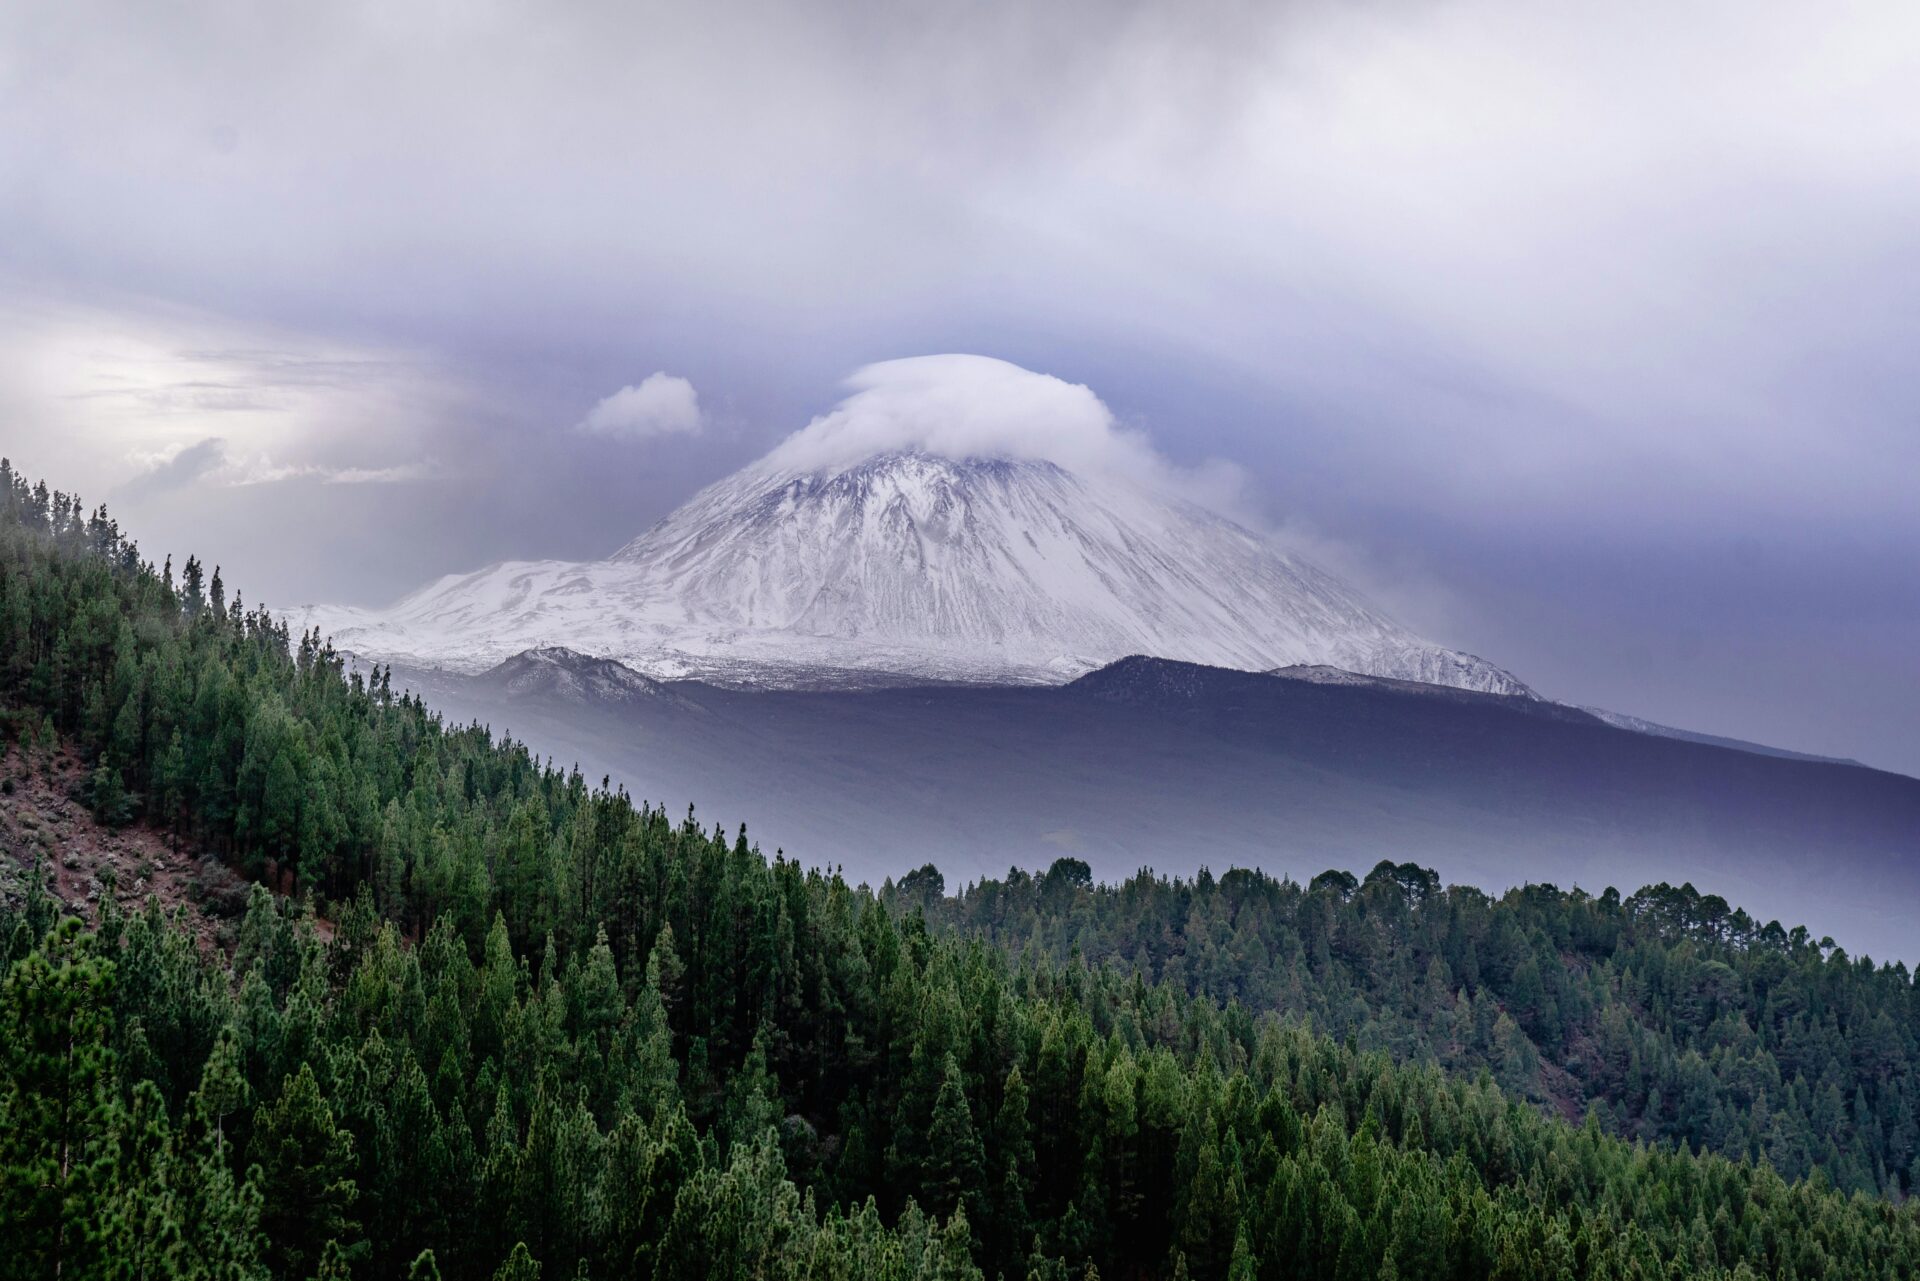
If the weather’s just right, you might catch a glimpse of Mount Teide over on Tenerife. It’s a bit of a unicorn—only visible on crystal-clear mornings.
Distances from the viewpoint:
- Roque Nublo: 3 km southwest
- Morro de la Agujereada: 500 meters northeast
- Mount Teide (Tenerife): 120 km northeast
If you’re hoping to spot Tenerife, aim for early morning. I’ve had the best luck in winter, when the air’s extra clear.
Photographic Tips and Weather Considerations
Early mornings are magic for photos at Pico de las Nieves. The light after sunrise bathes everything in gold and really makes the island pop.
Don’t let the sunny coast fool you—bring a jacket. Up here, it can get chilly, especially in winter. I’ve seen temps dip below 10°C.
Handy camera gear:
- Wide-angle lens for those sweeping shots
- Polarizing filter to cut through haze
- Tripod for sharp long exposures
- Spare batteries (the cold drains them fast)
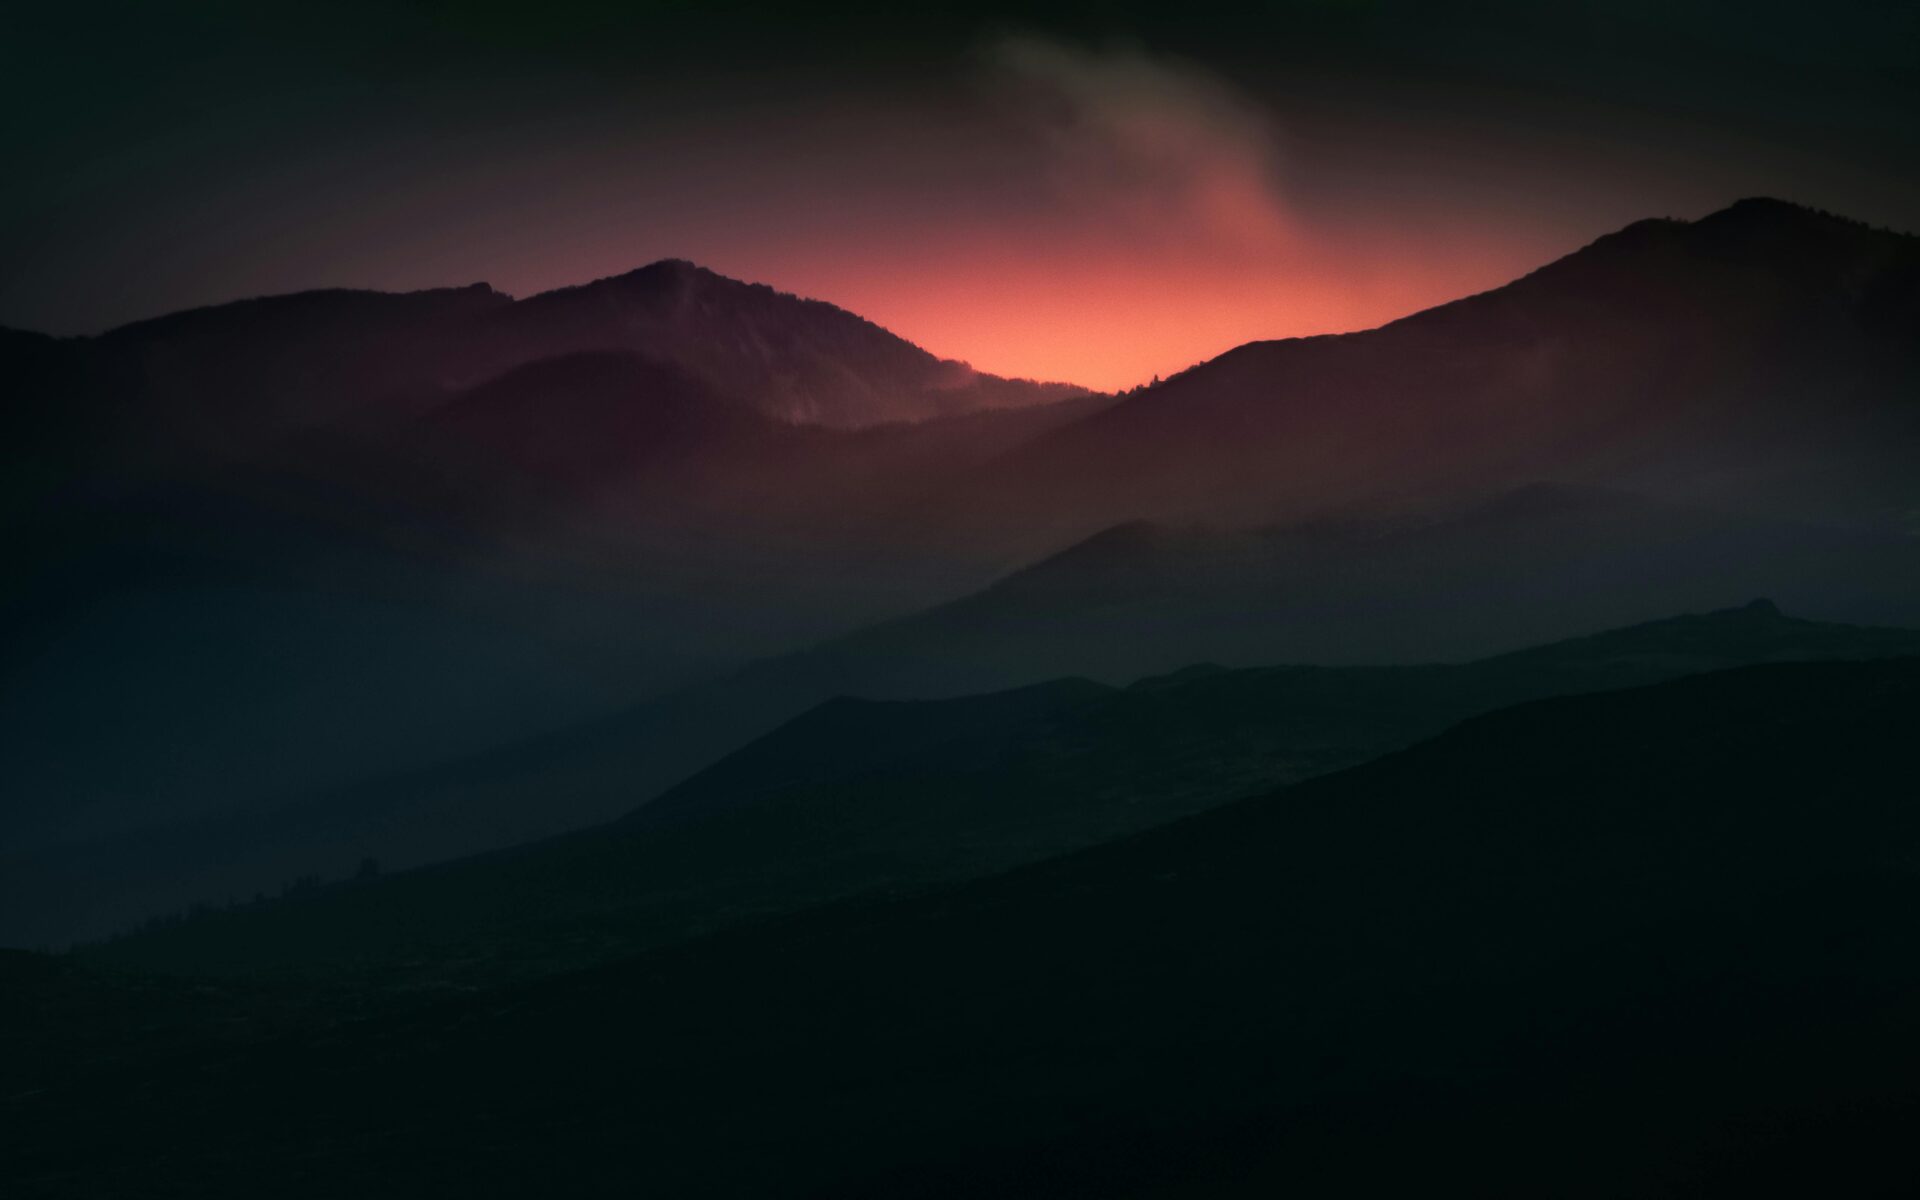
Weather can change on a dime. I always check the forecast before heading up, but even then, clouds can roll in out of nowhere.
Best visibility comes when high pressure keeps the skies clear. Cloudy or rainy days? You probably won’t see a thing.

Altitude and Geographic Features
At almost 2,000 meters, Pico de las Nieves sits in the island’s alpine zone. The thinner air and lower pressure make the views feel extra sharp.
You’re right in the heart of Gran Canaria’s volcanic caldera system. Ancient crater walls form dramatic ridges that stretch out from this spot.
What the altitude means:
- Cleaner air, less distortion
- Cooler temps all year
- Some folks might feel the altitude a bit
- Longer sightlines when it’s clear
The cumbre region is a patchwork of volcanic peaks and ridges that have been around for millions of years. It’s a natural platform for soaking up the island’s geological variety.
Pine forests blanket the slopes below 1,800 meters. Above that, the landscape gets sparse and rugged. You can really see the shift in vegetation from up top.
Hiking Trails to the Summit
If you’d rather hike than drive, several trails lead up to Pico de las Nieves. The Cruz Grande route is the crowd favorite because it’s so scenic. Llanos de la Pez offers circular hikes, and the Ayacata trail brings a different vibe.
Popular Routes: Cruz Grande to Pico de las Nieves
The Cruz Grande trailhead kicks off the most scenic hike to the summit. This 15.2 km out-and-back trek follows the old Ruta de la Plata (Silver Route) for much of the way.
Trail basics:
- Distance: 15.2 km round trip
- Elevation Gain: 964 meters
- Time: About 6 hours
- Start: Cruz Grande viewpoint on GC-60
You start on cobbled paths through a landscape dotted with succulents. The yellow arrows and signs make it easy to follow.
Once you hit Llanos de Pargana, the hike continues northeast into pine forests. At Degollada Los Hornos, you break off onto trail S-51.
The last 2.9 km wind through tall Canary pines. The ground is often covered in white sage, which gives the forest a silvery glow.

Llanos de la Pez and Alternative Circular Hikes
Llanos de la Pez is another solid starting point. This recreation area sits along the GC-600, between Mirador Presa de Los Hornos and Cruz de los Llanos.
From here, you can take the “Circular Llanos de la Pez hiking trail” up to the summit. It links up with the main trail system near Degollada Los Hornos.
Circular trails here let you loop back instead of retracing your steps. The views change constantly as you circle the central mountains and forests.
Parking’s easier at Llanos de la Pez than at Cruz Grande. There are also facilities, so it’s a good base for longer hikes.
Ayacata to Pico de las Nieves Trek
The route from Ayacata sees fewer hikers, but it’s a great alternative if you want a quieter path. Several connecting trails start here and lead up toward Pico de las Nieves.
Starting from Ayacata puts you at a different elevation and gives you a fresh angle on the mountain. The trail passes through changing vegetation and opens up to new views of the southern slopes.
Local signs help you find your way, but it’s worth checking trail conditions first. Some sections get less maintenance than the main routes.
Trail Difficulty and Safety Advice
Hiking to Pico de las Nieves is moderate to moderately tough. That 964-meter elevation gain can sneak up on you, especially going back down.
Safety tips:
- Cobbled sections can get slippery
- Weather changes fast at altitude
- Parking at Cruz Grande is limited
- No technical climbing, but endurance matters
The trails are well-marked, and I didn’t run into any tricky bits, but the steady climb will test your stamina.
Some parts of the old Ruta de la Plata still have original cobblestones—watch your step, especially on the descent. Sturdy boots are your friend.
There’s a cool detour to the Ventana del Nublo viewpoint—a natural arch that perfectly frames Roque Nublo. It’s just a 10-minute side trip and totally worth it.
Weather can turn on you quickly in the mountains. I always pack a rain jacket and extra layers, even if the sky looks clear.
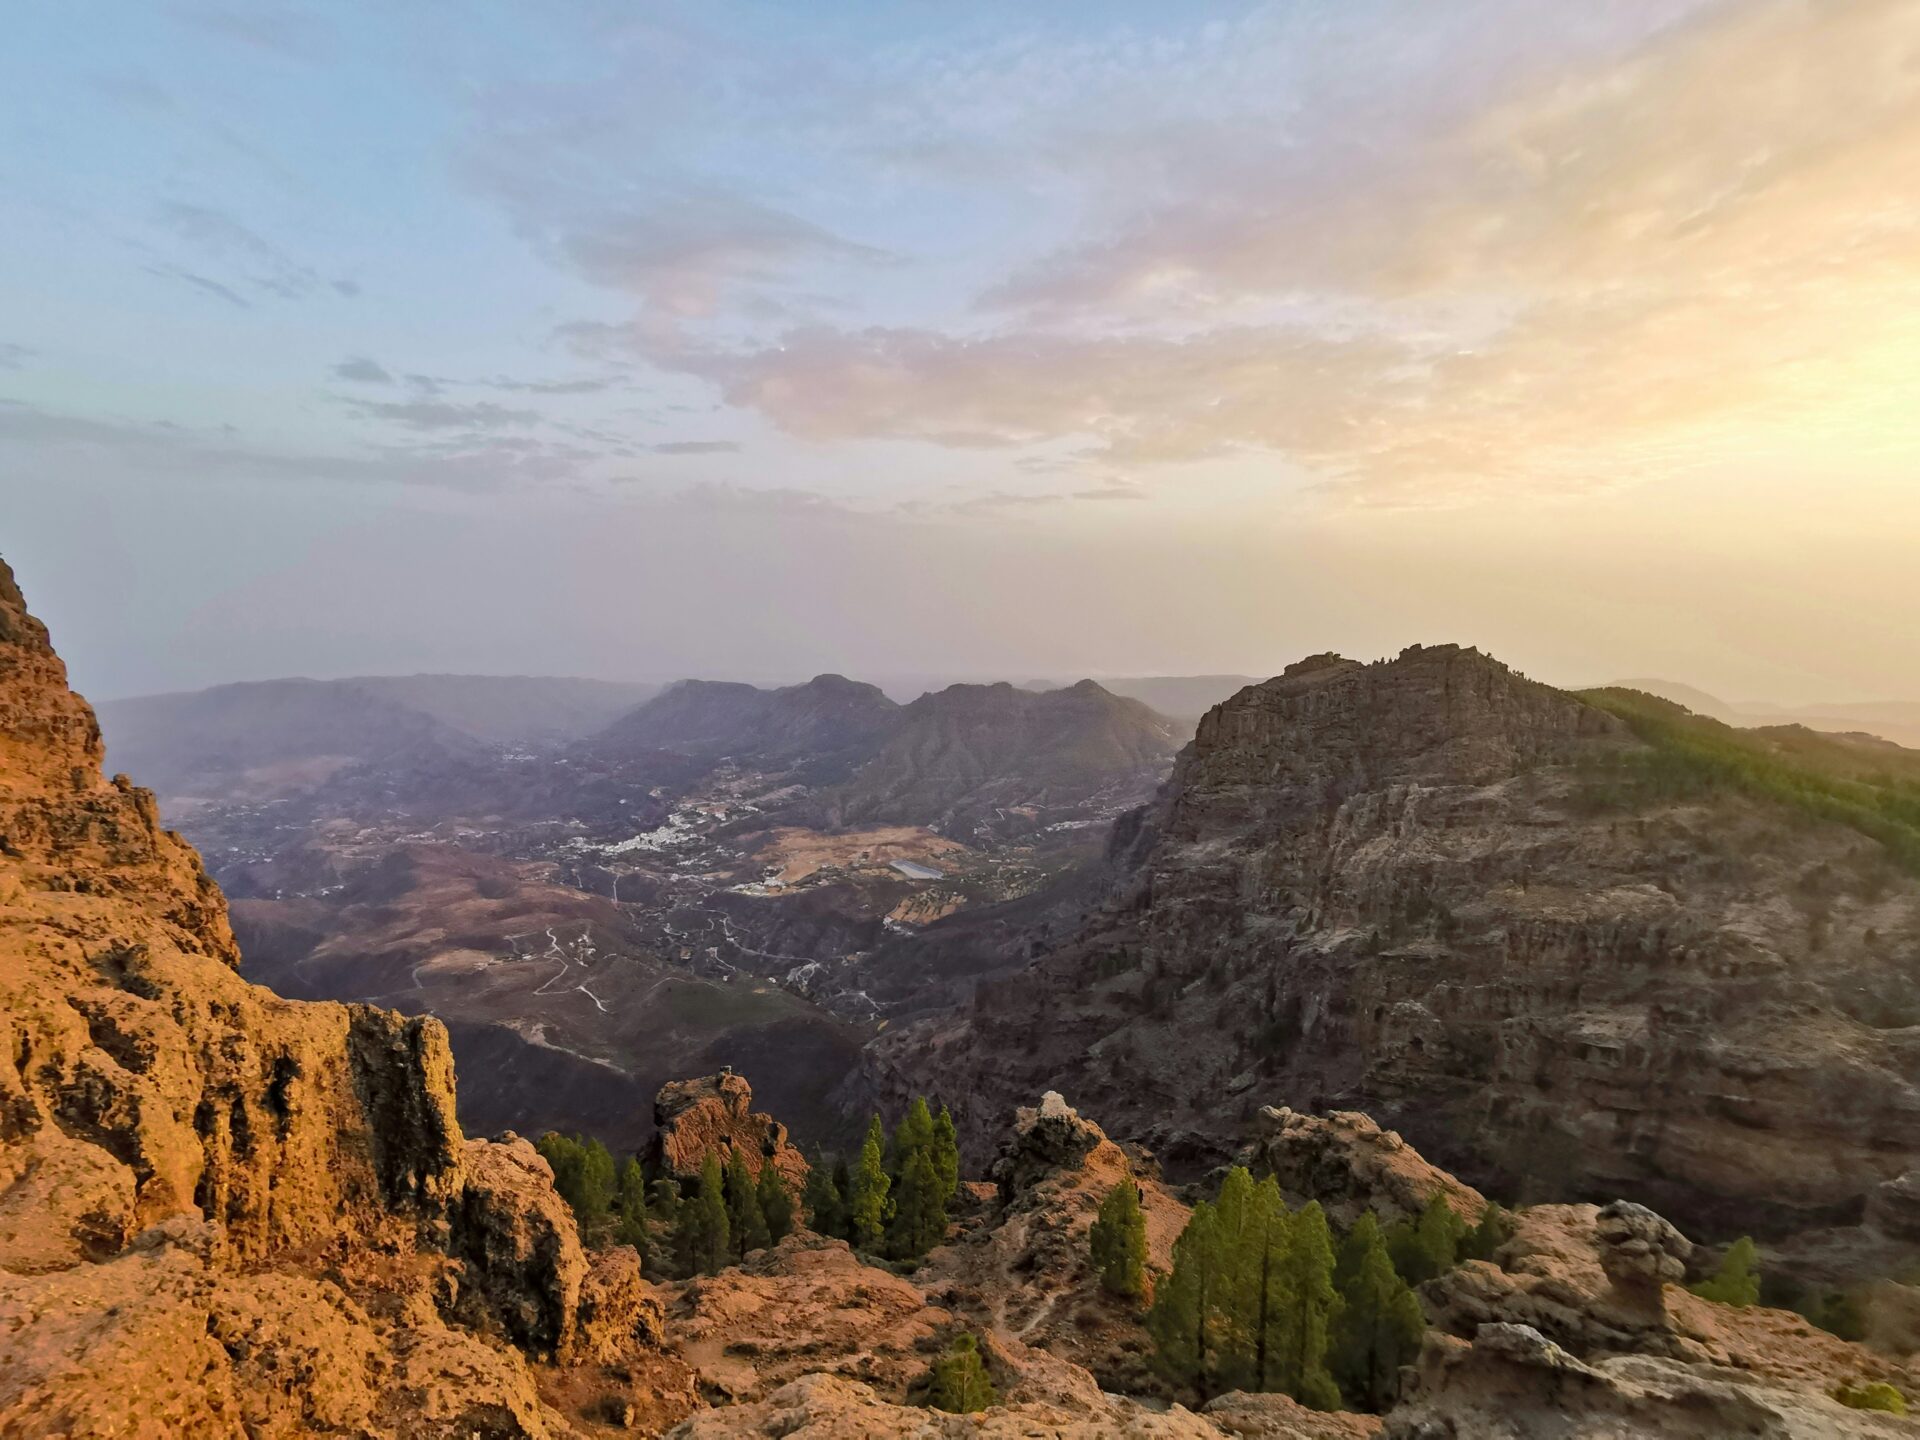
Exploring the Surrounding Mountains and Villages
Around Pico de las Nieves, the landscape really turns dramatic. The area’s dotted with traditional villages and wild mountain peaks.
Exploring Cumbre, Pico de los Pozos, and Landmark Ridges
The Cumbre ridge system stretches from Pico de las Nieves toward the island’s center. It’s basically the backbone of Gran Canaria’s mountains—a volcanic spine with some serious attitude.
Pico de los Pozos sits northeast of the main summit at 1,935 meters. I reached it by following a short hiking trail branching off the main road.
From the ridge, you get killer views of both the north coast and the southern valleys. The contrast between the lush north and drier south is striking.
There are a bunch of unnamed peaks along the Cumbre, too. They’re usually quieter than the main viewpoint and only require a short walk from the car.
The geology here is pure volcanic drama. Basalt rock formations and ancient lava flows tell the story of the island’s fiery past.
Nearby Villages: Tejeda, San Mateo, and Local Culture
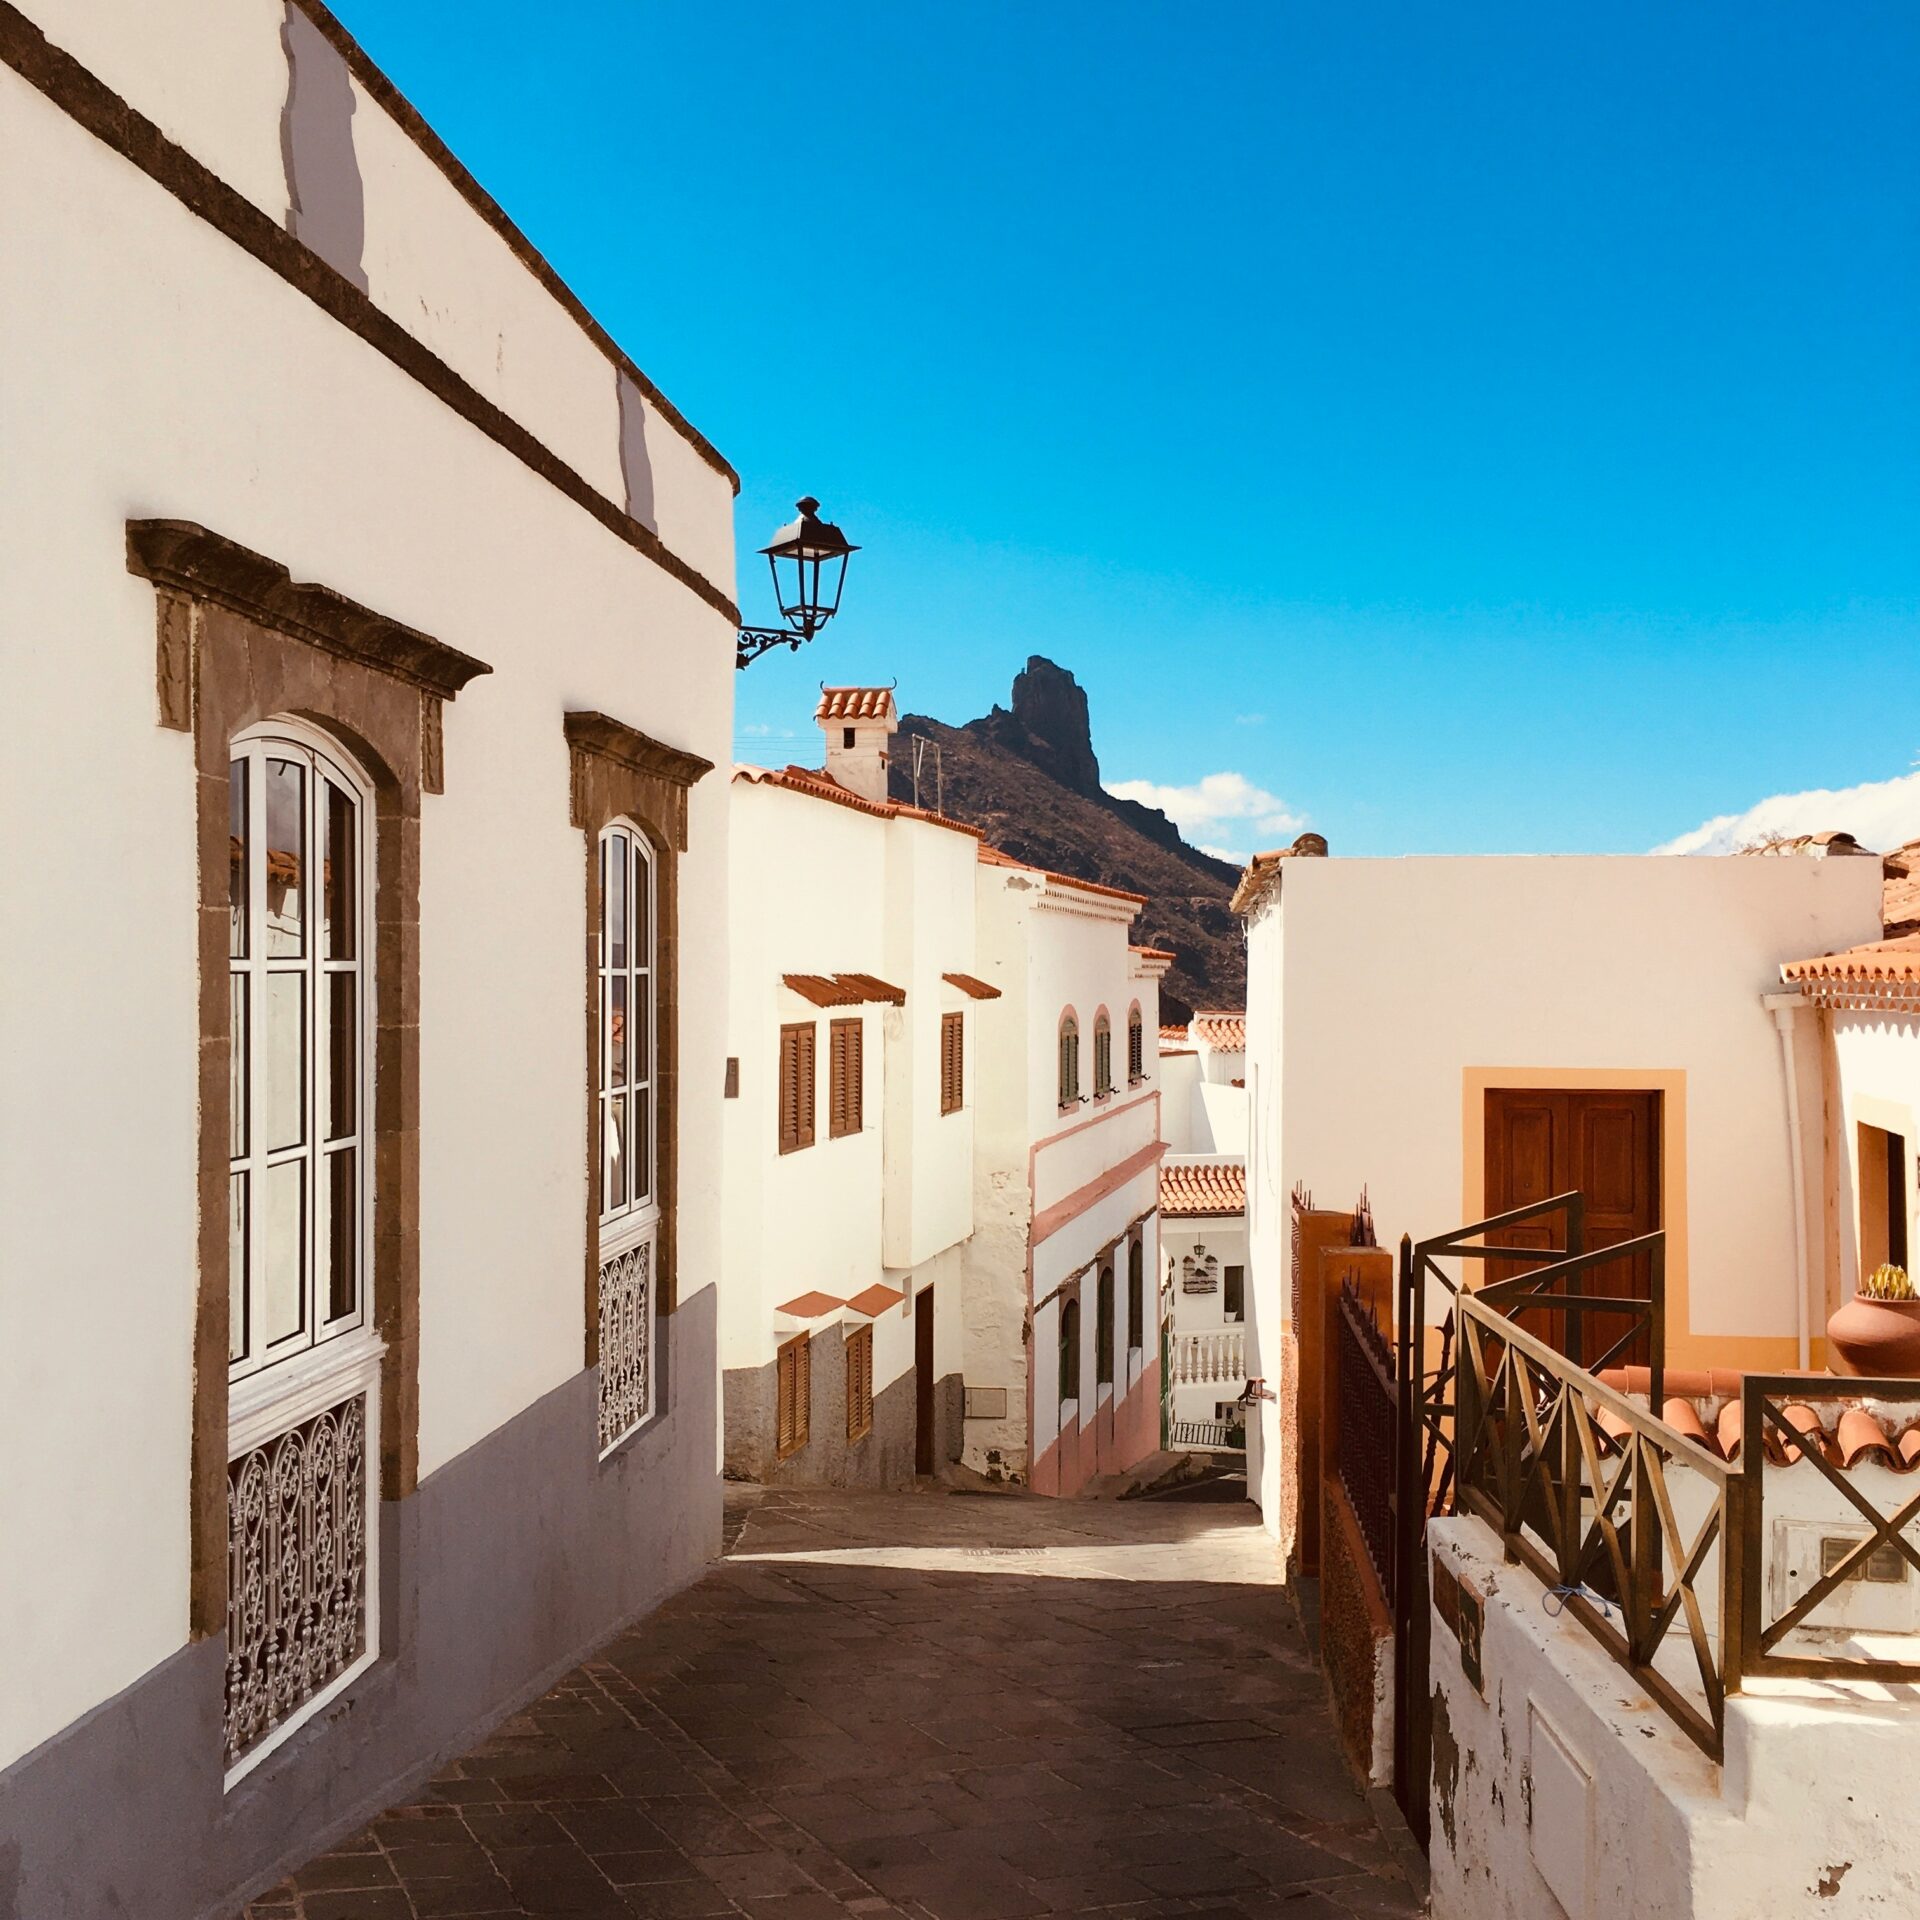
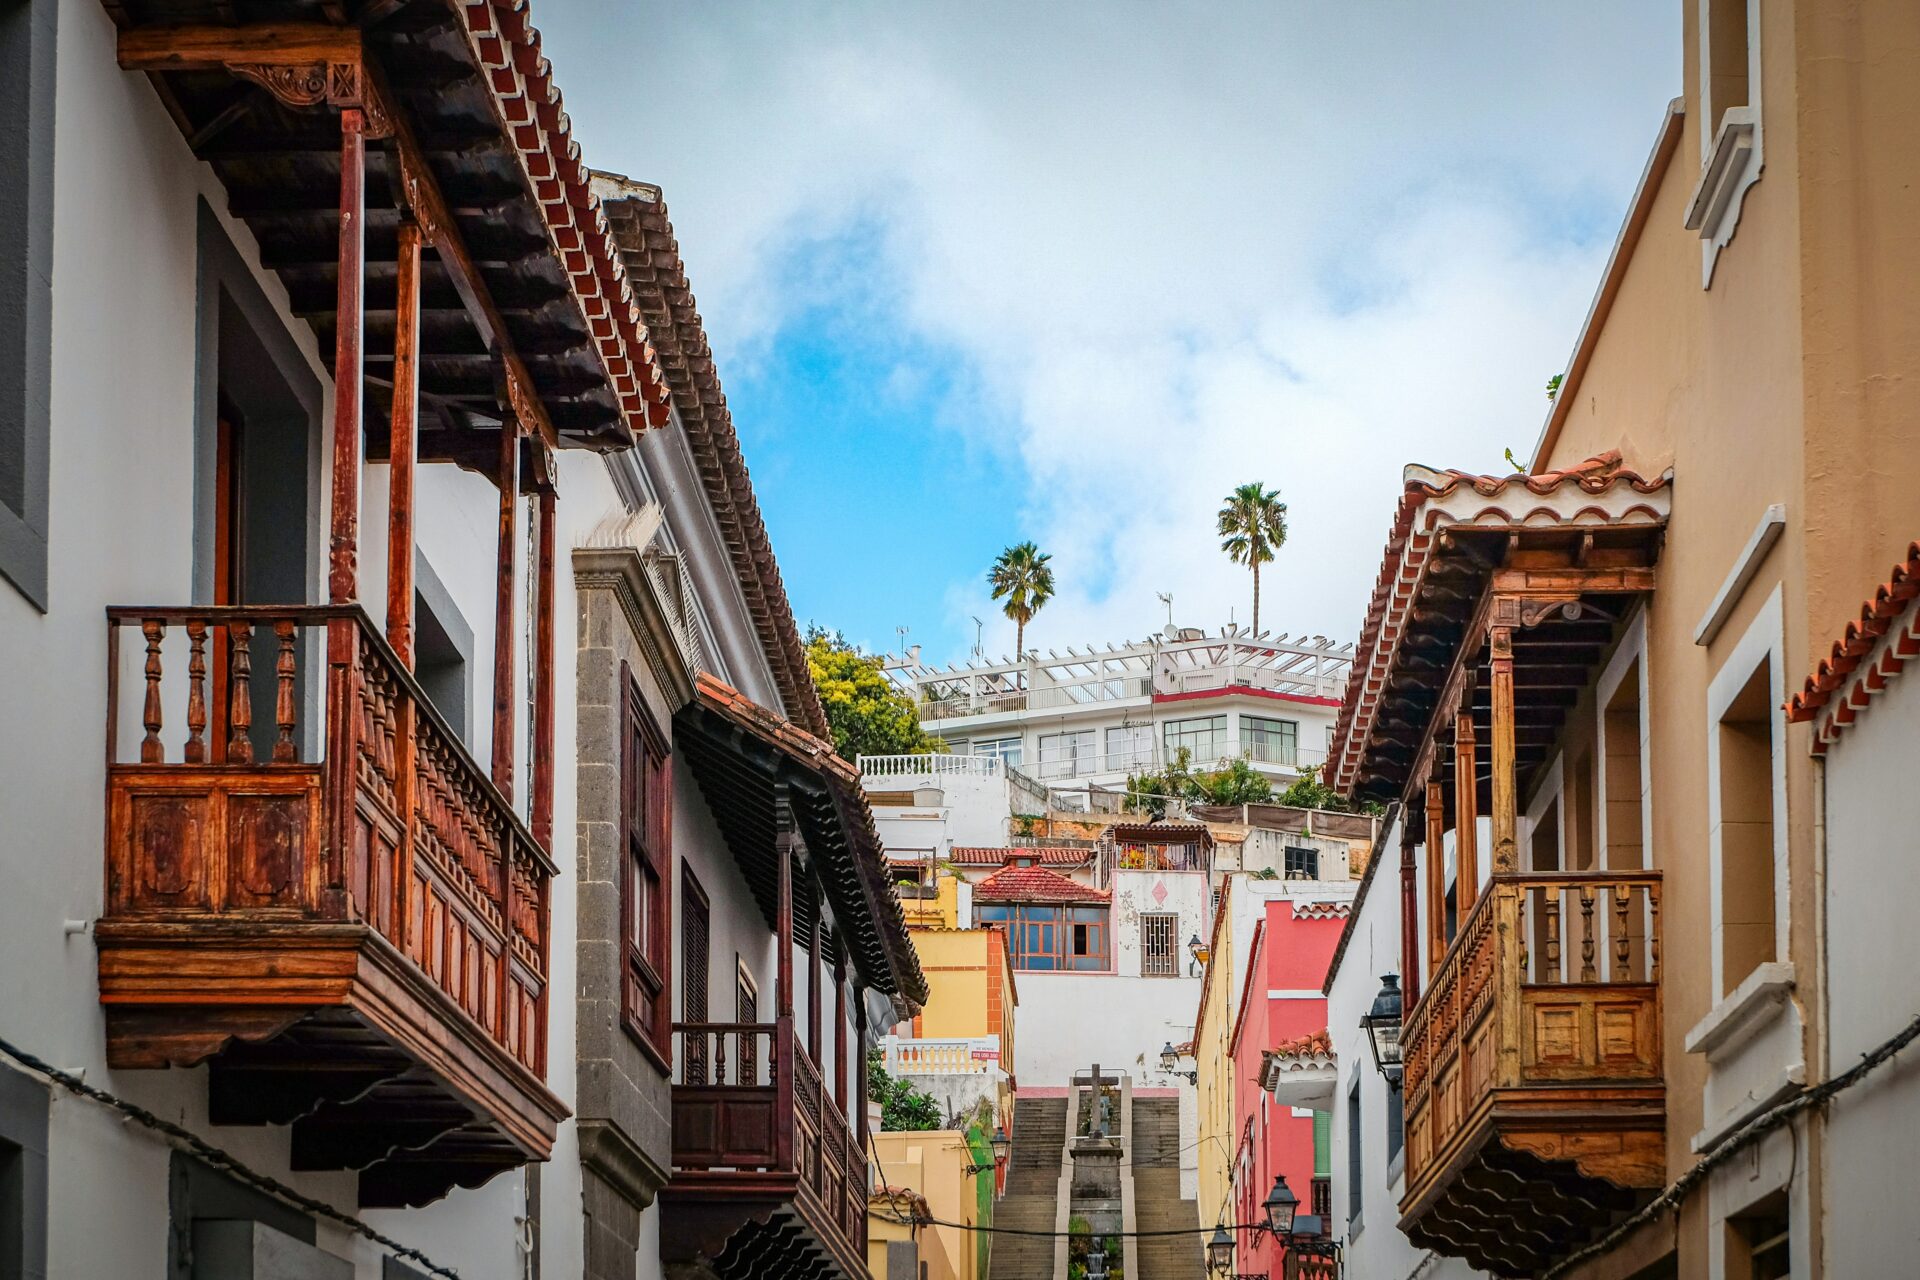
Tejeda really stands out as the most picturesque village around here. You’ll find it perched at 1,050 meters on the eastern edge of the Tejeda caldera.
When I wandered through its narrow lanes, those white-washed buildings and classic Canarian rooftops felt like something out of a postcard.
The village center has a handful of local spots that are worth checking out:
- Dulcería Nublo – This bakery’s got all the traditional sweets you’d hope for.
- Heladería LaLexe – If you’re craving something cold, their artisan ice cream hits the spot.
- Texeda – For a fancier experience, this restaurant and brewery delivers.
San Mateo sits further north, and it feels much more down-to-earth. I barely saw any tourists, which meant I actually got to chat with locals and soak up the real atmosphere.
Both villages make solid home bases for exploring the mountains. You can find groceries, restaurants, and places to stay without any hassle.
The culture here? It’s tied closely to mountain farming roots. I watched people tending terraced fields and using old-school building methods that have survived for generations.
Driving and Hiking Through the GC-60 and GC-600 Corridors
The GC-60 highway links San Bartolomé de Tirajana with Ayacata, running right below Pico de las Nieves. I took this road to reach trailheads and some jaw-dropping viewpoints.
You get dramatic mountain views along the way. There are plenty of spots to pull over and snap photos.
Cruz Grande, one of the main viewpoints, is the best place to start a hike up to Pico de las Nieves.
The GC-600 winds through mountain valleys and leads to the Llanos de la Pez recreation area. I liked this route for its quieter hiking trails and less traffic.
Both roads have their quirks:
- Narrow sections where you’ll need to drive carefully
- Steep grades and sharp hairpin bends
- Parking can be tricky at the popular viewpoints
- Weather changes fast, so visibility isn’t always great
If you can, drive these routes early in the morning or later in the afternoon. The light gets magical, and you’ll dodge most of the crowds.
During peak tourist seasons, these roads can get surprisingly busy.

Experiences and Tips for Visiting Pico de las Nieves
Getting the most out of your visit comes down to timing and being prepared. Try to go on a clear day, and definitely bring warm clothes—up here at 1,949 meters, it gets chilly.
Best Times and Season for a Visit
If you want those sweeping views at Pico de las Nieves, early morning is your best bet. I’d say aim to arrive before 9 AM, when the clouds haven’t rolled in yet and you can see across Gran Canaria.
Prime viewing times:
- Sunrise (7:00-8:30 AM): The panoramas are unreal at this hour.
- Late afternoon (4:00-6:00 PM): Everything glows during golden hour.
- Winter months (November-March): You’ll usually get clearer skies.
In summer, clouds start creeping in from the ocean by mid-morning. Sometimes the peak rises right above the cloud layer, so you get this wild view of a sea of clouds below.
Weather can flip on you in minutes. I’ve watched blue skies turn to thick fog before I even finished my coffee. Always check the forecast before heading up from Llanos de la Pez.
Winter can get cold enough for frost, but spring and fall are just about perfect—mild temperatures and steady weather.
Dining Options and Rest Areas
You won’t find any restaurants or cafes right at Pico de las Nieves. If you want a real meal, you’ll need to drive back down toward Llanos de la Pez or one of the nearby villages.
I always bring my own snacks and plenty of water. The parking area has a few stone walls and benches, but there aren’t any shops or vendors around.
Nearby dining locations:
- Tejeda village (15 minutes away): Good mix of local restaurants and cafes.
- Cruz de Tejeda (10 minutes): There’s a mountain lodge with hearty, traditional food.
- Parador Cruz de Tejeda: If you’re after something upscale, this spot serves island views with your meal.
The wind can get pretty wild up there, so don’t let your picnic blow away.
Bring more water than you think you’ll need—the dry air sneaks up on you. I’d suggest at least a liter per person if you’re planning to hang around for a while.
What to Bring and Preparation Essentials
Mountain weather at Pico de las Nieves feels like a whole different world compared to the coast of Gran Canaria. Temperatures usually drop by about 12°C once you leave sea level behind.
Essential items to pack:
- Warm jacket or fleece (trust me, even in summer you’ll want it)
- Windproof layer for those relentless mountain gusts
- Comfortable walking shoes with solid grip
- Sunglasses and sunscreen—UV rays hit harder up here
- Camera with extra battery (the cold seems to eat battery life)
After a couple visits, I realized layers are the only way to go. Early mornings can feel downright chilly, so I usually start out bundled up. By afternoon, though, the sun sometimes demands lighter clothes.
I always make sure to fuel up the car before heading up. The drive from Llanos de la Pez has some steep stretches, and my fuel gauge drops faster than usual.
Before I tackle those winding mountain roads, I check the car’s condition. The brakes really get a workout on the way back down to the coast.