Orlando’s theme parks have a reputation that’s hard to beat, and every trip here tempts me to grab my camera and start hunting for stories. I wander through Disney World or Universal, and it’s like stepping into a kaleidoscope—colors, laughter, and scenes that don’t feel real until I snap a photo. Figuring out how to take great theme park photos means I get to relive those wild, happy moments just as they happened.
I’ve realized that camera settings, timing, and a good eye for angles can turn a so-so picture into something I want to frame. Photographing rides, characters, or those tiny park details? It’s a blast, and honestly, it’s rewarding every time.
Whether you’re shooting on your phone or lugging around a DSLR, knowing a few photography basics makes your theme park memories pop. I’m excited to share some tips that have worked for me, so maybe you’ll catch the real magic of Orlando in your own shots.

Mastering Theme Park Photography in Orlando
Great theme park photos in Orlando don’t just happen by accident. Skills, the right gear, and picking the best spots all matter, whether I’m aiming at Cinderella Castle or trying to freeze a roller coaster mid-scream.
Foundational Skills for Beginners
When I first dived into theme park photography, I had to nail the basics. Exposure comes first—how much light hits the sensor. I mess with shutter speed, aperture, and ISO until I get the brightness just right.
Focusing takes practice too. Rides and characters move fast, so I usually trust autofocus, but for calm scenes like buildings, sometimes I’ll switch to manual focus. Playing with depth of field by changing aperture lets me blur out crowds or keep everything sharp.
I always pay attention to composition. The rule of thirds keeps things interesting, and I try to frame my subjects without too much clutter. Practice helps—so I shoot a lot and see what sticks.

Understanding Cameras and Essential Gear
I don’t believe you need the fanciest camera to get awesome theme park shots. Manual settings help a ton, whether I’m using a DSLR, mirrorless, or even a solid smartphone. A zoom lens saves me from swapping lenses every five minutes.
Here’s what I usually bring:
| Equipment | Why I Use It |
|---|---|
| Camera body | Main tool for capturing moments |
| Versatile lens | Covers wide and zoom shots |
| Tripod | Keeps photos sharp at night |
| Spare batteries | Avoids running out of power |
| Memory cards | Extra space for lots of photos |
A lightweight tripod or mini tripod comes in handy at night. Lens wipes are a must—Orlando’s humidity can fog things up fast. I keep my kit light so I’m not distracted by gear.
Choosing Locations for Iconic Orlando Shots
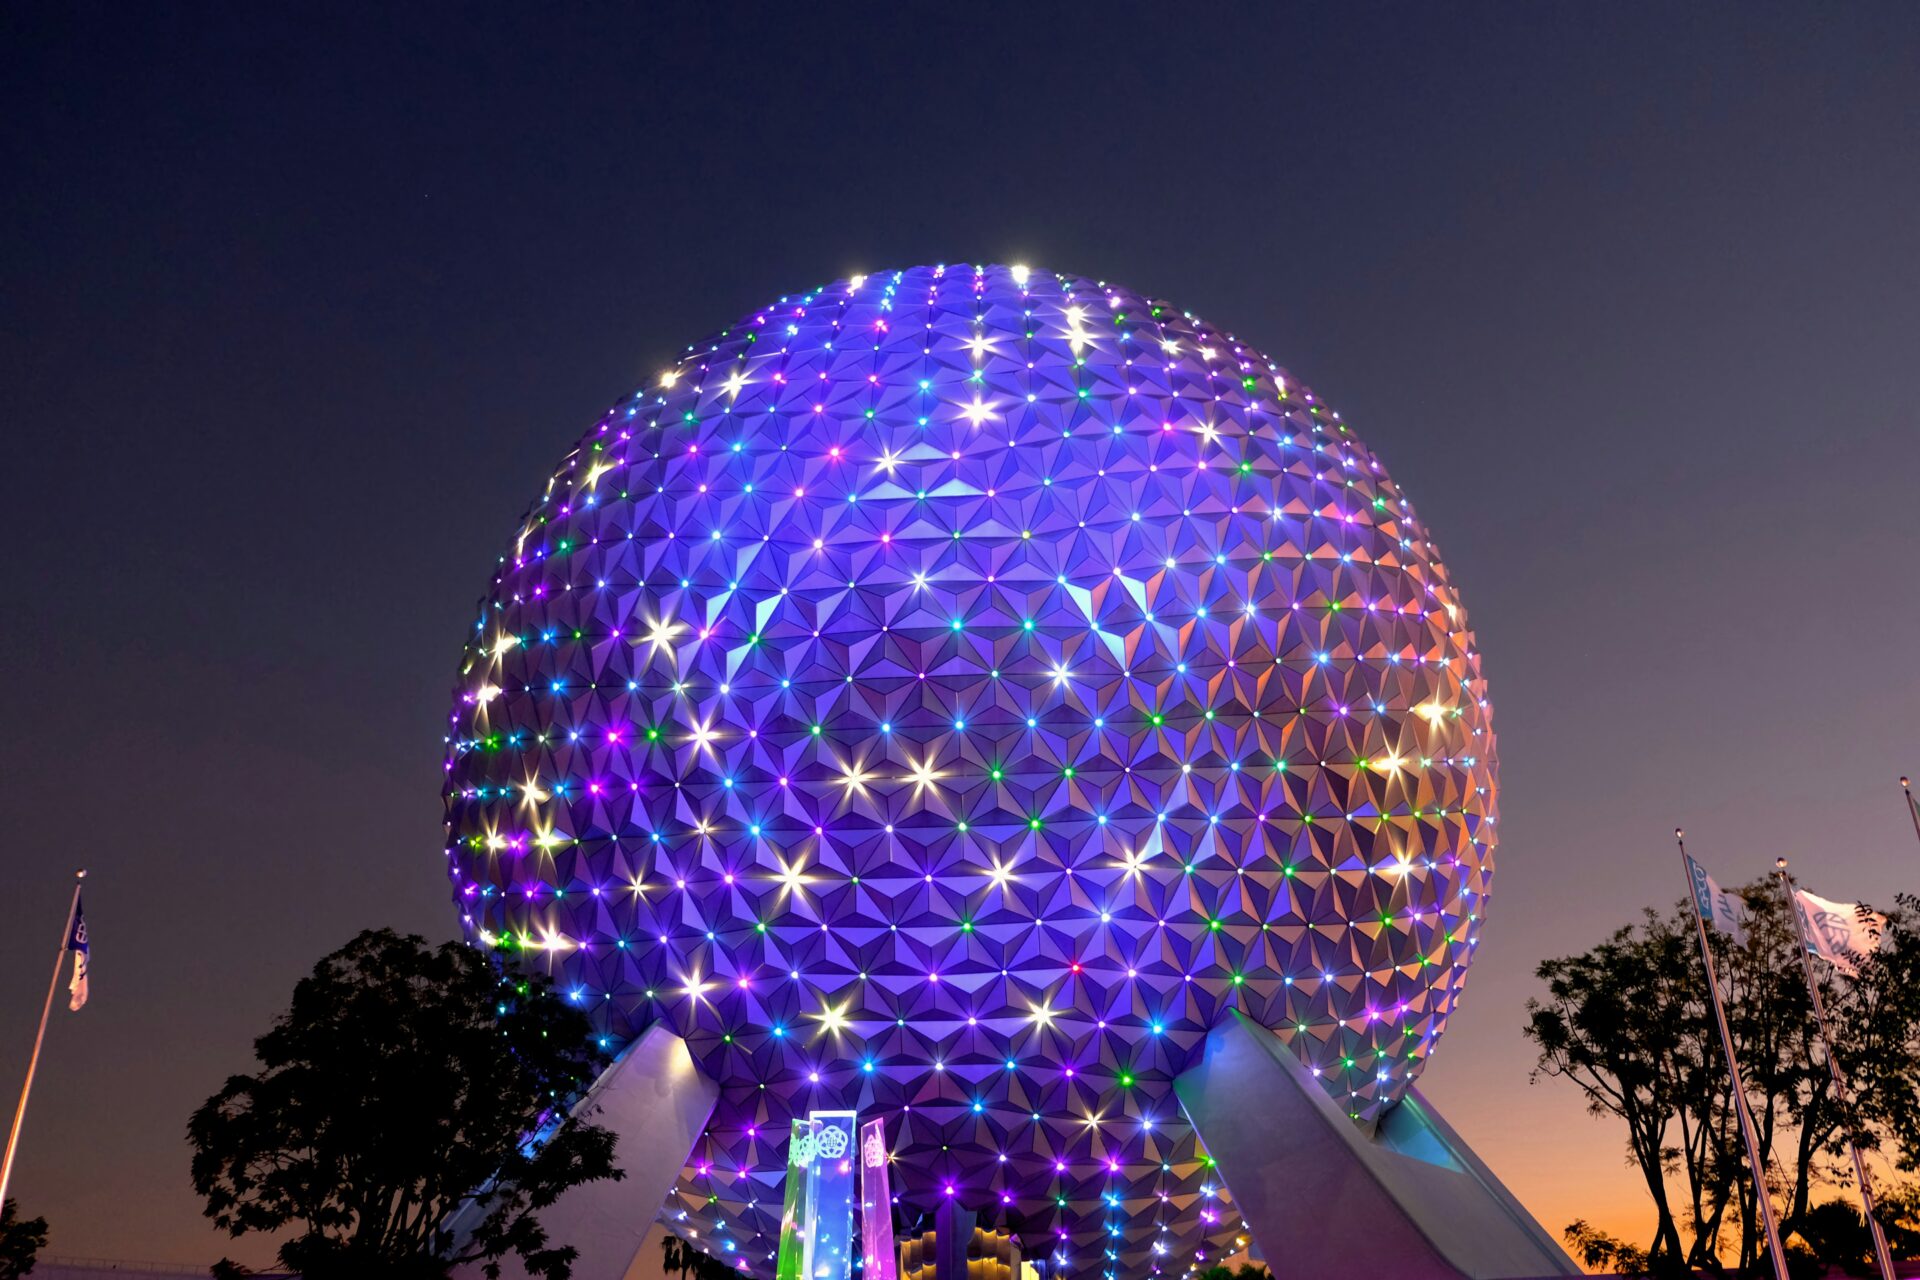
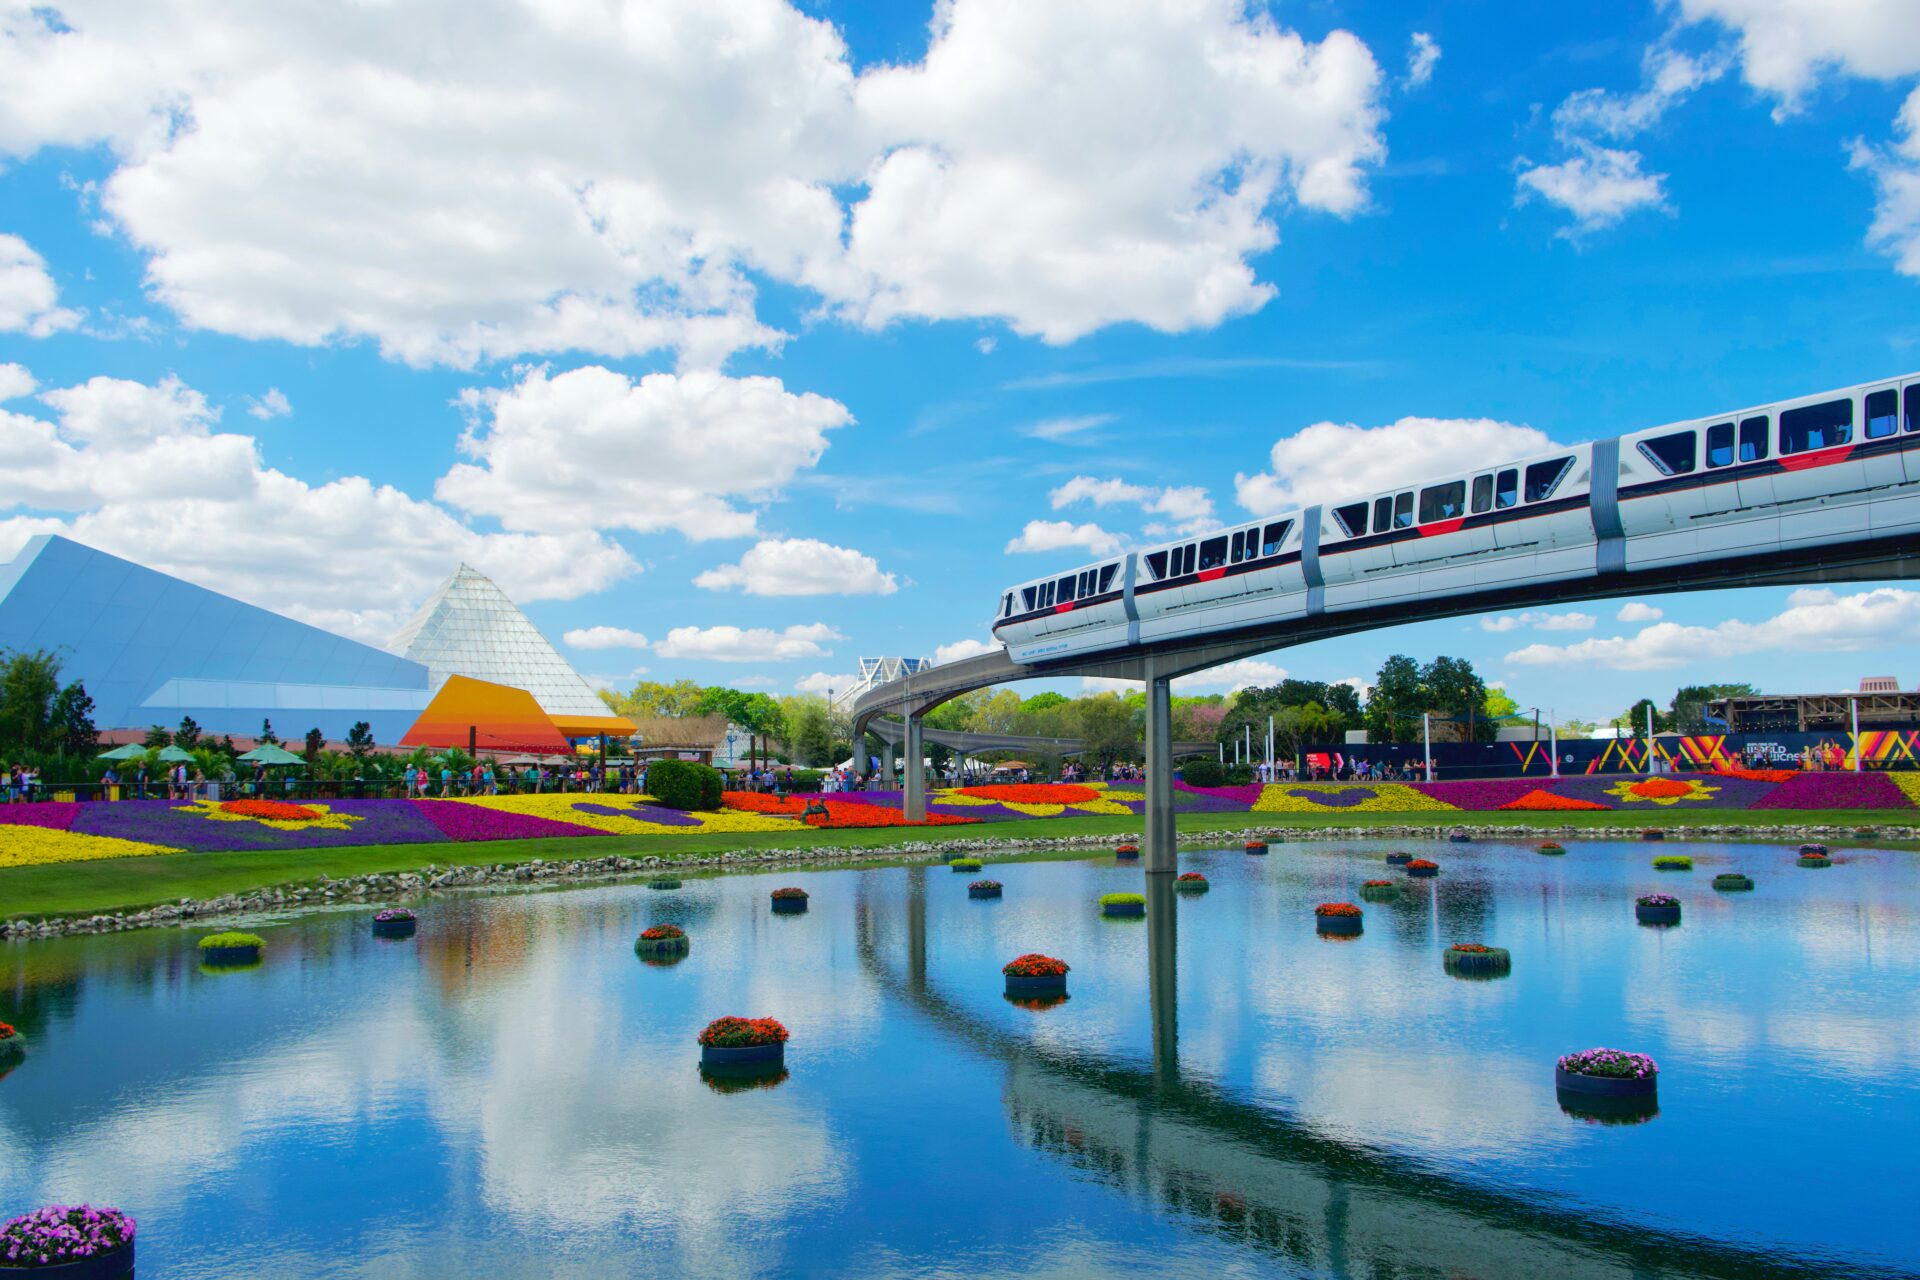
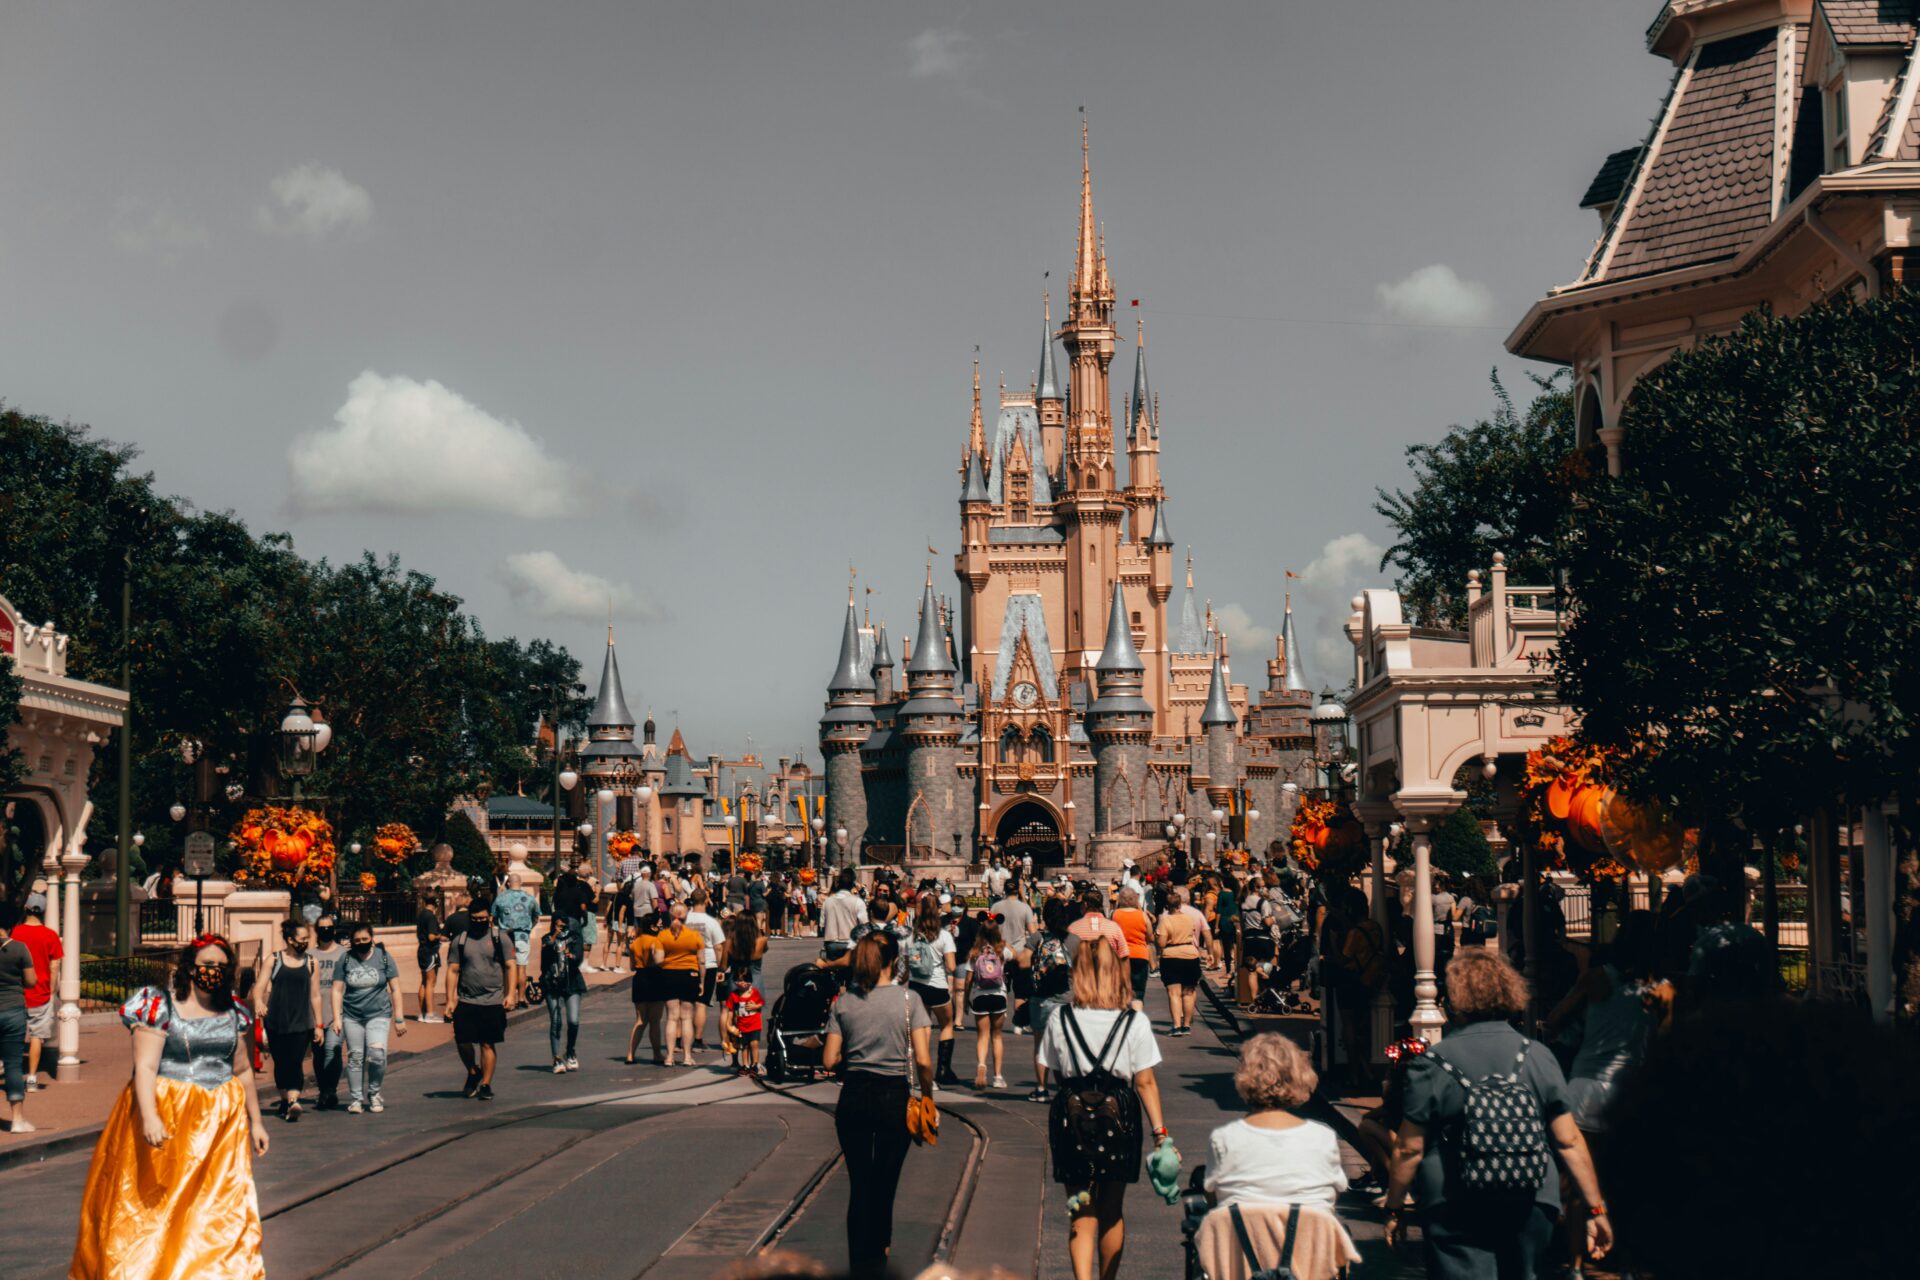
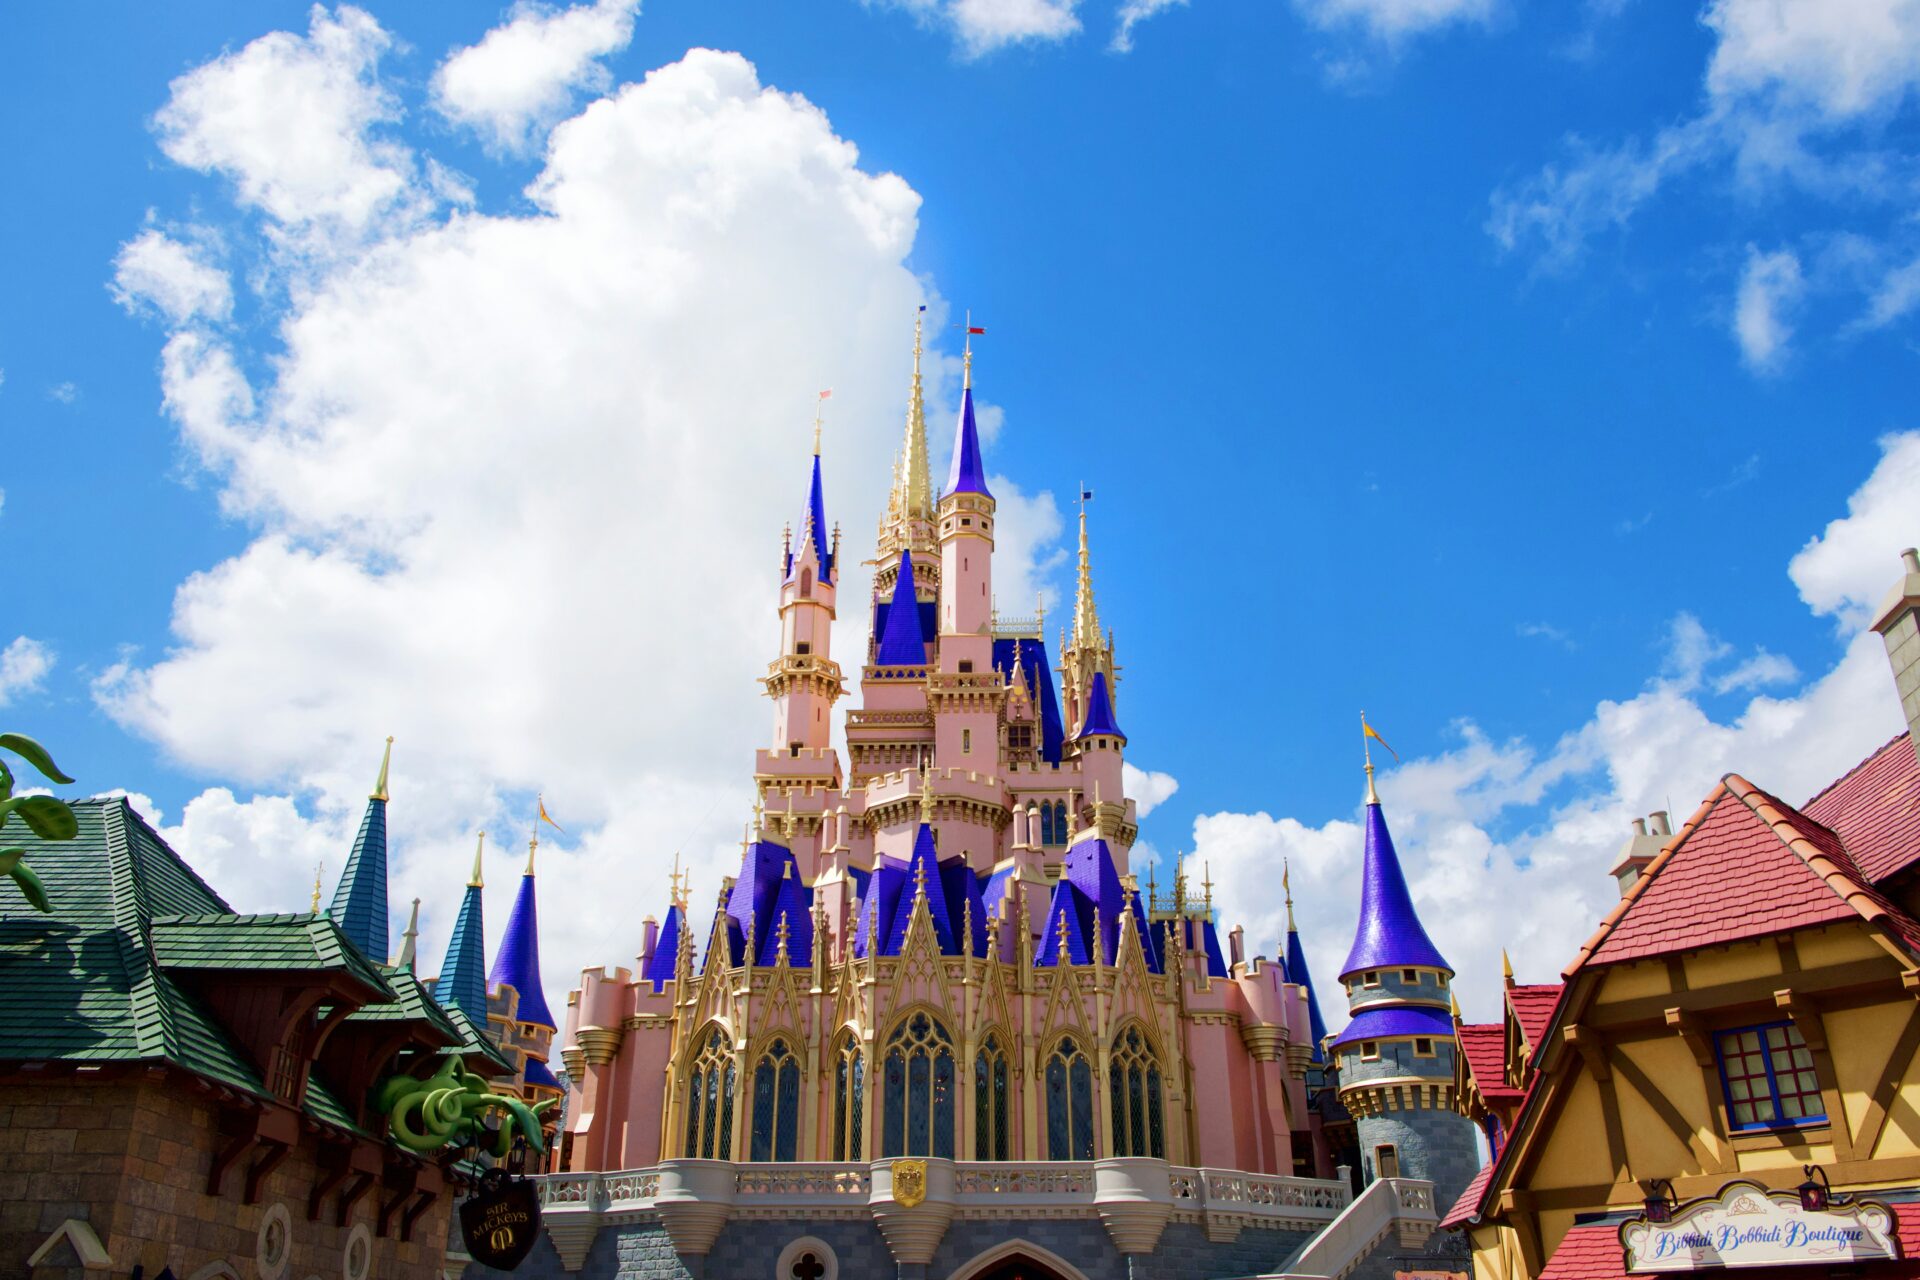
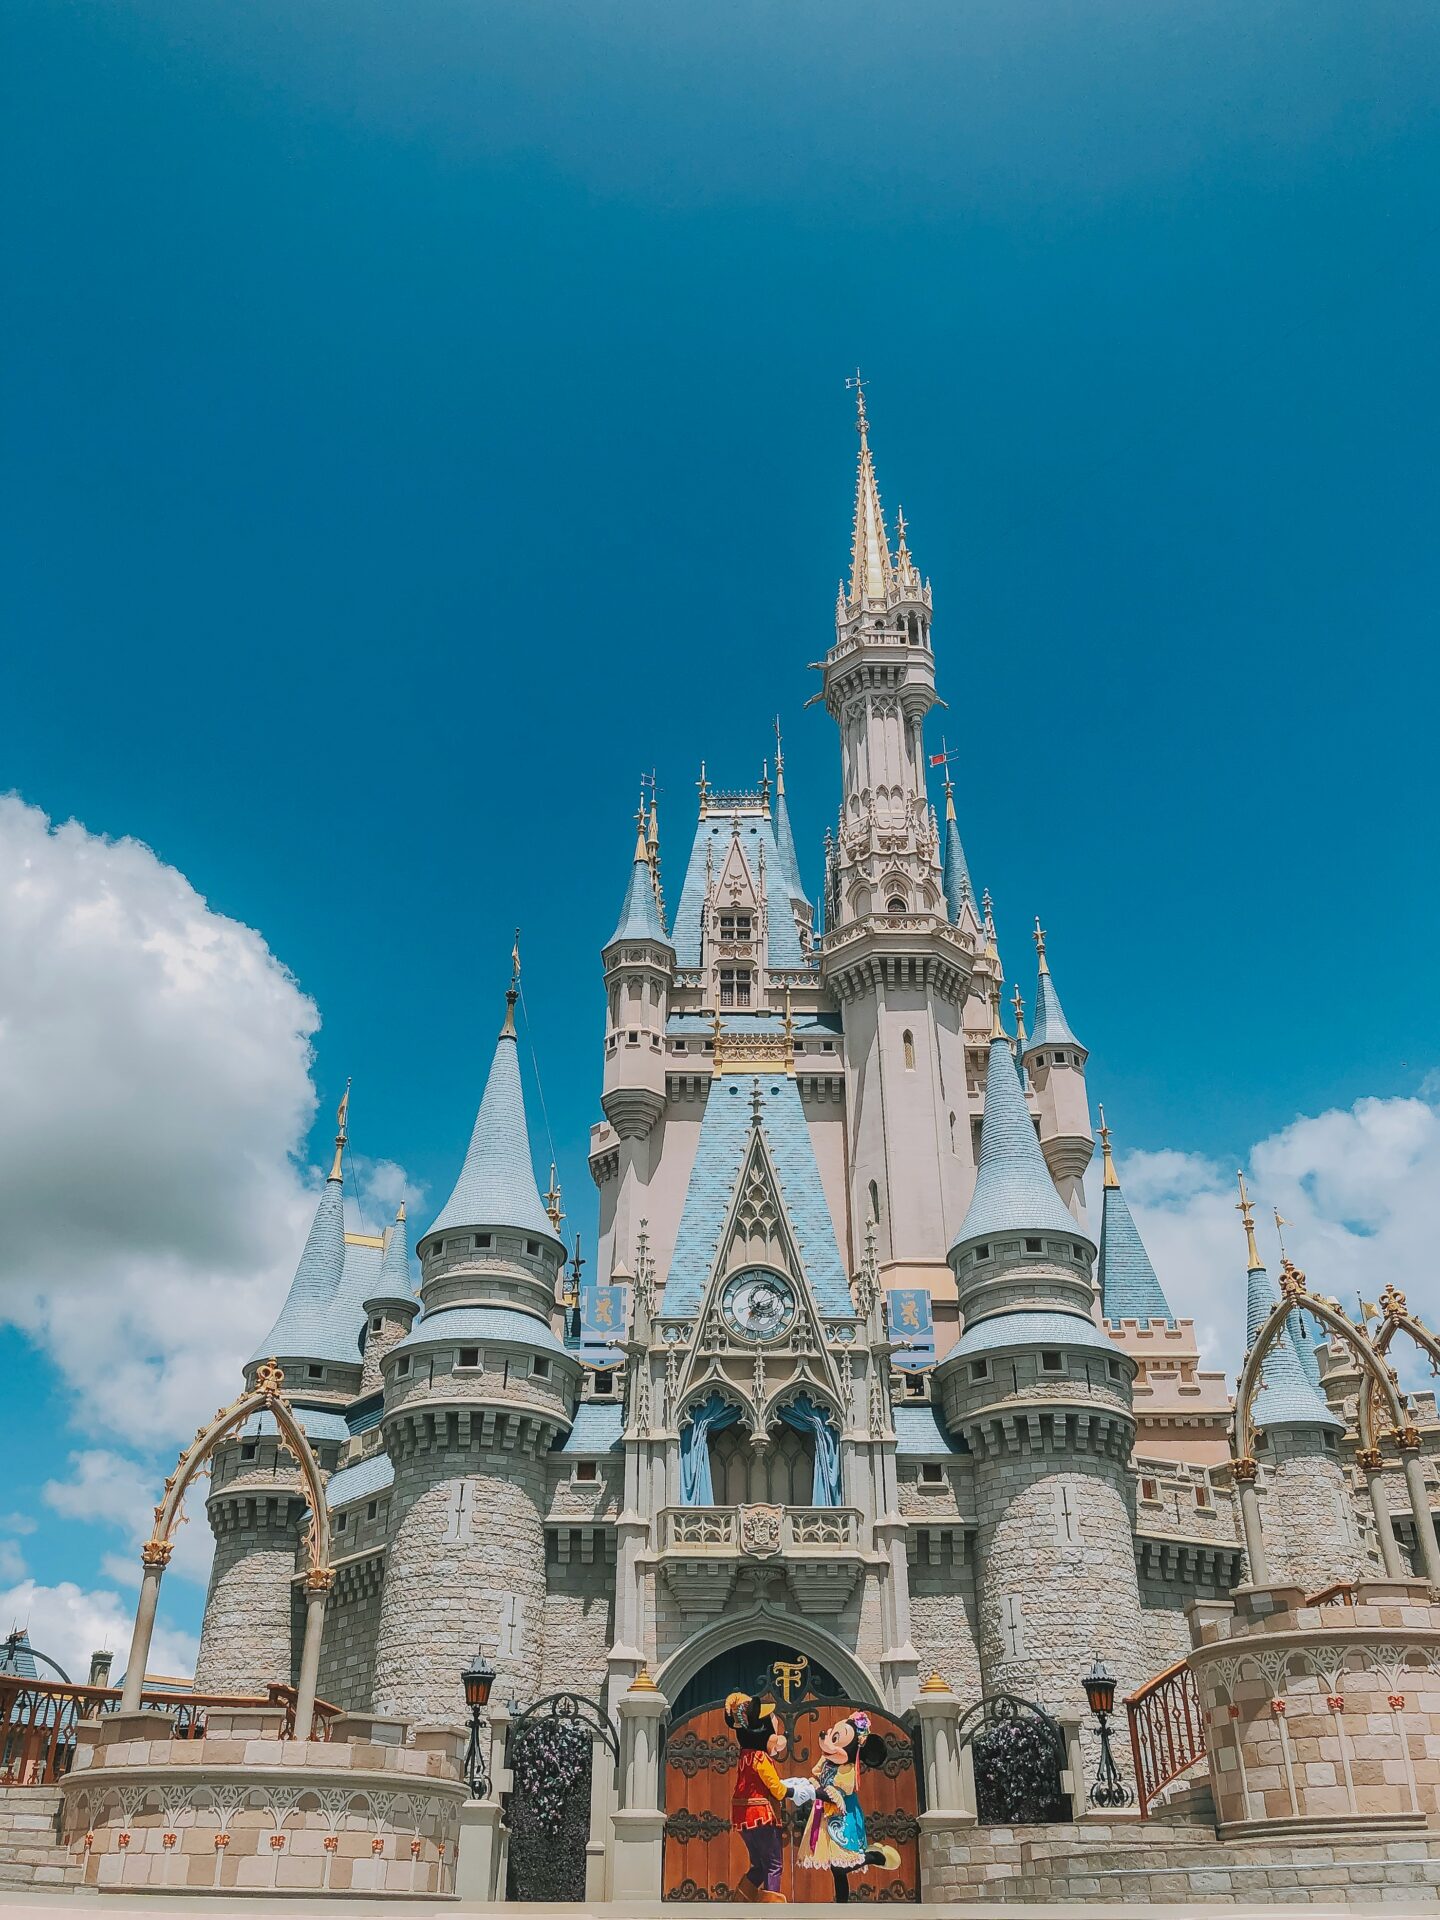
Location makes or breaks a photo. I head for classics: Cinderella Castle, Universal’s spinning globe, the Tree of Life. These spots just work for those “yep, I was there!” shots.
To dodge crowds, I get to the parks early or wander into less-busy corners. Elevated views and quirky angles help me feature rides or characters without a sea of strangers in the way. I’ll check out photo hotspots or use park maps to hunt for scenic backdrops, quiet nooks, or wild nighttime displays.
Character meet-and-greets and parades? They’re gold for action shots. I watch the light change all day, sometimes hanging around for golden hour when everything goes soft and colorful. Planning a little helps me bring home photos that really feel like Orlando.
Timing and Lighting for Captivating Park Images
Lighting and timing can totally change the mood of your photos. Picking the right moment lets me catch the parks at their most colorful and dreamy.
Golden Hour and Night Photography Techniques
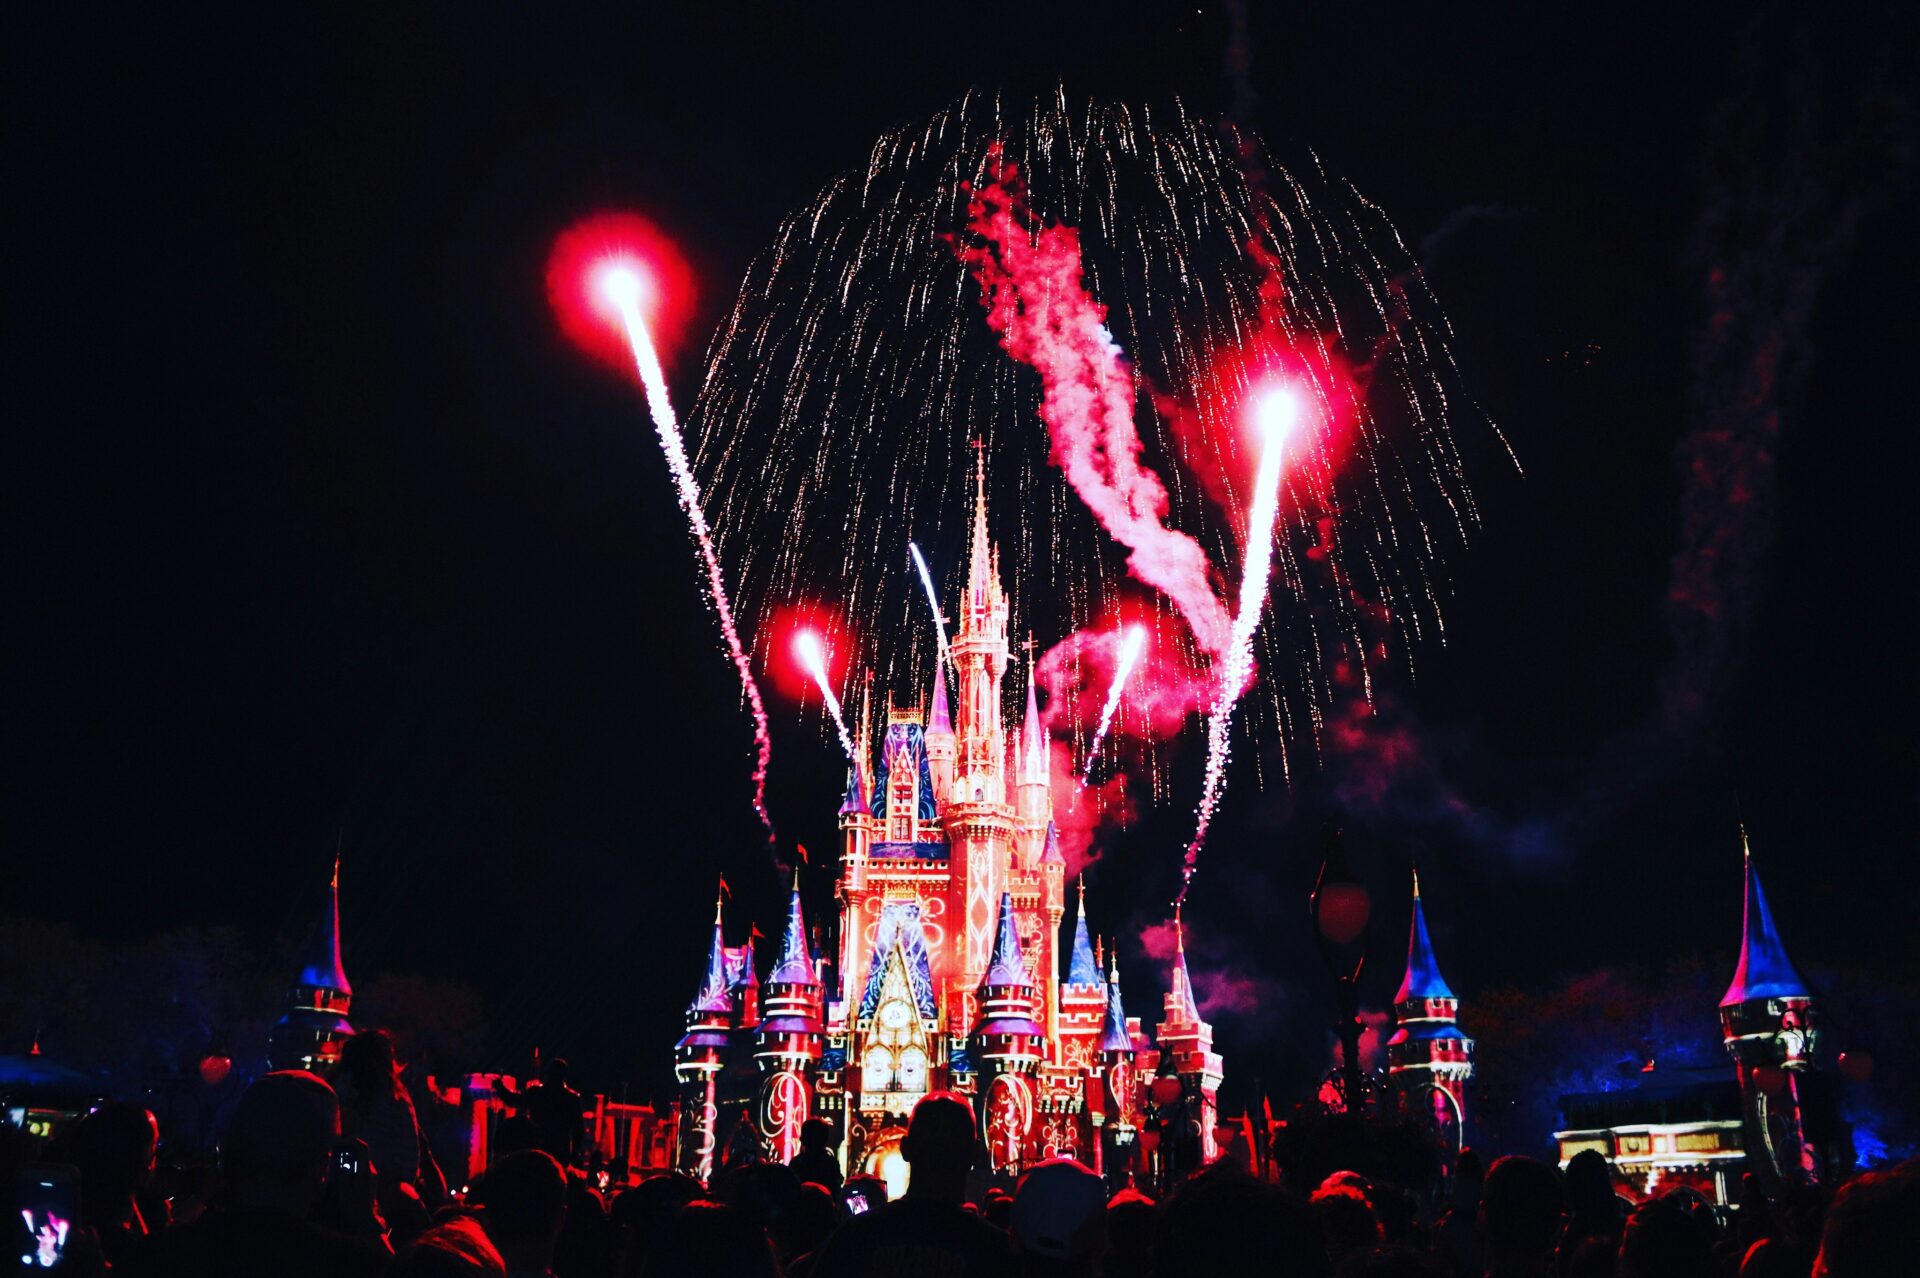
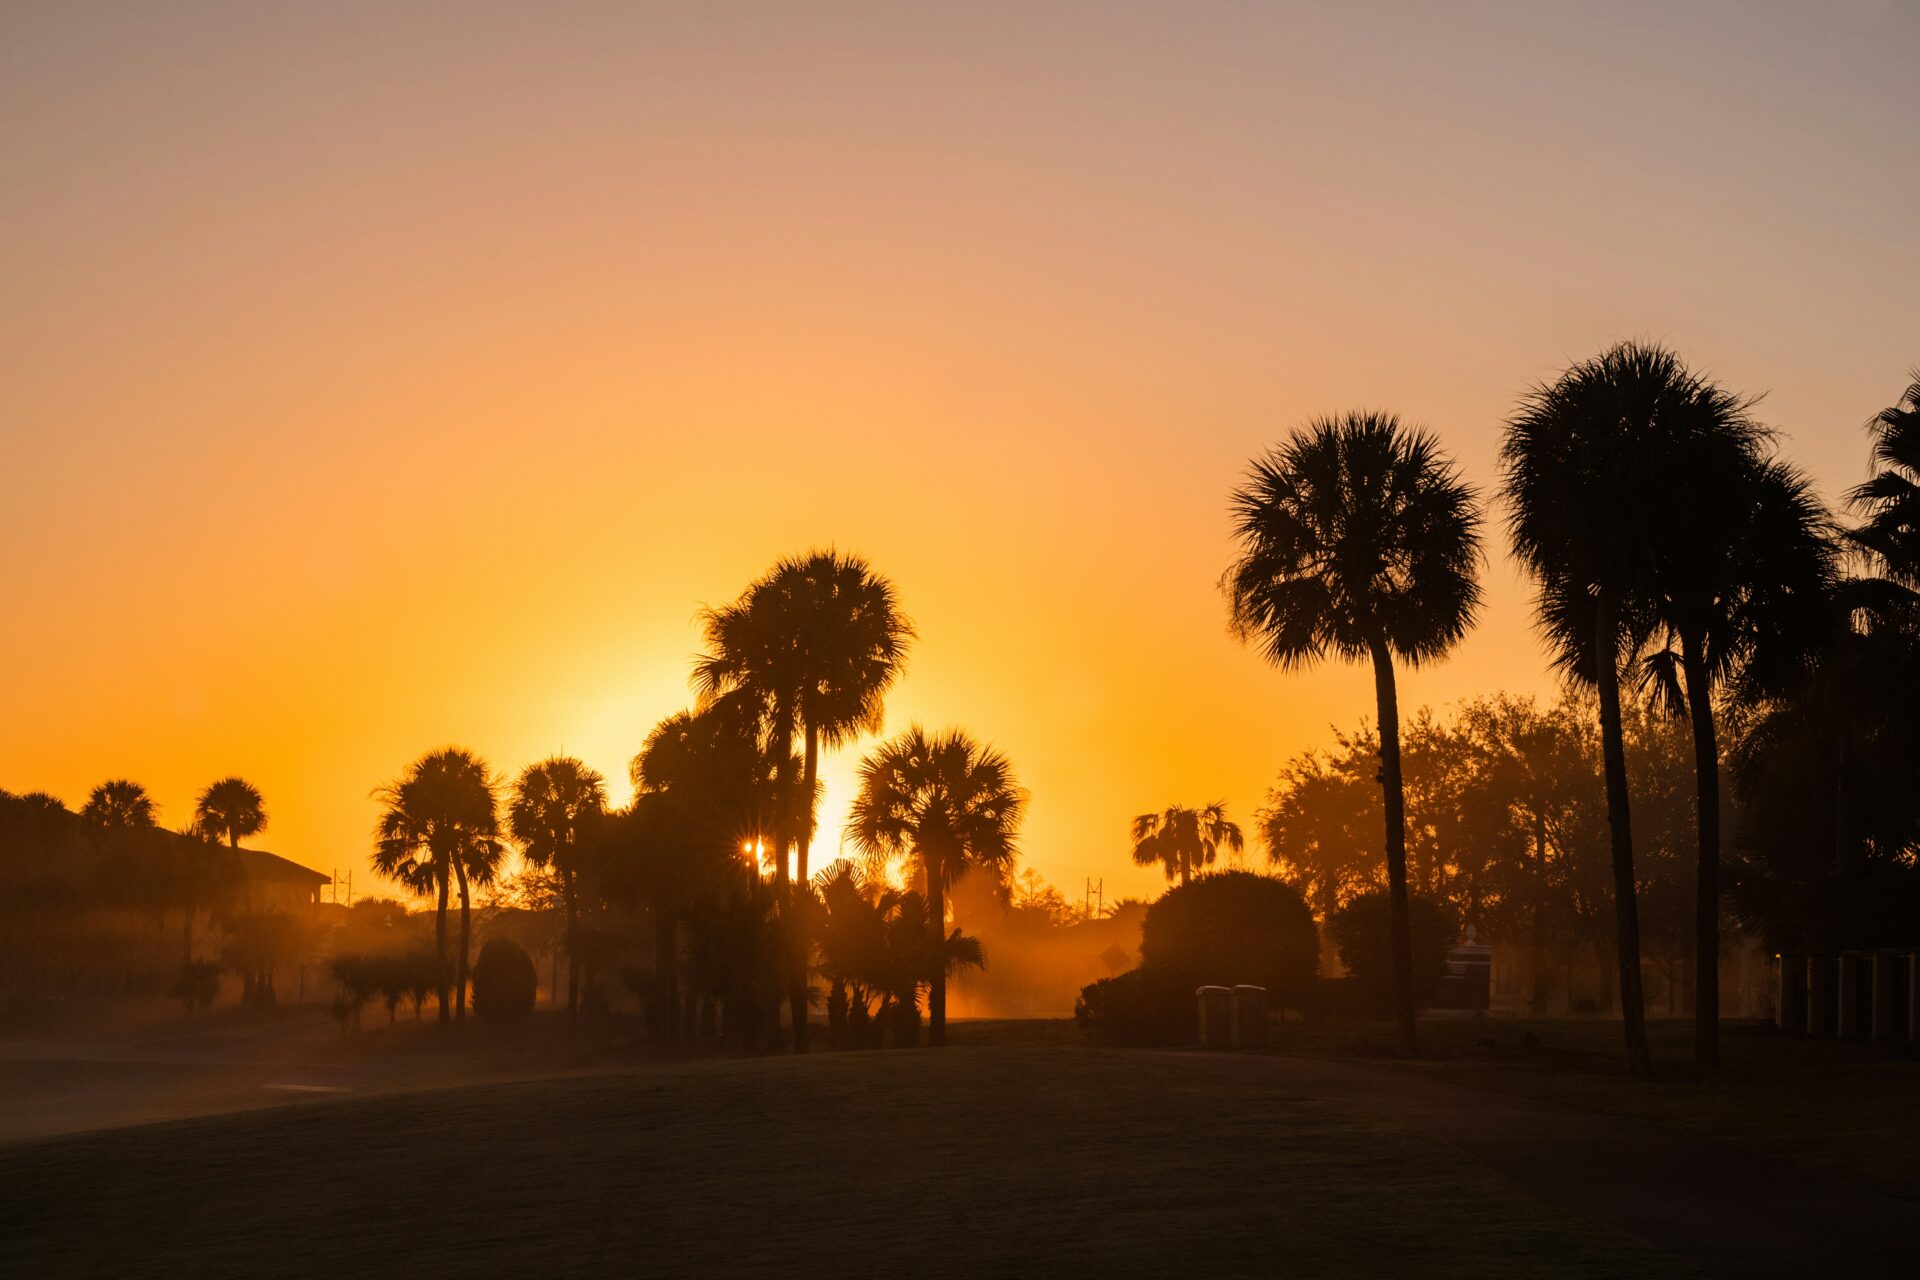
I’m always chasing the “golden hour”—that sweet spot just after sunrise and before sunset. The light’s soft and warm, making everything glow. Cinderella’s Castle? It looks straight out of a fairytale during these hours.
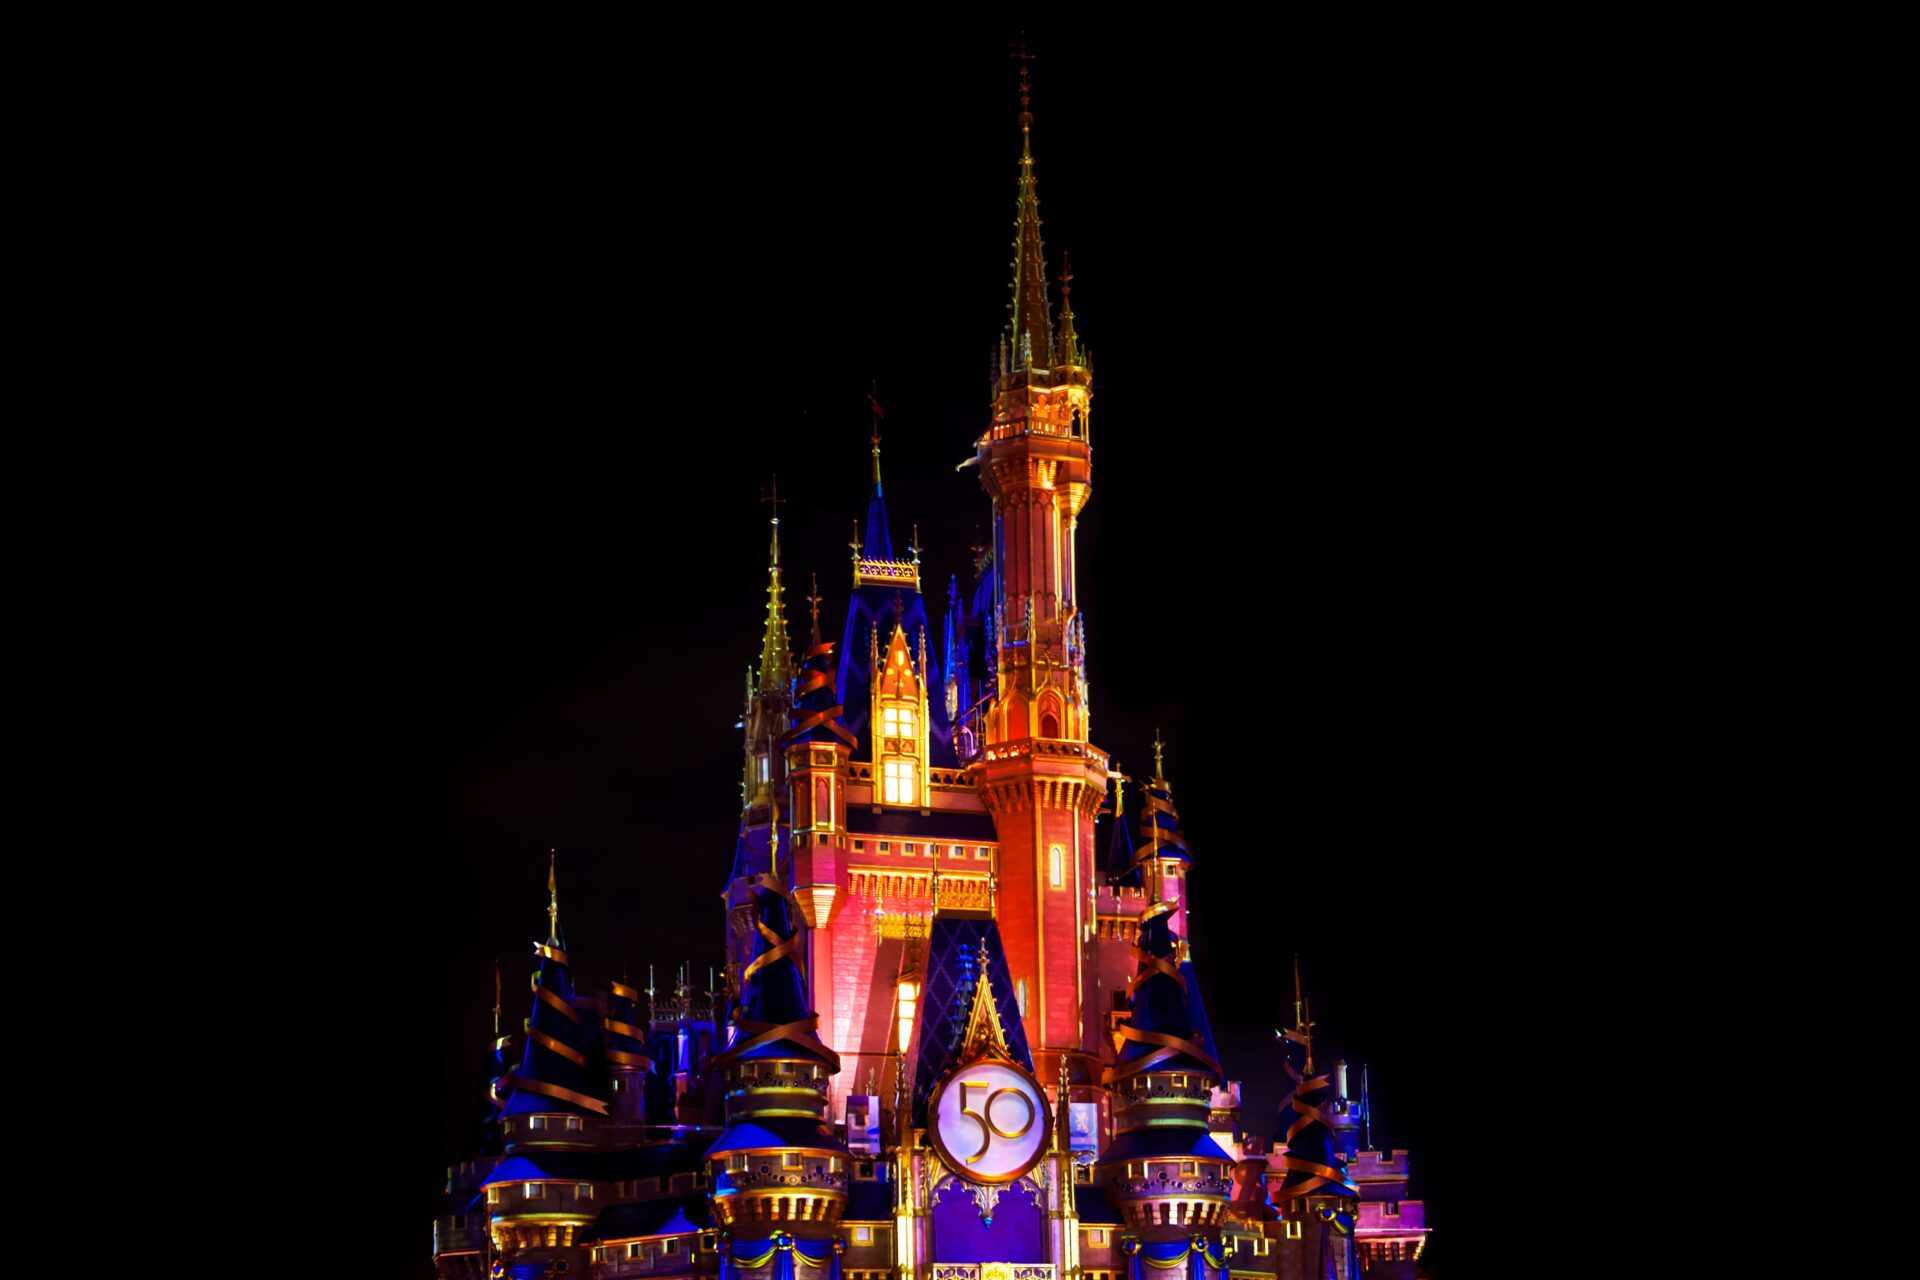
At night, Orlando’s parks light up in a way that’s hard to describe. Neon, fireworks, glowing rides—it’s a different vibe. I set up my tripod, especially for fireworks or anything that glows. I keep my ISO reasonable to avoid grain, and I slow down my shutter to let in more light. Sometimes I’ll try a long exposure just for fun, catching light trails or that dreamy, bustling crowd effect.
Seasonal and Special Event Opportunities
Seasons in Orlando bring new photo ops all the time. Spring means flowers and bright colors everywhere. Fall comes with pumpkins and Halloween decorations—super fun for unique shots. Winter? Christmas parades and twinkling lights make for magical night scenes.
Parades, fireworks, and surprise character pop-ups always catch my eye. I check the park calendar for festivals and special events, since limited-time decorations or shows can make my photos feel unique to that trip.
Planning Around Crowds for the Best Results
Crowds are tricky, but I plan around them. I show up before the park opens or stick around late—way fewer people, way better photos. Early mornings are perfect for those wide, crowd-free shots.
Sometimes, I just wait for a gap in the foot traffic. Patience pays off. If the crowds won’t budge, I’ll focus on details or use a wide aperture to blur the background, keeping my subject sharp. It’s about working with what you’ve got.
Creative Composition Techniques in Theme Parks
Orlando’s theme parks are a playground for creative shots. I mess with angles, framing, and perspective to make my photos stand out and really capture the energy of the place.
Using Leading Lines to Guide the Viewer
I hunt for lines that guide your eyes through the photo—paths, fences, even the queue for a ride. Leading lines pull attention right where I want it.
Take the curved walkway to Cinderella’s Castle. It almost begs you to follow it into the park. Tram tracks, water channels, parade ropes—they all work as lines that lead to something cool. I just make sure those lines point to a landmark or an interesting moment.

Framing with Attractions and Architecture
I love using park architecture to frame my shots. Shooting through an archway, between columns, or past props gives photos some depth.
The Universal Studios entrance arch makes a great frame for guests walking in. I use trees, ride structures, or themed windows to border a scene and keep the focus where I want it. This trick blocks out distractions, which is a lifesaver in busy parks.
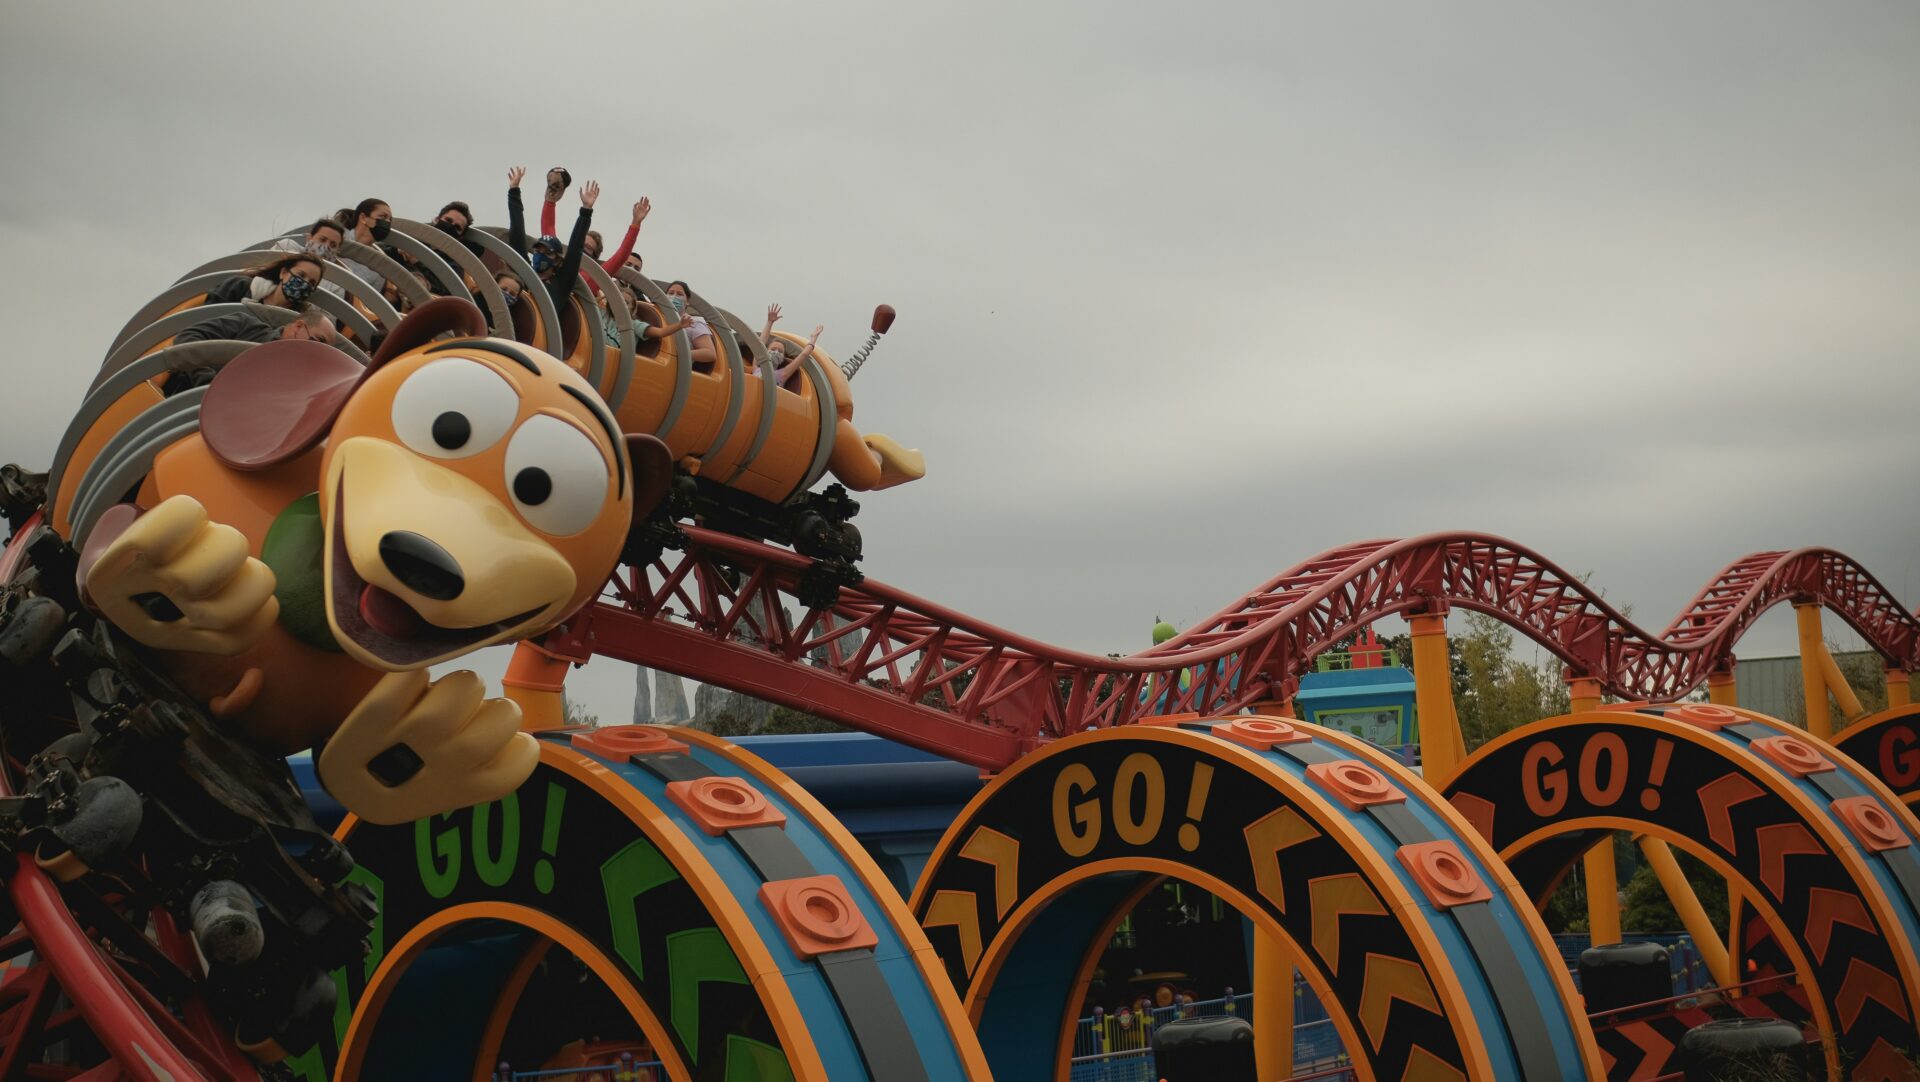
Dynamic Angles for Roller Coaster Shots
Roller coasters demand a little creativity. I shoot from below to make them look massive and wild. Sometimes I catch them from the side as they zoom past, using a fast shutter to freeze the action.
If I’m feeling bold, I’ll tilt my camera or squat down low for a dramatic angle. Raised viewing spots help too, especially for those big loops. I skip the straight-on shots—quirky angles just look more exciting and show off the ride’s twists.
Storytelling with Park Guests and Characters
The real magic? It’s in the people. I look for candid moments—kids meeting their heroes, friends laughing on a ride. Those honest reactions bring photos to life.
I try to catch unscripted scenes, not stiff poses. Getting down to a kid’s eye level or including a bit of the park in the background makes the shot feel personal and rooted in the place. Wide angles let me fit in the subject and the crowd’s energy, telling a fuller story.
Capturing the Magic of Orlando’s Coasters and Attractions
Photographing Orlando’s theme parks is a thrill, especially when I’m after those wild coasters and iconic attractions. I’ve learned to handle fast motion, bright colors, and crowds, all while trying to capture the emotion and spirit of these places.
Roller Coaster Photography Essentials
Timing matters most with roller coasters. The best shots usually come as the train dives or whips around a curve. I set my shutter speed high—1/1000 of a second or faster—to freeze everything in place.
Light changes all day long, so I often shoot in the morning or late afternoon for softer shadows. I like to try different angles; shooting from the ground makes the coaster look huge, while a wider shot lets me show off more of the track.
Here’s how I set up:
| Setting | Value |
|---|---|
| Shutter Speed | 1/1000 sec or faster |
| Aperture | f/4 – f/8 |
| ISO | 100-400 (sunny) |
Crowds can be a pain, but sometimes their reactions help tell the story. I look for backgrounds that highlight the coaster against the sky, not a mess of people.
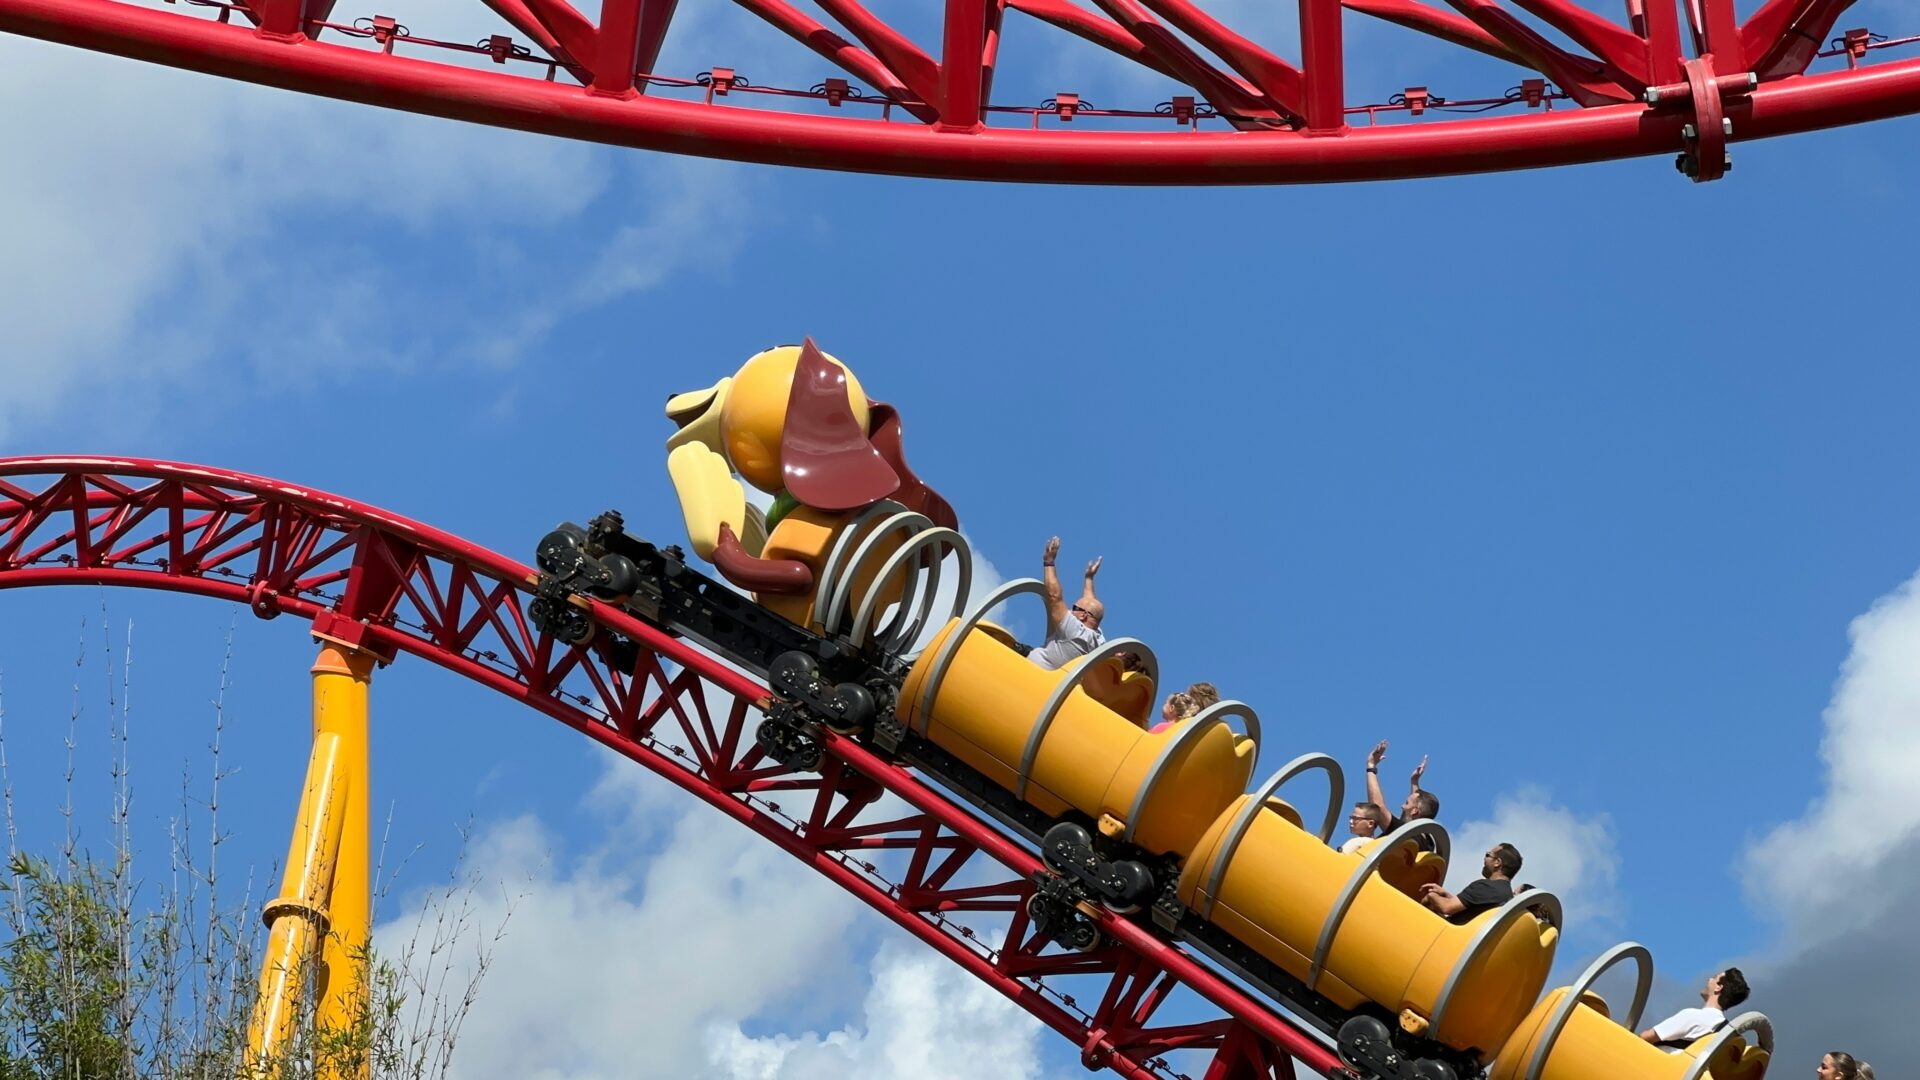
Showcasing Thrilling Motion and Emotions
I want you to feel the rush of the ride in my photos. I look for riders with their hands up or faces lit up with excitement. For motion, I sometimes pan my camera with the train, using a slower shutter speed—maybe 1/100 to 1/250—to blur the background but keep the coaster sharp.
If I want to freeze everything, I use burst mode to catch that perfect split-second. Faces matter, so I zoom in on expressions (as long as ride rules say it’s ok).
At night or indoors, I bump up the ISO and use a wide aperture like f/2.8, so I can still get clear, bright shots without too much blur.

Photographing Iconic Structures and Landmarks
Some landmarks—Cinderella Castle, Spaceship Earth—are just unmistakable. When I shoot these, I try to add a twist: maybe flowers in the foreground, or a reflection in the water, so my photo isn’t just like everyone else’s.
I use the rule of thirds, putting the main landmark off-center for a more interesting look. Early and late hours give me softer light and fewer tourists. If I can’t escape the crowds, sometimes I crop in tight or use people to show how big the structure really is.
Rainy days surprise me sometimes—reflections and empty walkways can make for some of my favorite, moodiest shots. A wide-angle lens helps me fit in the whole scene, plus a bit of the surrounding park for context.
Advanced Tips for Unique Theme Park Photography
Taking your Orlando theme park photos to the next level isn’t just about timing your shots. Careful editing techniques and knowing how to keep your camera safe all day will help your images stand out—even after you’ve left the parks.
Editing and Post-Processing for Dramatic Impact
I always take time to edit my theme park photos. Editing can turn an ordinary shot into something that really grabs your attention.
I usually start by adjusting exposure and contrast. These tweaks help the colors pop, especially when you’re dealing with those wild lights and deep shadows at places like Universal Orlando or Walt Disney World.
I’ll crop images and fix any weird tilts. It’s amazing how much more balanced a photo feels when everything lines up.
Color work is huge for me. I’ll bump up the saturation in park photos, but I try not to go overboard—nobody wants neon grass.
Sometimes I sharpen little details, like the spires on Cinderella Castle or the veins in palm leaves. It’s a subtle trick, but it pulls your eye right where I want it.
Night shots? Oh, those can be tricky. I rely on noise reduction to keep the sky smooth and the shadows clean.
Here’s a quick look at the edits I use most:
| Edit Type | Why I Use It |
|---|---|
| Exposure | To fix harsh sun or gloomy interiors |
| Contrast | Adds depth and makes images pop |
| Color Balance | Fixes weird lighting |
| Crop & Straighten | Gets the composition just right |
| Sharpening | Brings out the details |
Honestly, editing is where I get to put my own spin on even the most familiar scenes. That’s the real magic for me.
Protecting Equipment During Park Adventures
Theme park days really put cameras through the wringer. Orlando’s humidity? It’s no joke. Sudden rainstorms pop up all the time.
I usually stash my camera in a padded bag—honestly, it’s saved me more than once. When the clouds roll in, I’ll grab a rain cover or just improvise with a plastic bag. If you’re eyeing those water rides, tossing your gear in a dry bag or hard case feels like a no-brainer.
All that walking around means I bump into things more than I’d like to admit. A sturdy camera strap helps a ton, and before every ride, I make a quick check on lens caps and accessories. It’s become a little ritual. I never forget a microfiber cloth either; it’s perfect for wiping off sweat, fingerprints, or the occasional splash.
Here are my top tips for gear safety:
- Carry a lens cloth for quick cleaning
- Use a weatherproof bag for extra protection
- Double-check straps before every move
- Avoid changing lenses outdoors if it’s windy or wet
These simple habits have kept my camera working through wild weather and long days. Honestly, it’s worth the extra effort.